
Build your own lanterns from 2×4 wood with these plans that include all of the measurements! These lanterns are a great way to use scrap wood, so save this for your list of projects you can’t wait to make! You can use these plans to make lanterns in a variety of sizes. These lanterns are…
Similar Posts

Do it yourself Pallet Table
This DIY Pallet Table is such a great idea for an inexpensive coffee table. It simple use of pallet wood, a little sanding and stain with a bit of monogramming and sealing would make a great addition to any living room. Isn’t it beautiful? Did I mention pallet wood is free? The Diva of DIY,…
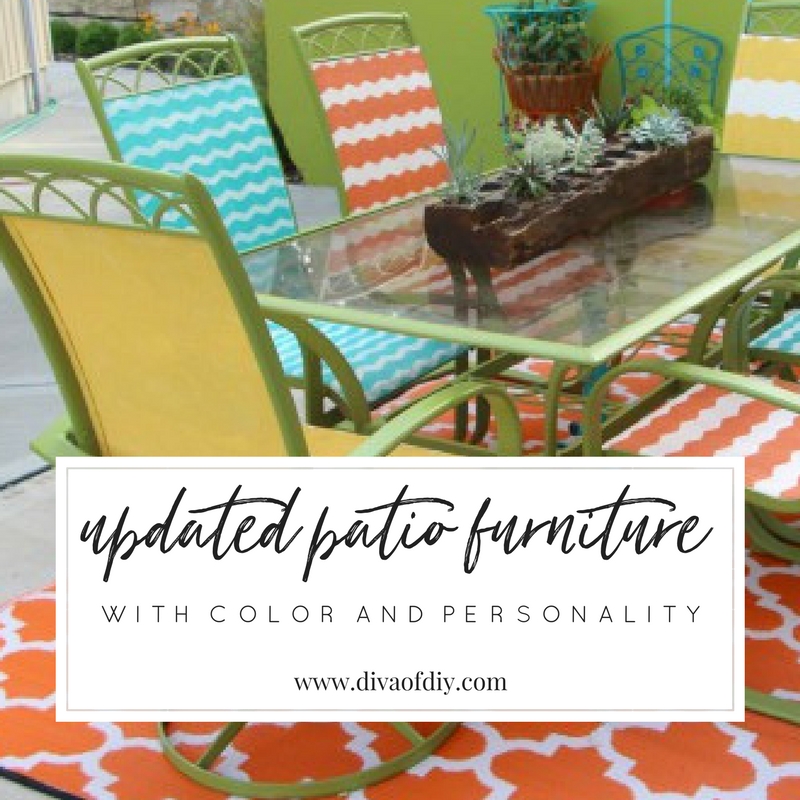
How to Update Your Tired Patio Furniture
Over the harsh winter months and sunny summer days patio furniture that is left outside takes a beating. Let’s update your tired patio furniture. Don’t be intimidated by this project. Take it step by step and you will be thinking, why didn’t I do this earlier! I’m kind of embarrassed to even be showing you my…

Talk DIY to Me #6 – Featuring Painted Furniture Makeovers
Furniture makeovers are one of the cheapest way to change things in your home! I love to take an outdated piece of furniture and turn it into something I fall in love with all over again! There are so many ways to makeover furniture so that is why we are kicking off the first week…

How to Make Easy No Sew Burlap Pillow Covers
This year I was asked to decorate the TV set for Kansas City Live, a lifestyle show and I was honored to do it! You see I have been a part of the KCL family for 3 1/2 years. Each week I share my repurposed and upcycled projects on their show so it seemed natural…
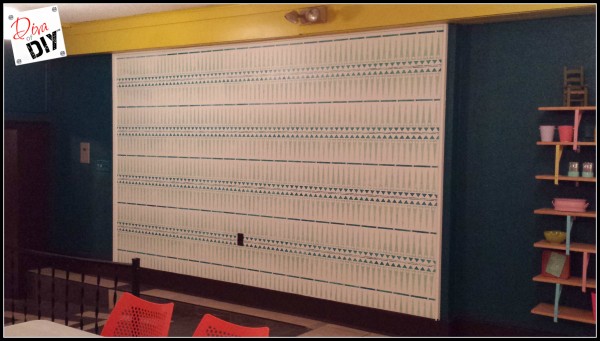
Tutorial on How to Create a Tribal Wall Using a Stencil
Are you looking to create a Tribal Wall in your home? The Diva of DIY, Leanne Lee, shows you can to do just that using a stencil! This tribal wall and the Herringbone Wall were featured in Restaurant Impossible at the Double H Ranch! You may think I’m nuts, but, I love creating Tribal and…