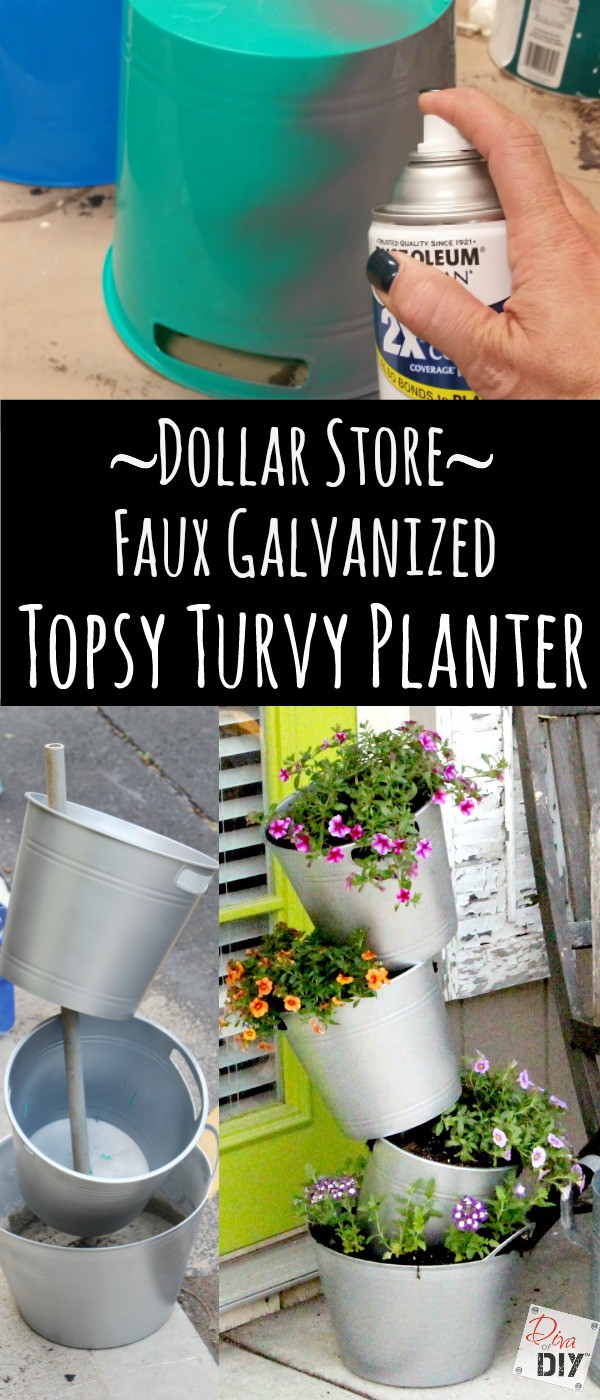
I love the punch of color annual flowers give to my outdoor decor. After I Updated my Tired Old Patio Furniture with bright fun colors I wanted to add something a little rustic. I’ve always loved the look of a topsy turvy flower pot and I decided I wanted to make one with galvanized buckets. Believe it or not, I did not have any buckets in my stash of treasures. If you buy them new they can be a little pricey so I put the project on the back burner. Then, one day I was out shopping and drove by a Dollar Store. We all know as DIYers that we can’t pass a Dollar Store without stopping and taking a peek right??? And what did I see when I walked in? Colorful plastic buckets!
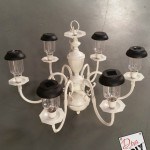
That’s when I asked myself, why couldn’t I turn those buckets into faux galvanized buckets and make a faux galvanized topsy turvy planter? Well of course I knew the answer to my question… heck yeah!
This post contains affiliate links. If you buy something from clicking one of my links, I will get a commission from the sale. You can see my full disclosure here. Thank you for supporting my blog!
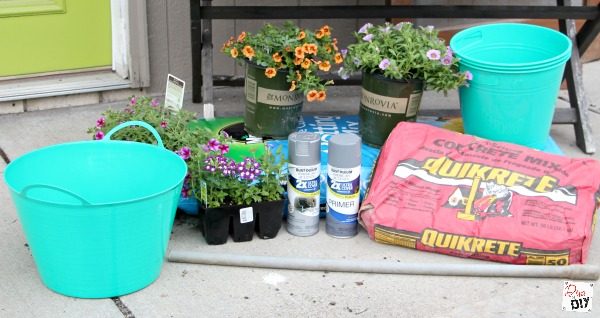
Flower Pot Supplies:
- 3 plastic buckets
the same size (These are not what I got but they are perfect!)
- 1 larger bucket
- Quikrete
(This is the one I used because it is fast-setting)
- 1″ PVC or pipe (Anything will work as long as it is sturdy enough to hold the weight)
- Rustoleum Gray Primer
(This is the one I used)
- Rustoleum Silver spray paint
- Drill and small drill bit
- scissors
- block of wood slightly taller then your 3 buckets
- soil
- flowers


Flower Pot Instructions:
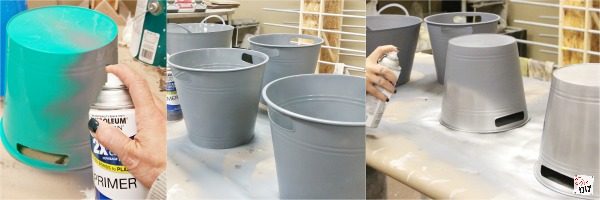
Step 1) Spray all the buckets with primer
Step 2) Spray all the buckets with metallic spray paint. Let dry.
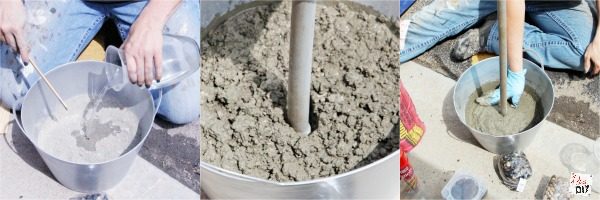
Step 3) In the larger bottom bucket mix your quikrete
Step 4) Push the pole down into the quikrete
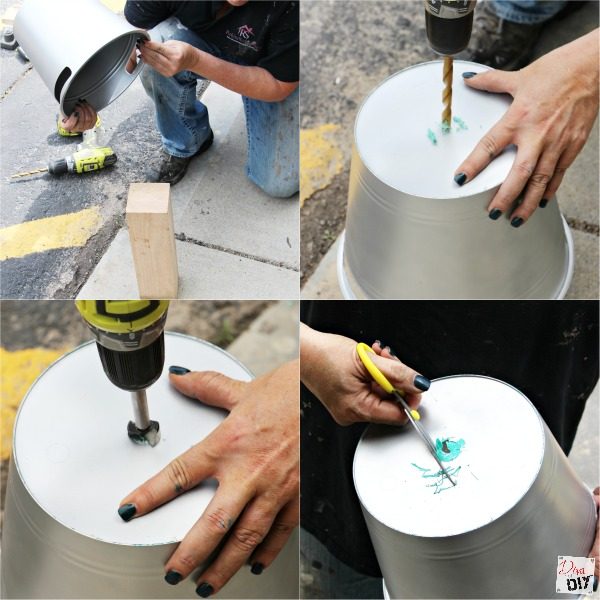
Step 5) Because these are plastic buckets you will want to put a block of wood down that is slightly taller then the bucket. Put the bucket over the wood.
Step 6) Drill a hole in the bottom of the bucket. You will need to make the hole wide enough to put the pole through. I found using scissors or small wire cutters
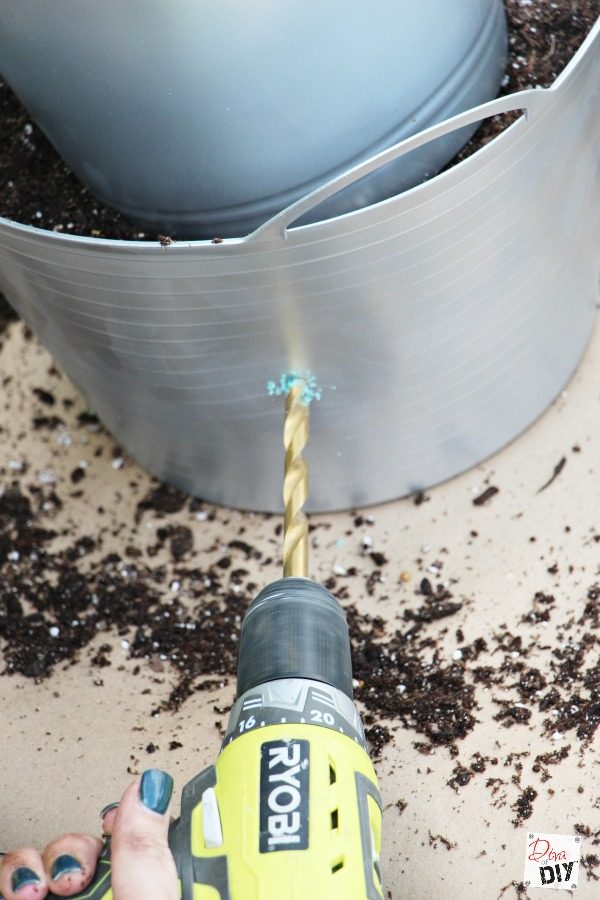
Step 7) Drill a couple holes in the back of the bottom bucket right above the concrete for flower pot water drainage. I thought of this as I was putting in my soil, that is why my soil is already in the bucket.

Step 8) Start stacking your faux galvanized flower pot buckets. I put the first 2 on and then filled them with soil and flowers. Then I put on the third. It seemed easier that way. You can plant flowers in the bottom bucket if you have room, or just put soil in it to cover the concrete.
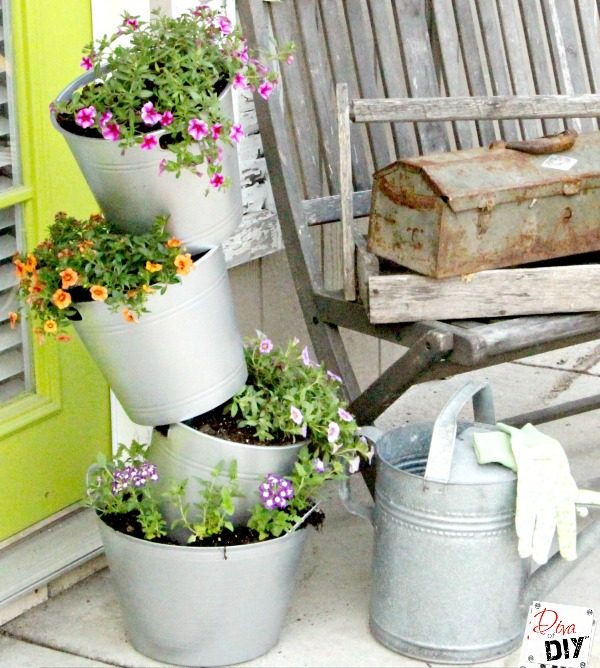
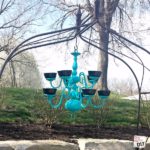
And there you have it! A faux galvanized topsy turvy bucket flower pot that cost less then $10! You can’t buy one bucket for that price! I love it so much I decided to keep one outside my shop to add a punch of color and I will make another one to go with my patio set. With my left over concrete mix I made several Table Top Fire Pit Bowls. It was the perfect way to use up the bag of quikrete!
Each and everyone of you inspire me and I LOVE to see the work that you’ve created. Feel free to share with me on Instagram, Twitter or Facebook. And as always, be sure to follow Diva Of DIY on Pinterest and sign up for our FREE Newsletter to receive the latest projects delivered straight to your inbox!
If you enjoyed this project, be sure to sign up for our weekly newsletter and check out these other projects: