
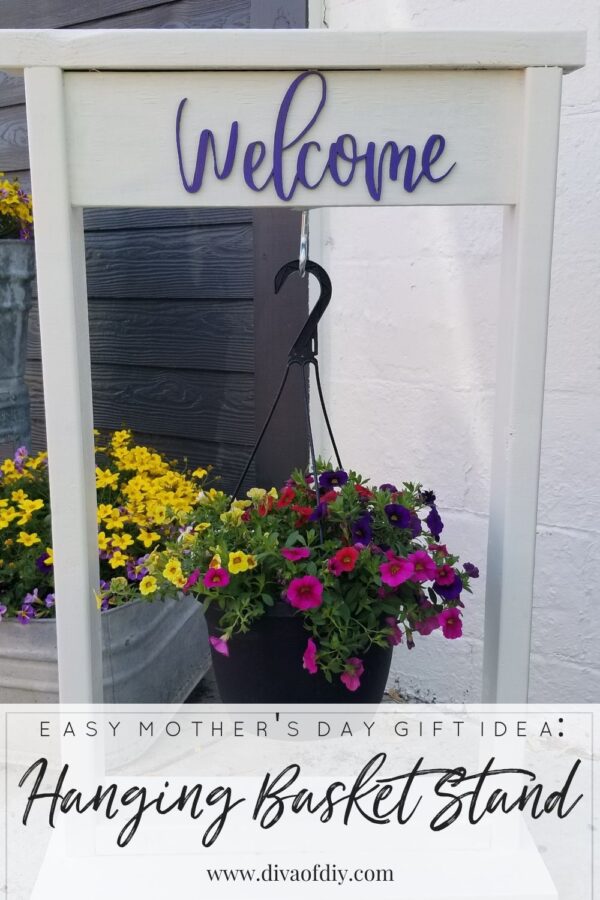
This hanging basket stand may rank as one of my favorite projects of all time. Why you ask? It’s easy, inexpensive and extremely versatile. Start with a hanging basket in the spring then switch to a lantern in the fall and you have a DIY project that functions all year long.

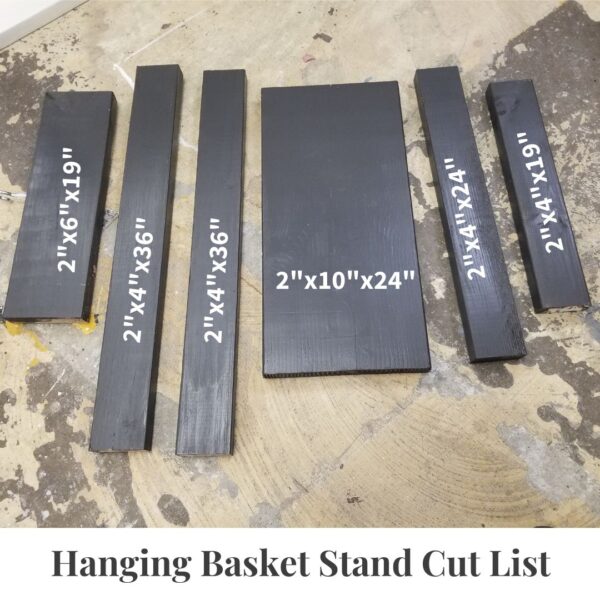
Supplies needed for this Hanging Basket Stand:
- 2″ x 10″ x 24″
- 2″ x 6″ x 19″
- Two 2″ x 4″ x 36″ (for a shorter planter, you can shorten this measurement)
- 2″ x 4″ x 24″
- 2″ x 4″ x 19″
- 2-3″ deck screws
- Exterior Paint
- Wood Glue
- Screw Hook
Tools needed for Hanging Basket Stand:
- Mitre Saw
- Drill
- Drill Bit
- Paintbrush
Step 1: Apply 2 coats of exterior paint to both sides of your cut boards. Let dry
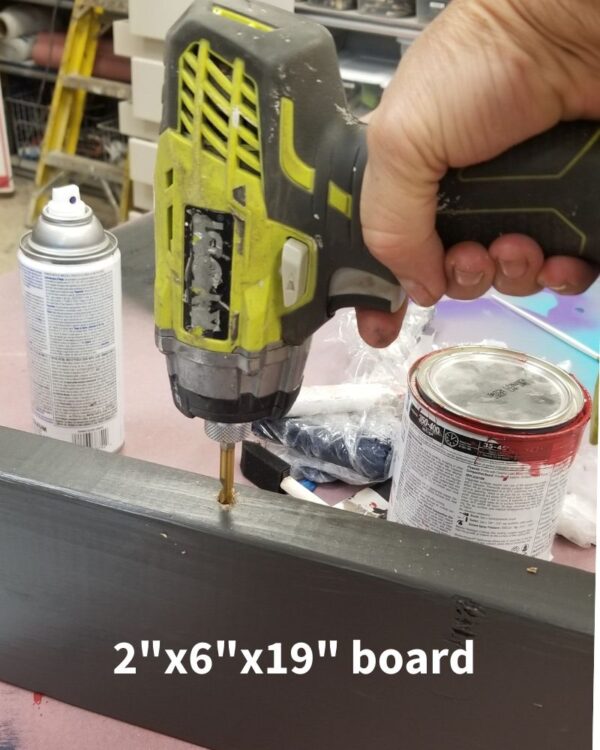
Grab your 2″ x 6″ x 19″
Step 2: Using your drill and drill bit, drill a pilot hole in the center of bottom of your board. This is for your screw hook.
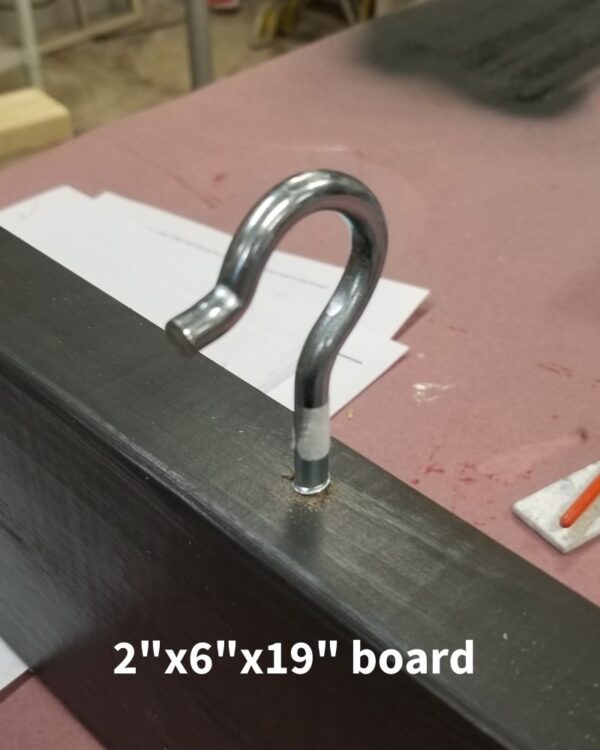
Step 3: Take your screw hook and screw it into the pilot hole you drilled in the bottom of the board.
Set board to the side.
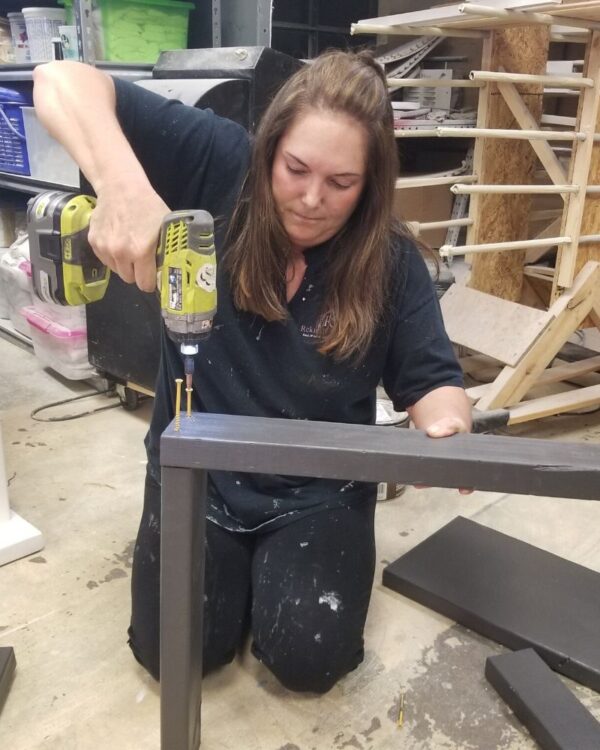
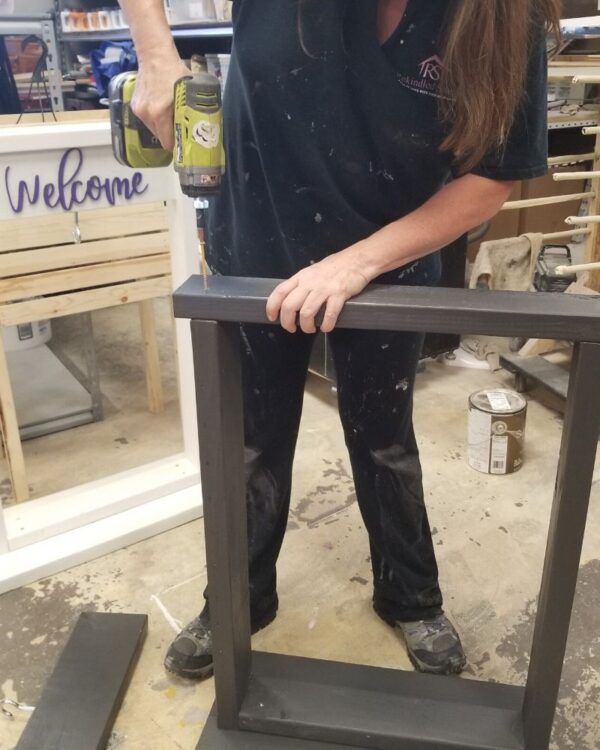
Grab one of your 2″ x 4″ x 36″ and your 2″ x 4″ x 19″ board.
Step 4: Using 2 deck screws, attach the 36″ board on top of the 19″ board. Repeat on other side. You will have a “U” Shape.

Grab your 2″ x 10″ x 24″ board. This is your bottom board.
Step 5: Place the bottom of the “U” or the 19″ board in the center of the 2″ x 10″ x 24″ board. Attach with your deck screws to secure.
Grab your 2″ x 4″ x 24″ board.
Step 6: Attach your 24″ board to the top of your “U” Shape.
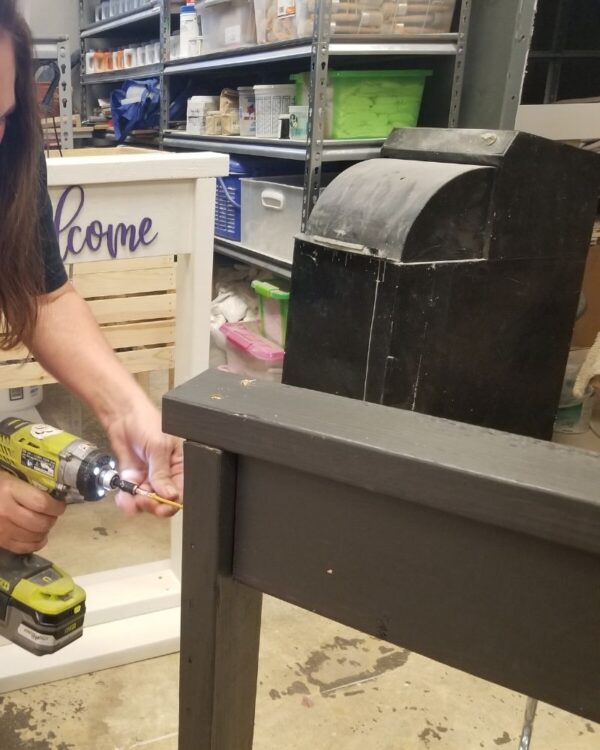
Grab your 2″ x 6″ x 19″ board that you set aside earlier
Step 7: Attach this board (see pic) using your deck screws. Place one screw at the top and one screw at the bottom.
If you love this hanging basket stand then you will love this raised planter and succulent planter.
Each and everyone of you inspire me and I LOVE to see the work that you’ve created. Feel free to share with me on Instagram, Twitter or Facebook. And as always, be sure to follow Diva Of DIY on Pinterest and sign up for our FREE Facebook group.