I love this time of year…the food, the fellowship, the family time and especially the traditions that we honor each year. One of our traditions is making homemade Christmas ornaments.
My absolute favorite thing to do the day after Thanksgiving is to pull out all of our Christmas decorations which include all of the homemade Christmas ornaments my 3 boys have made over the past 15 years. I unwrap each one and reminisce about its significance. It’s a special time and yes…I get teary-eyed and yes…my boys think I’m silly but I look forward to it every year.
Today I am going to share with you one of my favorite Homemade Christmas Ornament projects. It is fast, fun and full of personality.
This post contains affiliate links. If you buy something from clicking one of my links, I will get a commission from the sale. It will not cost you a penny more and allows me to keep sharing my ideas with you for free. You can see my full disclosure here. Thank you for supporting my blog!
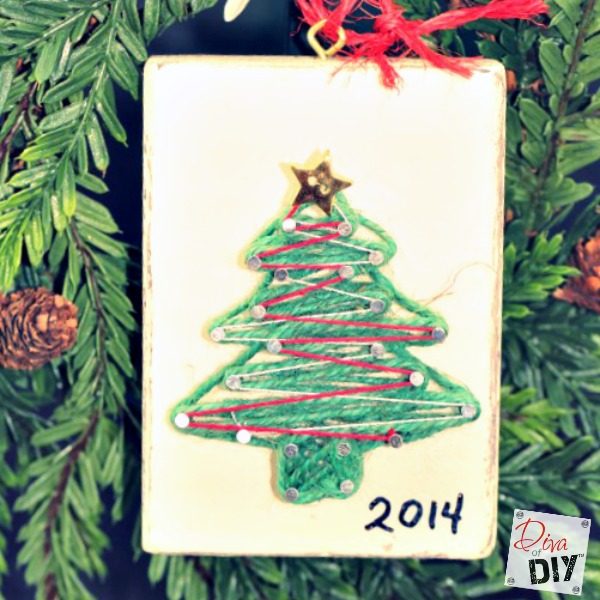
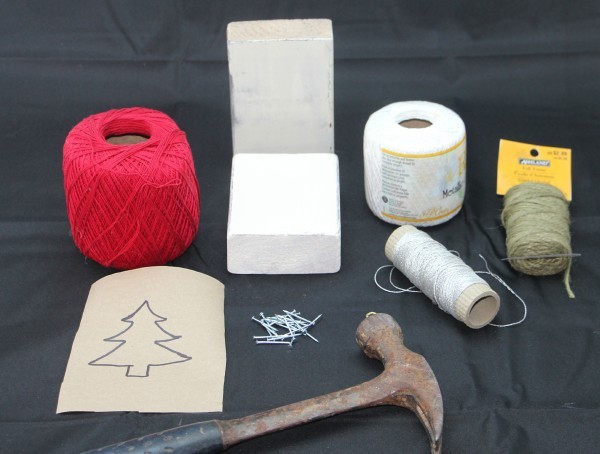
Homemade String Art Ornament Supplies:
- Small block of wood. I used some 2″x 4″ scraps that I had from a previous project.
- String, twine
or yarn in color of choice
- 1″ wire nails
(I use these because they have a good head on them)
- Hammer
- Printed or hand-sketched template to follow
- Eye hook
or other attachment to hang ornament
Homemade String Art Ornament Instructions:
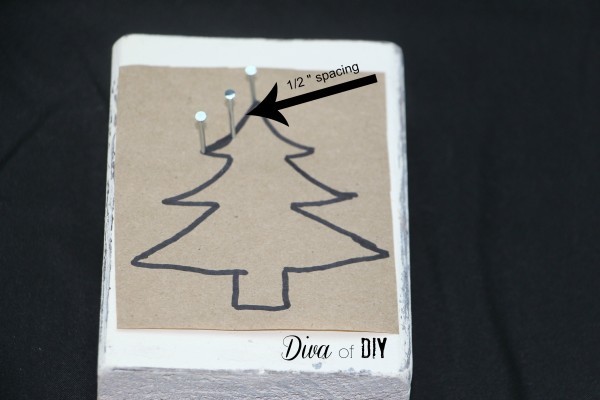
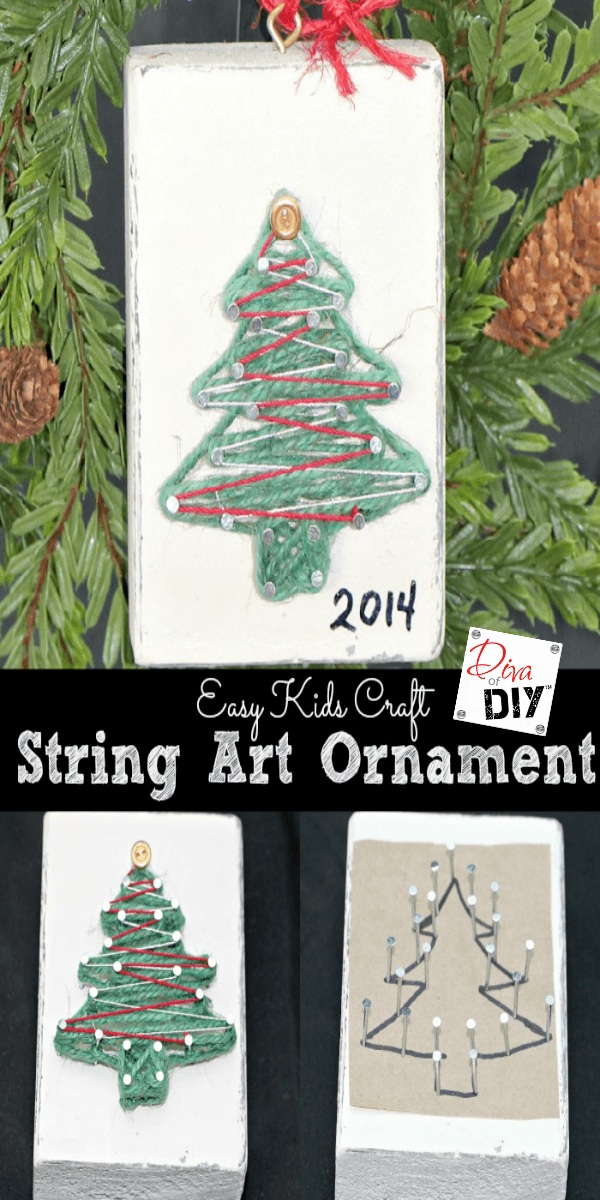
Begin by placing your template on top of your 2″x 4″ board. Once you have it where you want it, start hammering in your wire nails
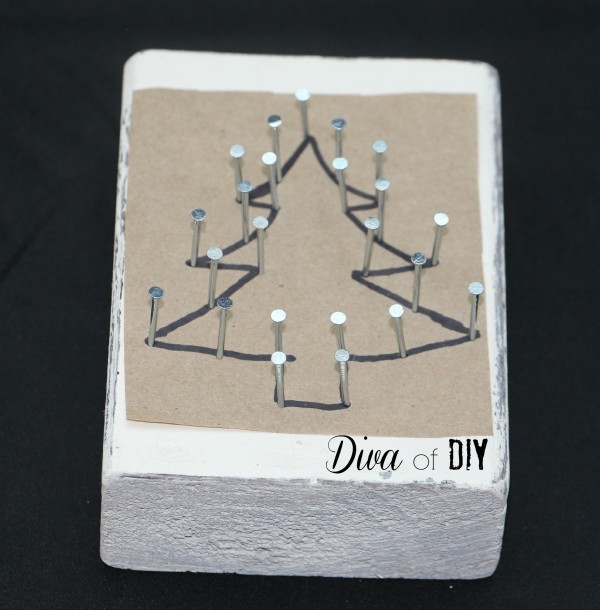
Repeat that process until you have an outline for your entire picture. Once that is done, remove the paper template.
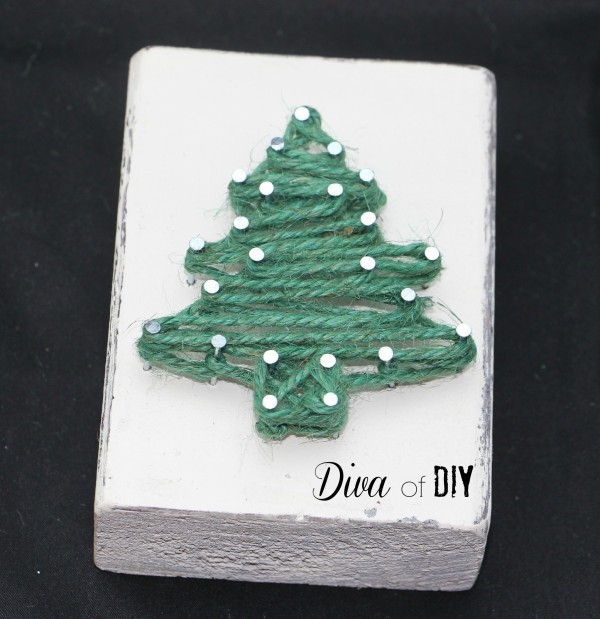
Start by tying the end of the string to one of the nails. Next, string away! You can do this in any pattern you want but start with your bottom color and build from there. I am using green twine for my tree.
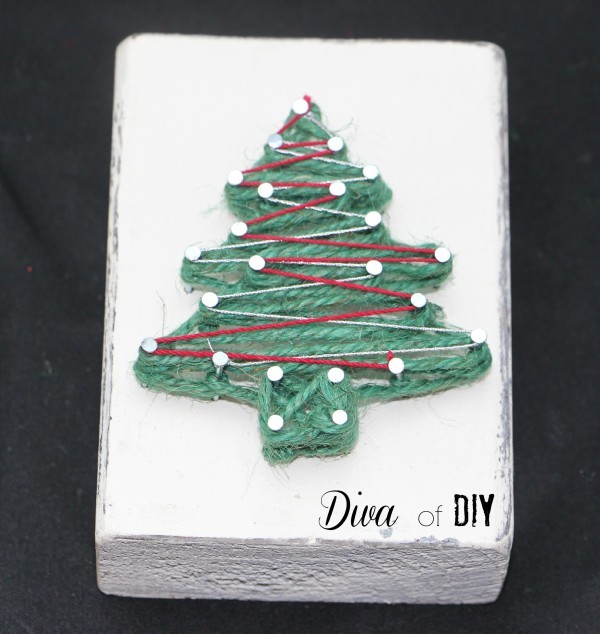
Once you have your base complete, you can start adding additional colors and/or threads. I chose to add red and silver embroidery thread for the garland of my tree.
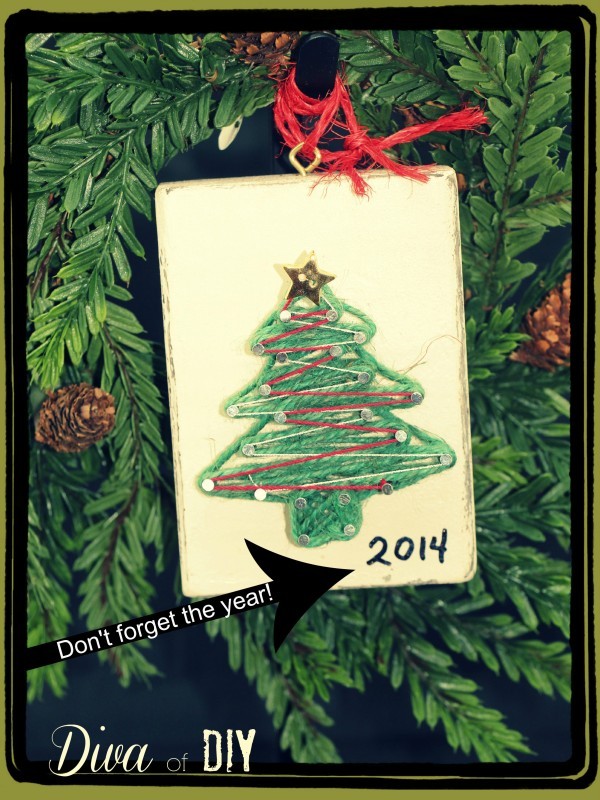
All that is left to do is glue a gold star button
Make sure you don’t forget to add the year it was made. I also like to add a few notes to the back of the ornament such as:
- Year in school
- Favorite Food
- Hobbies/Interests
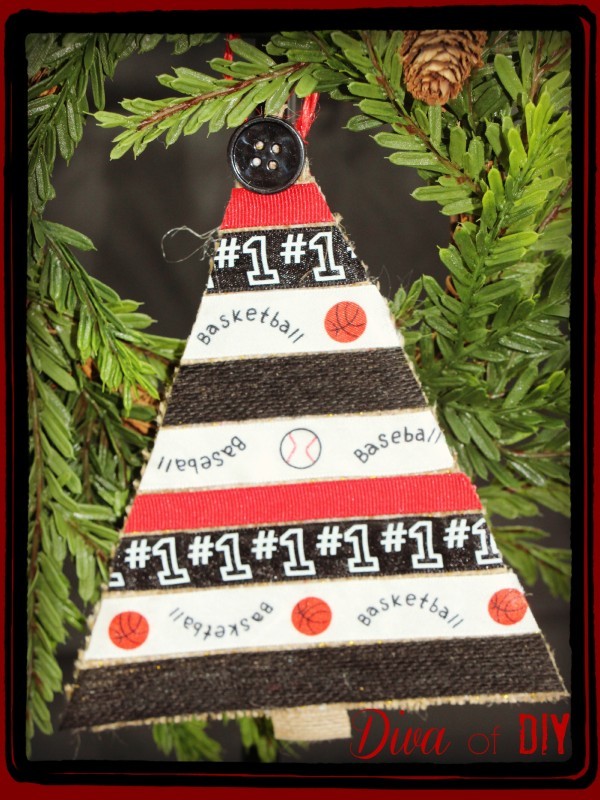
If you liked this homemade Christmas ornament idea then you will like this one too! Easy Handmade Christmas Ornaments for Kids
Each and everyone of you inspire me and I LOVE to see the work that you’ve created. Feel free to share with me on Instagram, Twitter or Facebook. And as always, be sure to follow Diva Of DIY on Pinterest and sign up for our FREE Newsletter to receive the latest projects delivered straight to your inbox!
Looking for more Christmas inspiration, check out these: