• Home
    • About
      • Contact
  • Shop
  • DIY | Projects
    • For The Home
    • Organization
    • Gift Ideas
    • Holidays
      • Valentine’s Day
      • Spring
      • 4th of July
      • Halloween
      • Thanksgiving/Fall
      • Christmas
    • Weddings
    • For The Outdoors
    • Repurposed/Upcycled
    • For Kids
    • Crafts
    • Chalk Paint
    • My Favorites
      • Gift Guides
      • Shop
      • My Keto Journey
        • Easy Keto Meal Plans
        • Recipes
  • Home Inspiration
    • Home Renovations
      • Lake House
      • Before & Afters
    • Kitchens
    • Bathrooms
    • Painting
    • Exterior
    • Design & Decor
    • Lighting
    • Accessories
    • Tips & Tutorials
    • Rekindled Spaces
      • Rekindled Spaces | Schedule a Consultation
      • Rekindled Spaces | Cabinet & Furniture Refinishing
      • Rekindled Spaces | Contact Us
      • Rekindled Spaces | Before & After Photos
    • Email
    • Facebook
    • Instagram
    • Pinterest
    • Twitter
    • YouTube

Diva of DIY

Oak cabinet makeover: How to paint like a professional

Tweet
Share128
Pin1K
1K Shares

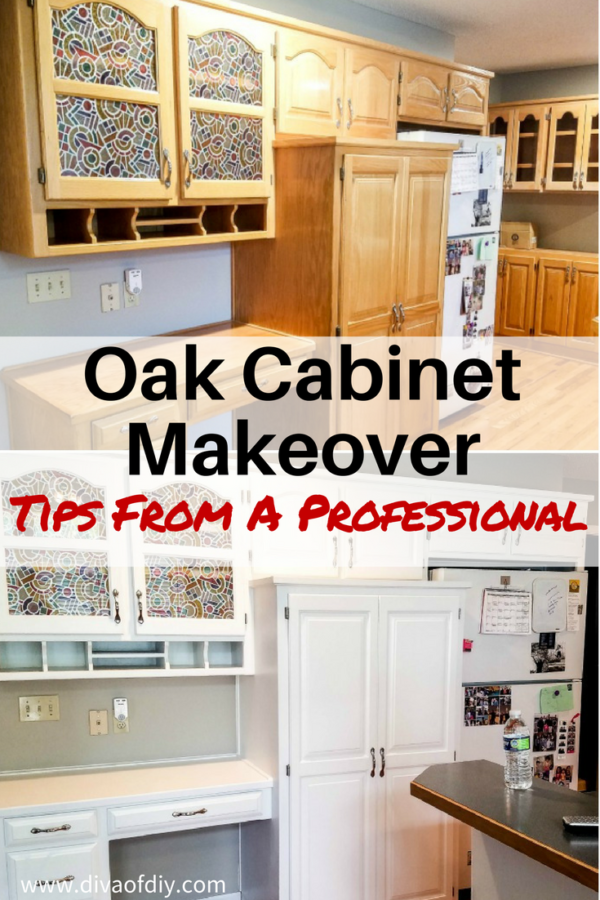
Do you have golden oak cabinets?   If you love them, awesome!  Should you hate them, you have options! Assuming they’re in good shape, why in the world would you rip them out and send them to the landfill?  Check out this oak cabinet makeover we just completed for a customer and then keep reading for the step by step tutorial.

oak cabinet makeover

For those of you that are new to my blog,  you may not be familiar with my contracting business, Rekindled Spaces that specializes in cabinet and furniture refinishing.  For 18 years, I have been transforming people’s homes with paint and stain.  While I would LOVE to travel all over the U.S. refinishing your cabinets, there is only so much time in a day and my husband and 3 boys are here in Kansas City. Don’t fret…I am confident that this oak cabinet makeover tutorial with teach you the correct way to paint your outdated cabinets.

I want to warn you…This is not an easy job.  You will not finish this in a couple of hours or even a couple of days.  Painting your cabinets like a professional will take 1-2 weeks depending on the size of the kitchen.  Still not a bad investment to save thousands of dollars right?

oak cabinet makeover

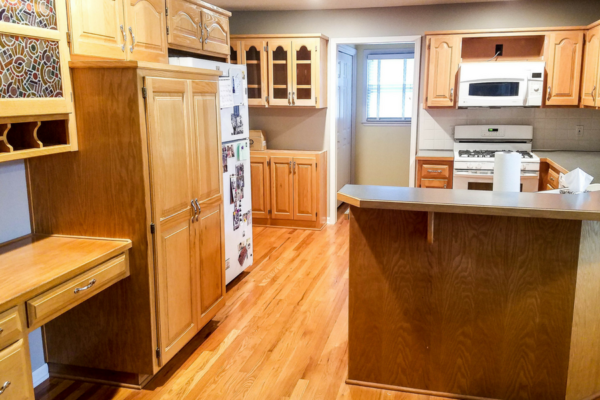
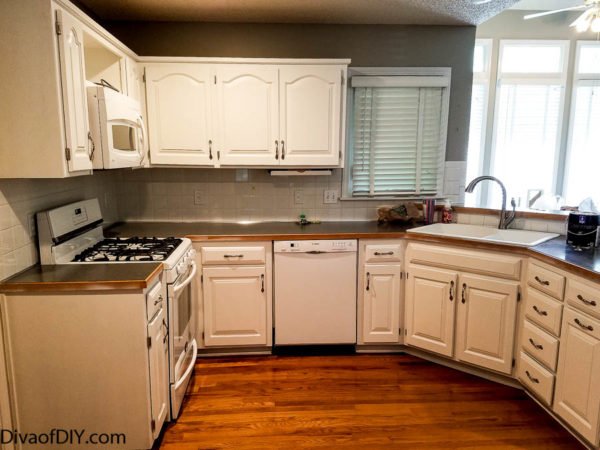
Here is a picture of the kitchen the day we started.  You can’t deny there is a TON of golden oak in this kitchen.

oak cabinet makeover

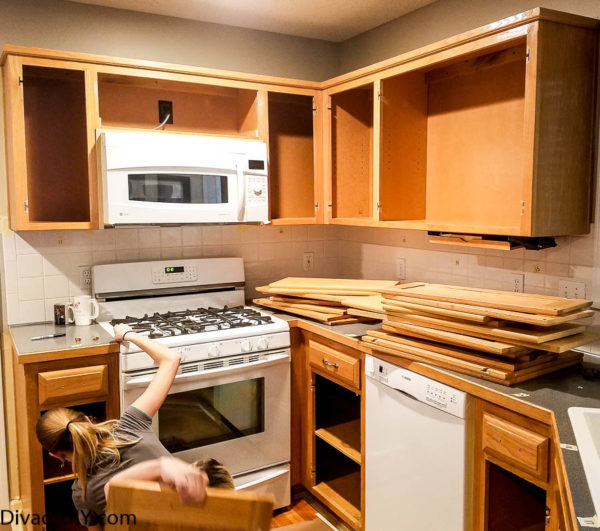
We start every cabinet job by removing all of the knobs and pulls and place them in gallon-sized ziploc bags.  Next, we remove all of the doors and drawers.  Click here to see exactly how we label them to make it easy to reinstall them.

Oak cabinet makeover- How to paint like a professional

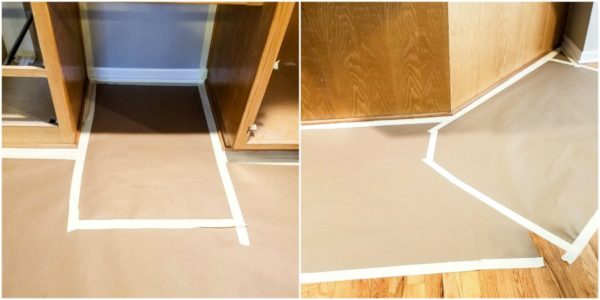
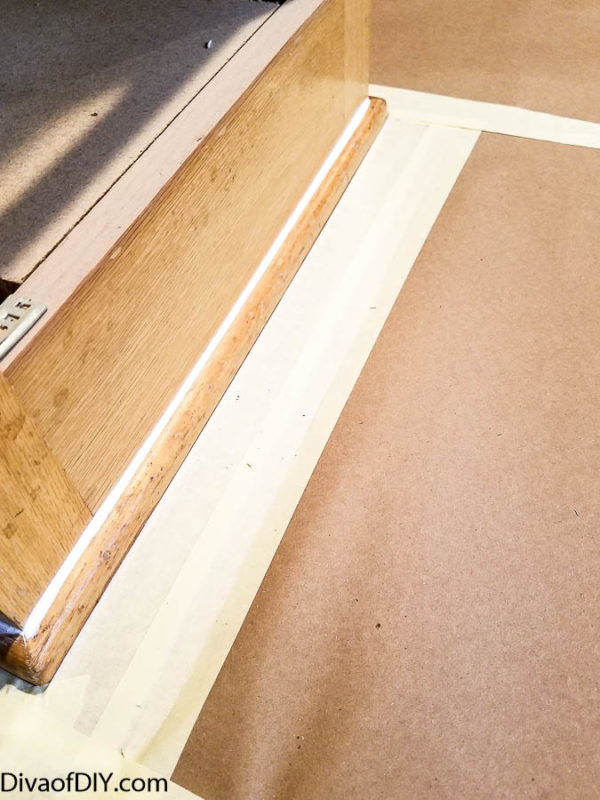
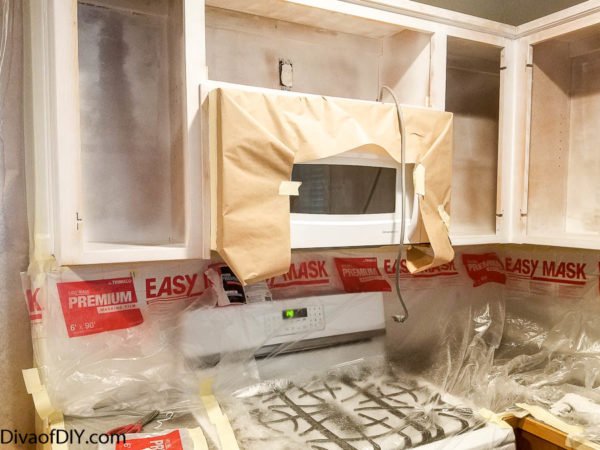
Once the cabinet doors and drawers are removed, we tape and paper around each set of cabinets making sure to have the tape butted up to the base shoe of the cabinet.

Oak cabinet makeover- How to paint like a professional

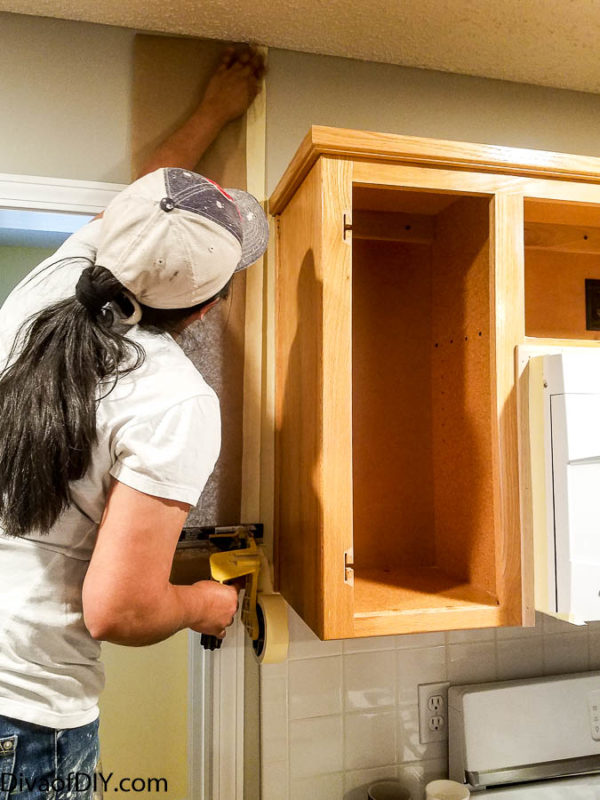
Using our masking gun, we repeat the tape/paper process along the wall next to the sides of the cabinets.

Oak cabinet makeover- How to paint like a professional

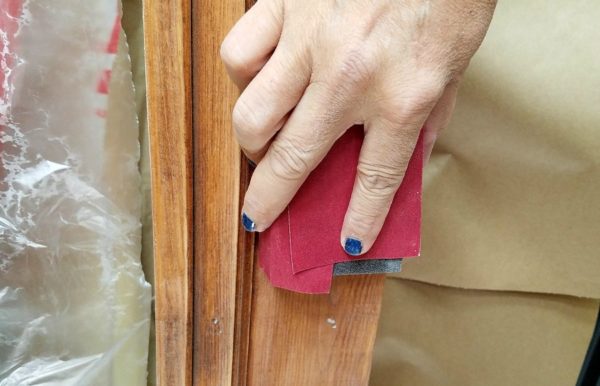
Next, a controversial topic…SANDING.  The number one question I am asked is whether or not you have to sand furniture or cabinets before you paint.  No matter what type of paint you are using, the answer remains the same…ALWAYS SAND!  Click here to see a full tutorial on how to prepare your cabinets like a professional.

Oak cabinet makeover- How to paint like a professional

The next step is caulking every seam or joint.  This is a super important step and should not be skipped.  You see, when your cabinets are stained, you don’t notice all of the gaps but I promise…when you paint them they will stick out everywhere!  Let caulk dry.

Make sure you invest in good caulk.  It needs to be flexible like this one.

Click here to download a printable of the supplies needed paint your cabinets like a professional.

Oak cabinet makeover- How to paint like a professional

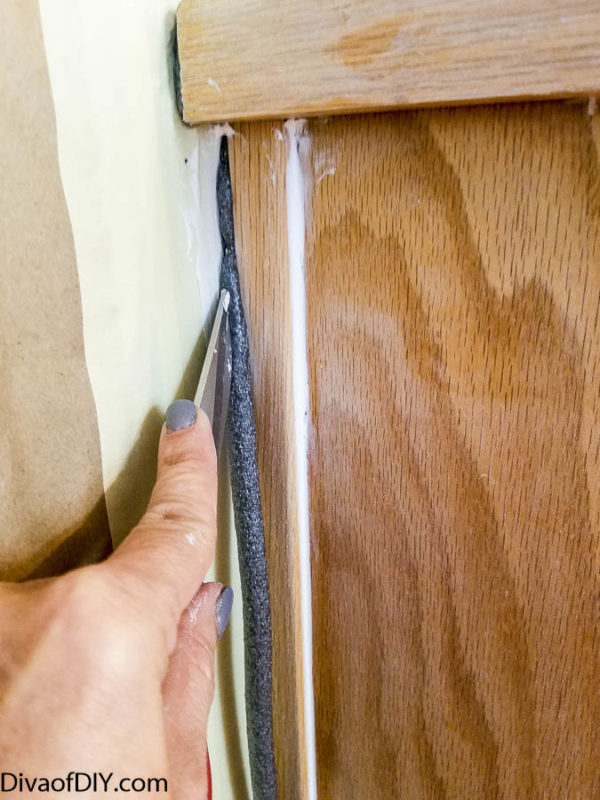
If you find large gaps between the cabinet and the wall, they will need to be addressed before you paint.  Depending on the size of the gap, insert of piece of backer rod just on the other side of the gap.  Follow with a thick bead of caulk..This flexible foam material will hold the caulk in place.  Let caulk dry.

Oak cabinet makeover- How to paint like a professiona

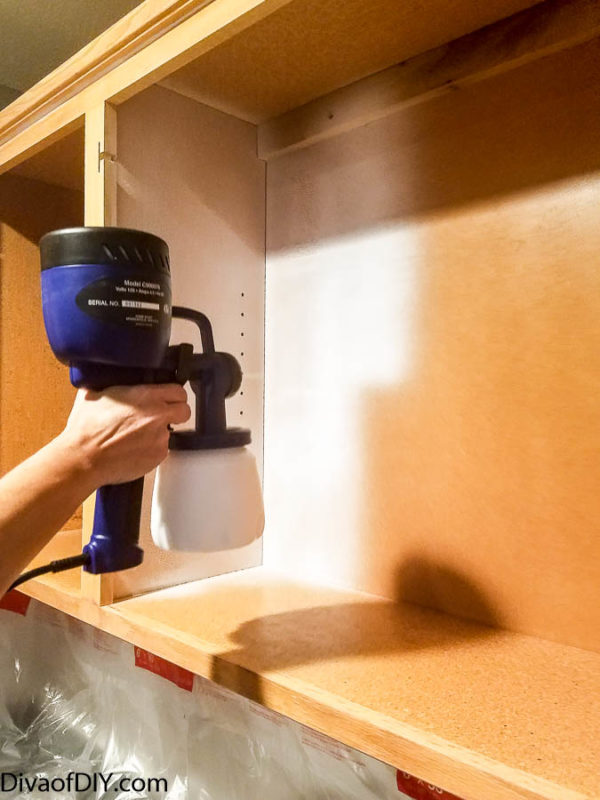
Once cabinets, have been sanded, cleaned and caulked…it’s time to prime.  This is the only primer I use when painting cabinets.

Oak cabinet makeover- How to paint like a professional

We spray our primer coats but you can brush and roll this coat if you don’t own a paint sprayer.  For this kitchen, we sprayed the inside and outside of the cabinets for a crisp, clean look.  Let primer dry overnight.

Oak cabinet makeover- How to paint like a professional

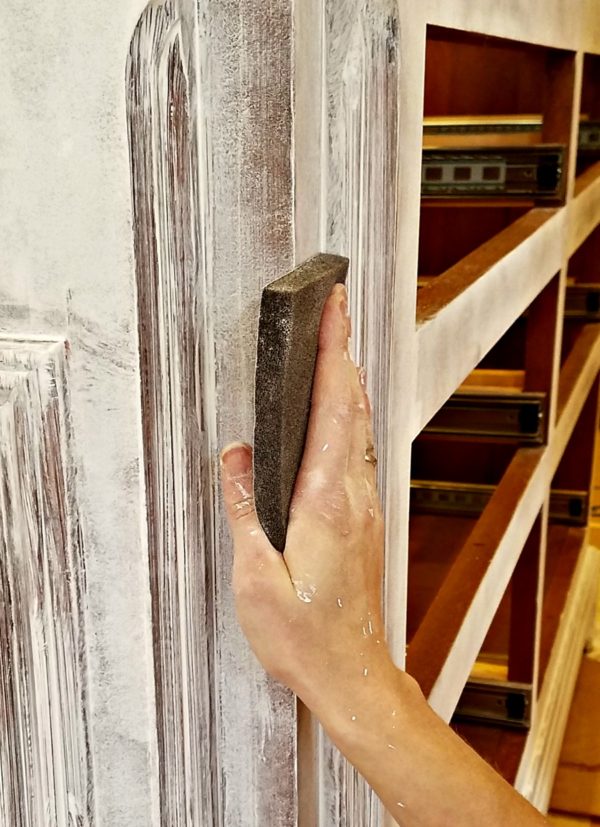
Once the primer has dried overnight, take a buffing pad and lightly sand the primer.  This will accomplish two things:   It will smooth the finish for the next coat of paint and most importantly it will ensure that the primer bonded to the original surface.


Now it’s time to paint.  Again, we use a paint sprayer to apply the finish but you can easily use a good-quality brush and roller to achieve a professional look.  We applied to layers of enamel to this kitchen, letting it dry completely between coats.

Oak cabinet makeover- How to paint like a professional

Once the second coat is completely dry, replace doors, drawers and hardware.  

This is the part where many homeowners decide to try some new cabinet hardware. Don’t forget the cabinet stoppers to protect your finish!


oak cabinet makeover

We have updated hundreds of kitchens by simply updating the cabinets. They’re often overlooked, even though the cabinets make the biggest impact when it comes to kitchen design.  When we are finished our clients always say “Why didn’t I do that sooner?”. 

Each and every one of you inspire me and I LOVE to see the work that you’ve created. Feel free to share with me on Instagram, Twitter or Facebook. And as always, be sure to follow Diva Of DIY on Pinterest and sign up for our FREE Newsletter to receive the latest projects delivered straight to your inbox!


Tweet
Share128
Pin1K
1K Shares

Before & Afters// Blog// DIY | Projects// Home Inspiration// Kitchens// New on the blog// Painting// Rekindled Spaces// Tips & TutorialsLeave a Comment

Become an insider and never miss a post!

« Updating Old Cabinets: How To Get A Modern Look
Furniture Makeover: How To Update A Dresser With Paint »

Leave a Reply Cancel reply

Your email address will not be published. Required fields are marked *

Looking For Something?

Shop Amazon!

Do you struggle with choosing paint colors for your home?

Trying to select them off of small paint strip can be a daunting task.  DOWNLOAD THIS FREE E-BOOK full of professional tips for choosing the perfect paint colors…
THE FIRST TIME!

You have Successfully Subscribed!

Subscribe

Please don't make the same mistakes most DIYer's make

Are you considering painting your cabinets?  Download our free cabinet painting checklist to make sure you are painting your cabinets the right way!

You have Successfully Subscribed!

  • Email
  • Facebook
  • Instagram
  • Pinterest
  • Twitter
  • YouTube
Privacy

Tags

bathroom makeover ideas Chalk Paint Christmas christmas decor christmas ornament Craft Projects design tips easy keto recipes Fall decorating fixer upper furniture Furniture Rehabs Gift Ideas Halloween handmade holiday holiday decor Home Decor home renovations keto keto diet kids crafts kitchen makeovers lake house fixer upper Mother's Day Organization Outdoor painting paint party Pallet Projects pallet projects Pumpkins repurposed Repurposed & Upcycled Repurposed Projects Restaurant: Impossible Shopping Guides Thanksgiving upcycled Upcycled Projects Valentine's Day wood decor wood projects wood signs wreaths

Copyright © 2021 · Savory theme by Restored 316

Copyright © 2021 · Savory Theme on Genesis Framework · WordPress · Log in