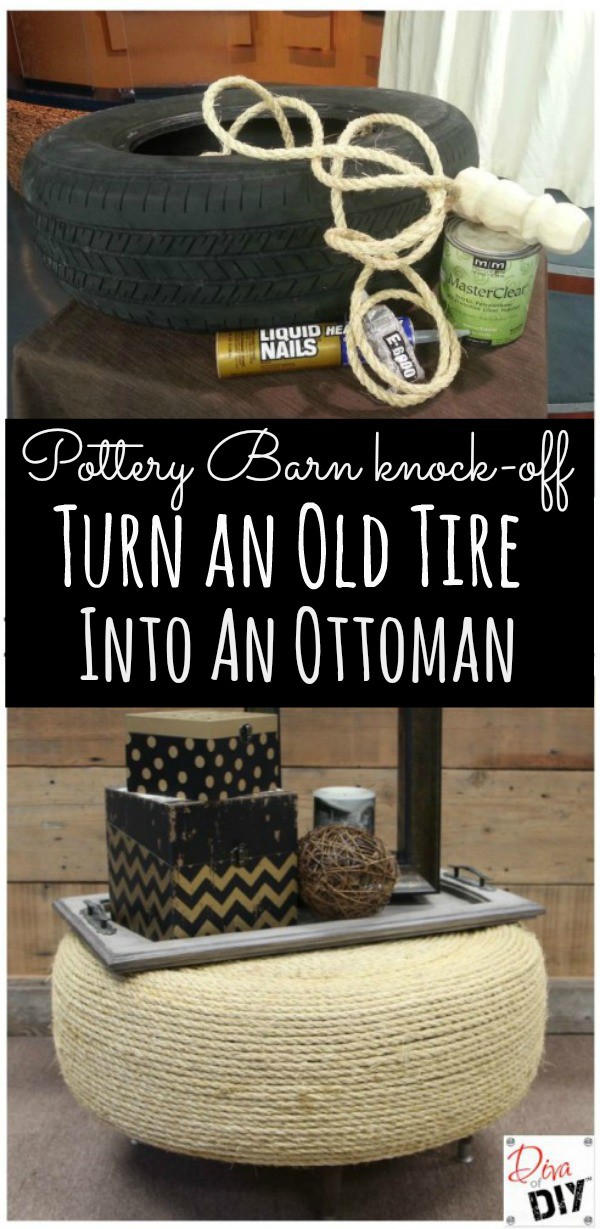
A stylish ottoman can cost a small fortune but chic decorating doesn’t have to break the bank. In this post, I will show you how to take an old tire and turn it into an ottoman in just a few simple steps.
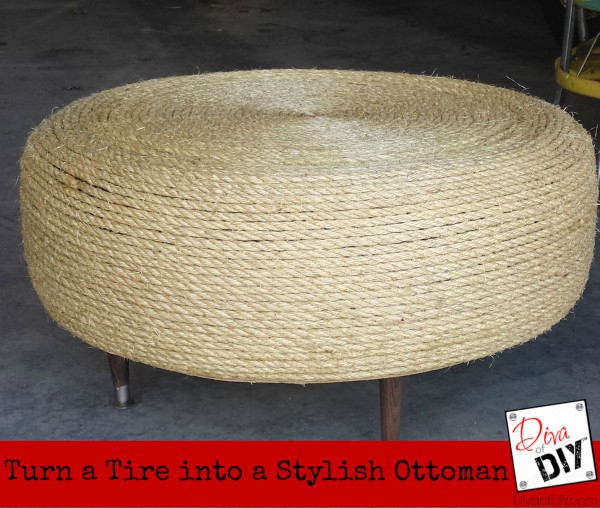
You will smile when your friends ask you where you bought this fabulous piece and only you can decide whether or not to tell them you bought it or…made it yourself for 1/6th the cost of those sold in the well-known stores.
Tire Ottoman Supply List:
Old Tire (rim removed)
Twine or Rope (I got mine at the hardware store)
Liquid Nail and Caulk Gun
Casters or Furniture Feet (if desired)
Upholstery Tacks (if desired)
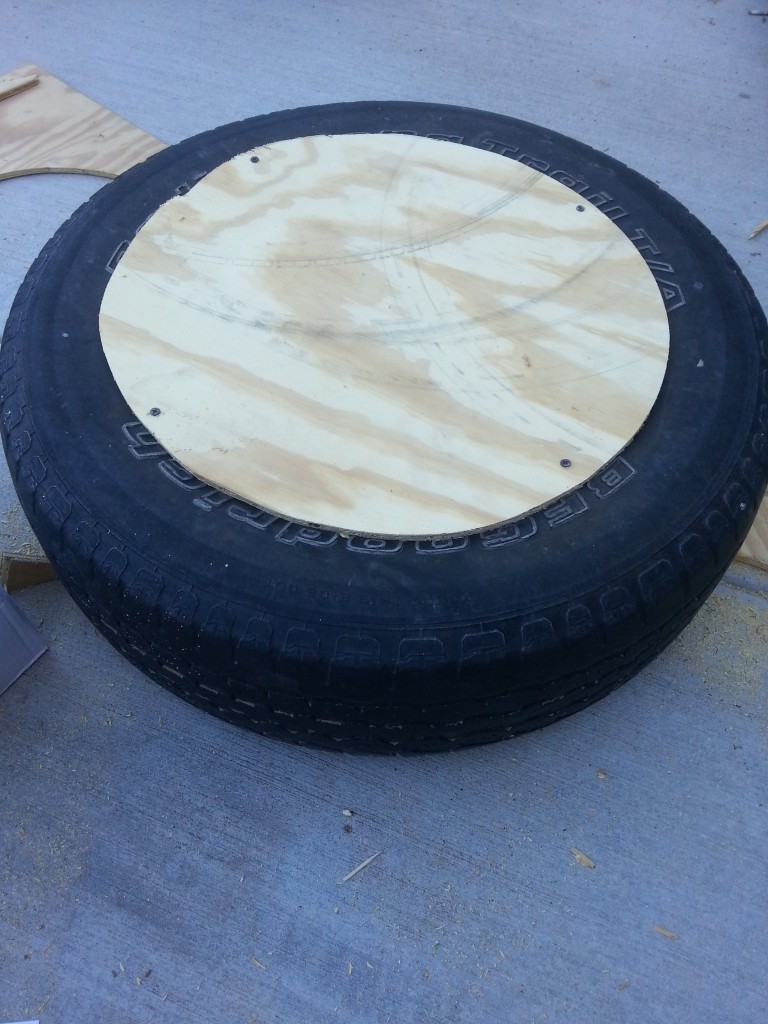
Sheet of plywood (Large enough to cut to the size of the tire circumference twice…you will need one for the top and one for the bottom)
Screws
Drill
Polyurethane or comparable clear sealer
Tire Ottoman Instructions:
1) Cut plywood to the circumference of the tire. You will need two…One for the top and one for the bottom
2) Screw the plywood to the top of tire. Repeat for bottom
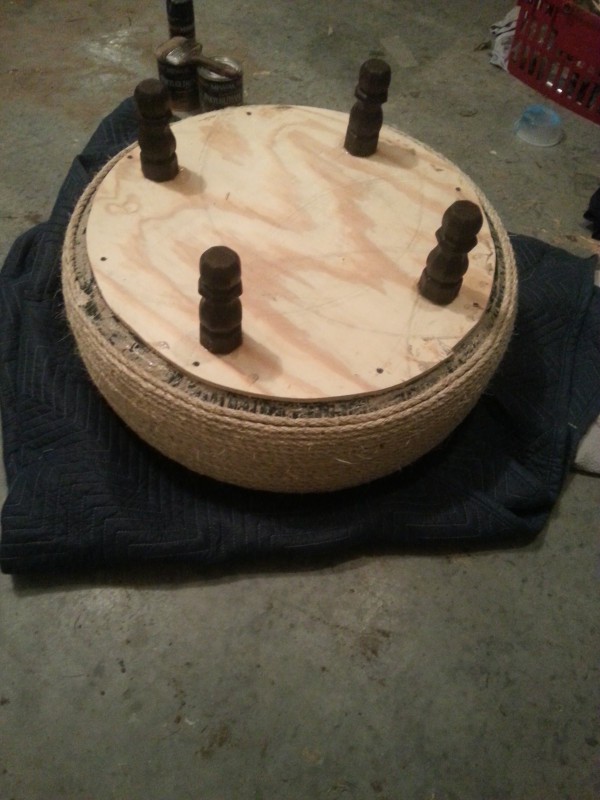
3) If attaching casters or furniture feet, go ahead and screw them into the bottom. Flip over
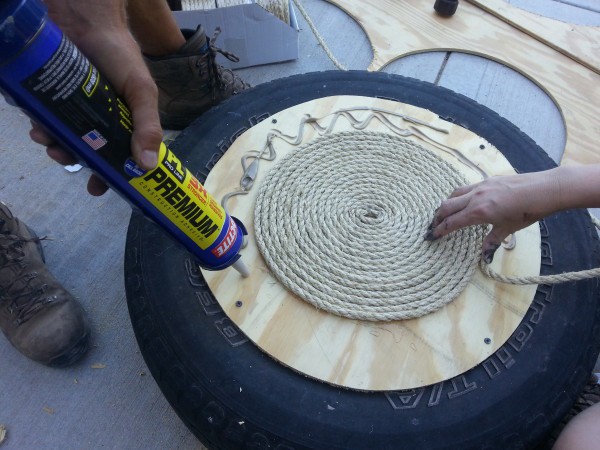
4) Starting in the top, middle of the plywood, start winding the rope in a circle gluing each section down with Liquid Nail.
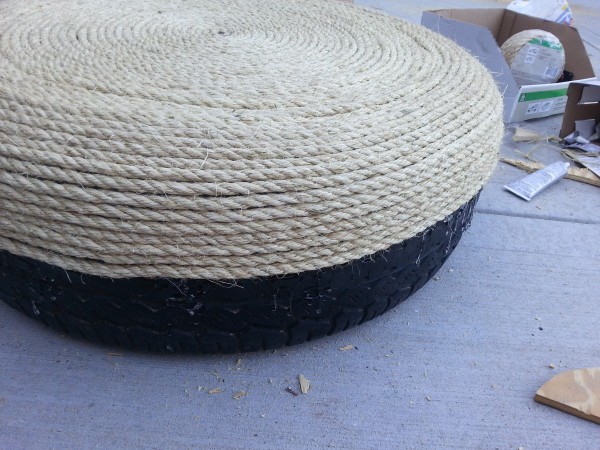
5) Keep winding and gluing the rope until you reach the bottom of the tire. Let dry
6) Seal entire ottoman with clear sealer. Let dry. Repeat.
If you would like to submit a Reader Project that you need help on or one that you have created feel free to Submit Your Project to me!
You all inspire me and I LOVE to see the work that you’ve created. You can also share with me on Instagram, Twitter or Facebook. And as always, be sure to follow Diva Of DIY on Pinterest and sign up for our FREE Newsletter to receive the latest projects delivered straight to your inbox!