
I love pumpkins, planters, mums, and Halloween so why not make a “Boo Pumpkin Planter” to hold one of my beautiful fall mums?
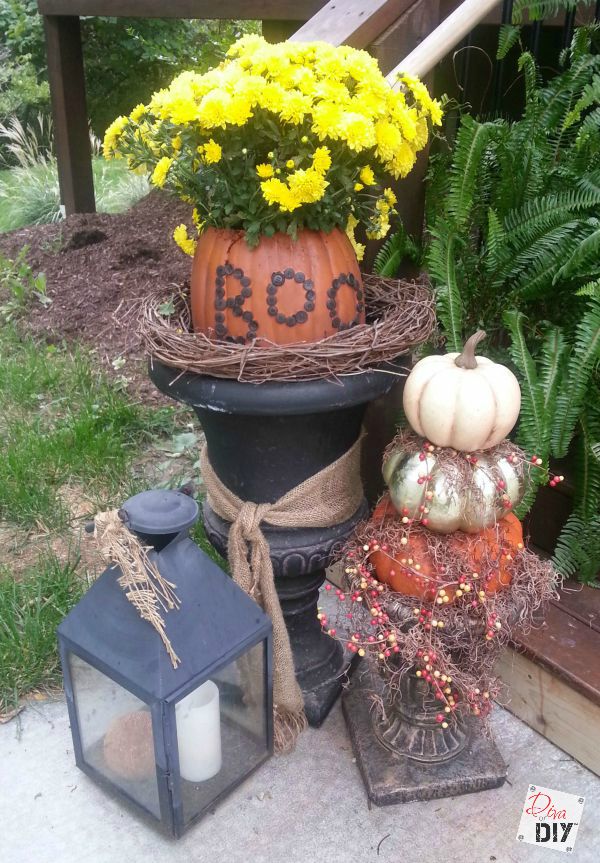
Every fall I decorate my porch a little different but two things I always incorporate are: 1) colorful mums and 2) pumpkins so this year I decided to put them together…in an urn.
This Boo pumpkin planter is super easy and a great project for the kids to help with.
This post contains affiliate links. If you buy something from clicking one of my links, I will get a commission from the sale. It will not cost you a penny more and allows me to keep sharing my ideas with you for free. You can see my full disclosure here. Thank you for supporting my blog!
Pumpkin Planter Supplies:
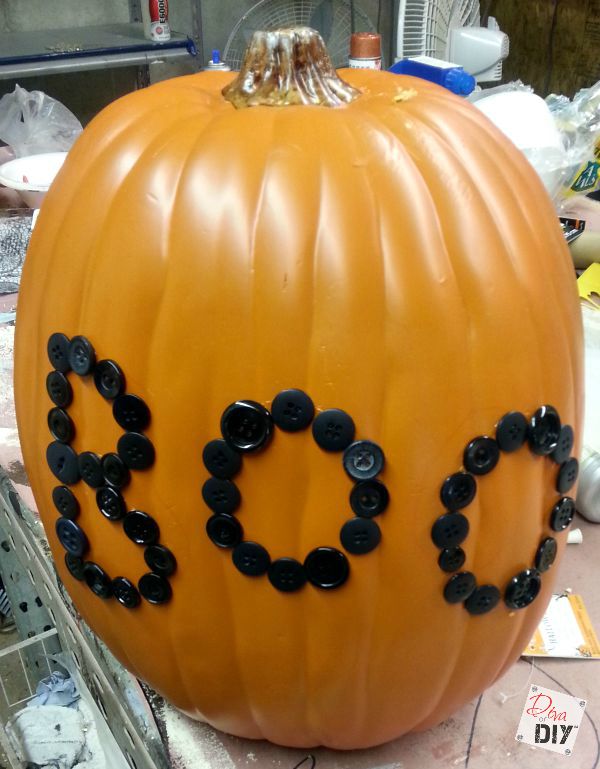
- Large hollow foam pumpkin
- Assorted buttons
(I chose to use all black to stay with the Halloween theme)
- E6000
- Versa-tool
(This is not an absolute necessity but…it makes the project ALOT easier) –
- Aging Glaze (see recipe below)

Pumpkin Planter Instructions:
1) Decide the word you want to spell and, using buttons


2) Plug in Versa-tool
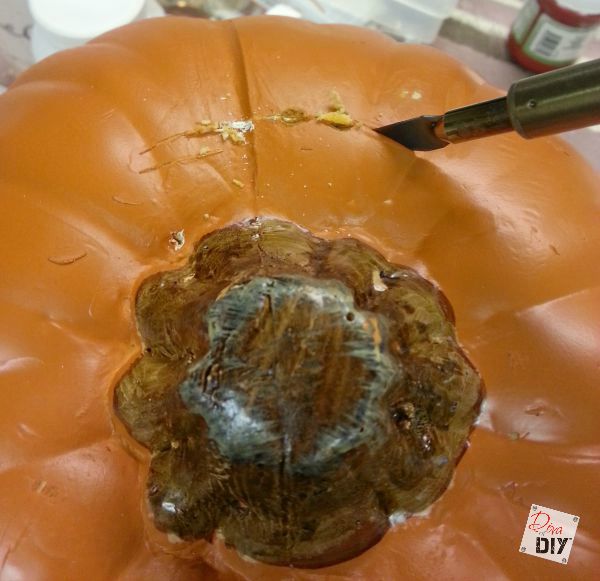
3) Using the hot knife

Here is the pumpkin with the mum sitting in it. This is really cute right? Well…In the life of a faux painter, it needed more so…I removed the mum and moved on to step 4.
4) Using the aging glaze recipe below, glaze the foam pumpkin. You can go right over the buttons…no worries. To see a step by step tutorial on glazing a foam pumpkin to make it look more realistic, click here.
Pumpkin Planter Aging Glaze Recipe:
- 1 part Burnt Umber Acrylic Paint
*
- 2 parts water
- Mix well
*You can also mix brown and black acrylic paint together if you don’t have Burnt Umber
Now that my friends is an adorable “Boo Pumpkin Planter”! Now that you have the idea, personalize it how ever you want. Make an initial pumpkin or spell out other short words like the word “Hello”…you can make anything you can dream up.
Each and everyone of you inspire me and I LOVE to see the work that you’ve created. Feel free to share with me on Instagram, Twitter or Facebook. And as always, be sure to follow Diva Of DIY on Pinterest and sign up for our FREE Newsletter to receive the latest projects delivered straight to your inbox!