You may have noticed that I am not your normal DIY blogger. Most of my blogging friends do projects for their homes and have beautiful pictures of their projects staged in the location the project was meant for. Well I must admit that a lot of my projects are done backwards. Take for instance these DIY curtains I made out of a drop cloth. I wanted to make outdoor curtains for the lake house. As you have probably realized most of my current projects have been for our lake house fixer upper. But, like so many of my projects I made them before I was actually ready for them so they could be filmed for my weekly syndicated DIY segment.
Here is a peek of the final show staging in the studio where we film in my shop. Not exactly where they will be forever, that photo will have to come later. Sorry readers, not everything is always real in blog world or TV land. What is real is that I am totally in love with these DIY curtains and I can’t wait to put them up in their forever home at the lake in a few weeks!
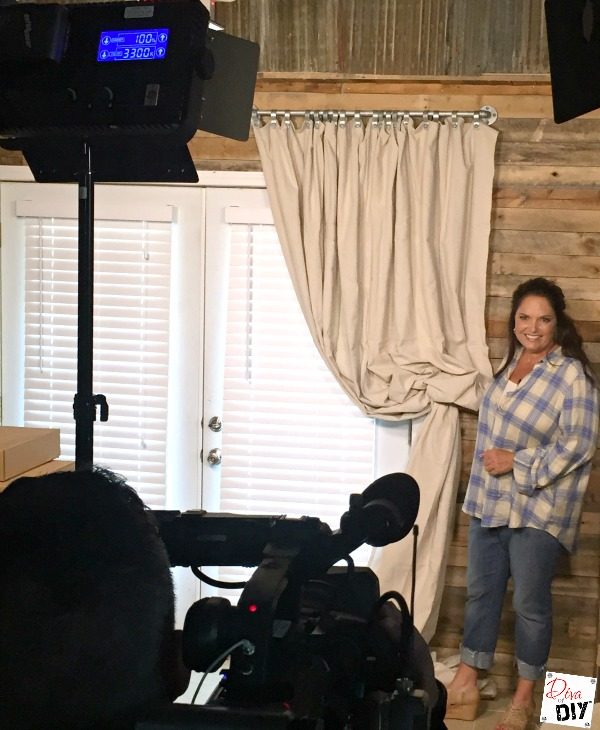
This curtain project is the perfect marriage between my contracting job and my love of an industrial look! Drop cloths have become a favorite for DIY curtains, especially for the sewing-challenged do-it-yourselfer (is that a word lol) like me. I love the shabby chic/farmhouse look, they’re cheap and wait for it…wait for it…they are already hemmed! What’s not to love? My twist on the drop cloth curtain is that I used chain link braces and carriage bolts to complete these beauties with the perfect outdoor industrial charm. Let’s get started…
This post contains affiliate links. If you buy something from clicking one of my links, I will get a commission from the sale. You can see my full disclosure here. Thank you for supporting my blog!
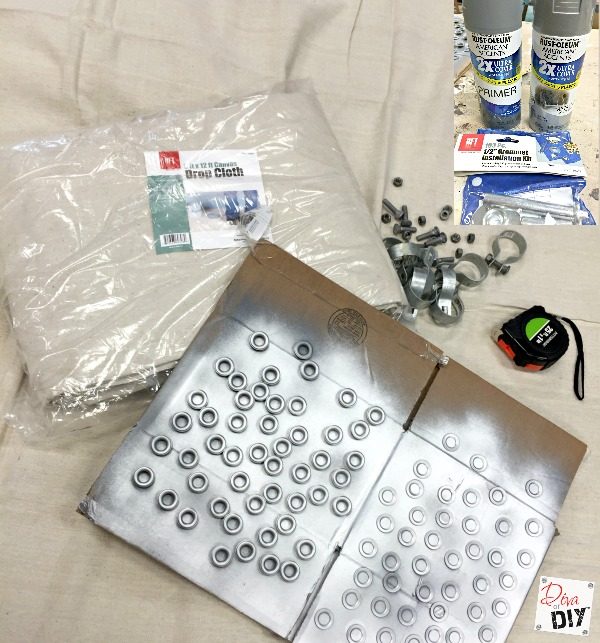
Supply List For DIY Curtains:
- 1/2″ Grommet Kit
- Rustoleum Spray Primer
- Rustoleum Metallic Aluminum Spray Paint
- 9′ x 12′ Drop Cloths
- Chain Link Braces
- Carriage Bolts (These fit my braces)
- Tape Measure
- Rubber Mallet
- A block of wood
- Curtain Rod
Instructions for DIY Curtains:
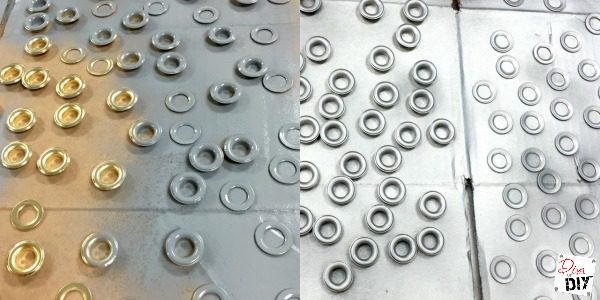
Step 1) Prime and spray paint grommets. Let dry. You know me, I’m not going to let the color of something stop my from making the project just the way I like. The grommets only came in gold and I wanted them in silver so I grabbed my spray paint and went to work.
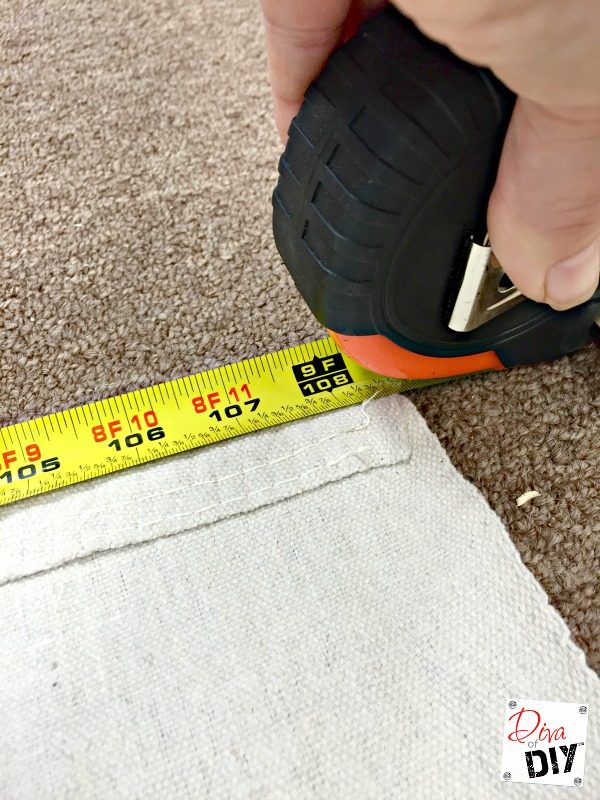
Step 2) Measure your drop cloth and divide it up evenly for the number of grommets you are going to use. I spaced mine every 7 inches.
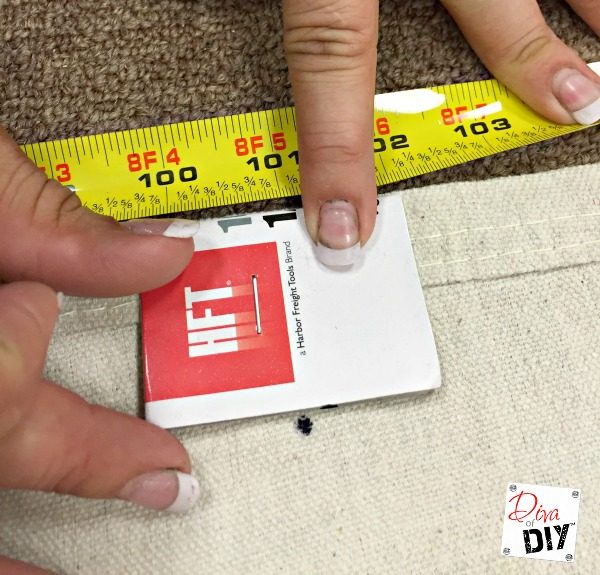
*Diva Tip: Decide how far down you want your grommet to be and make a template that width so you do not have to measure each time. I made mine 1 3/4″ down and used a scrap piece of the grommet kit packaging.
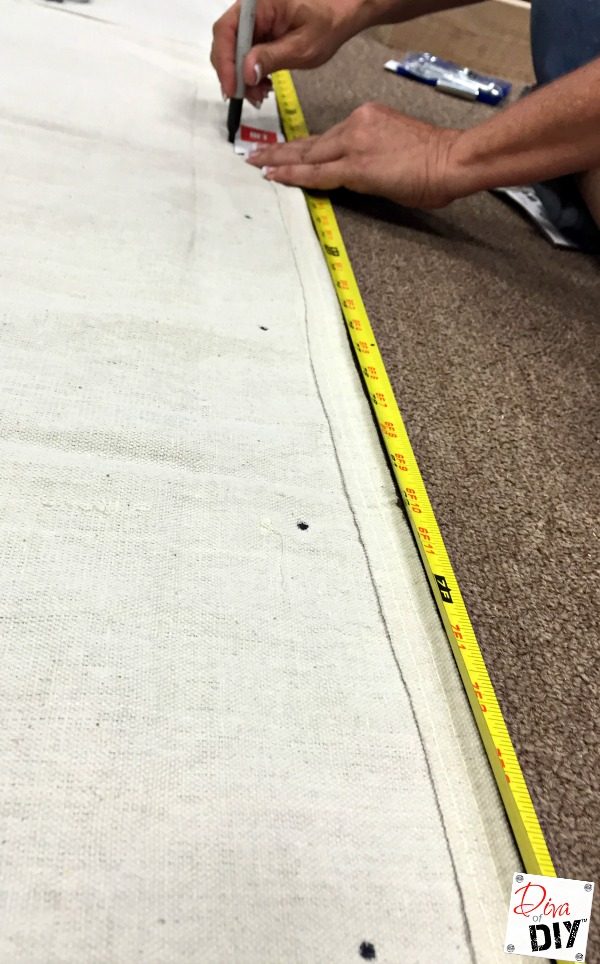
Step 3) Continue marking the entire length of the drop cloth.
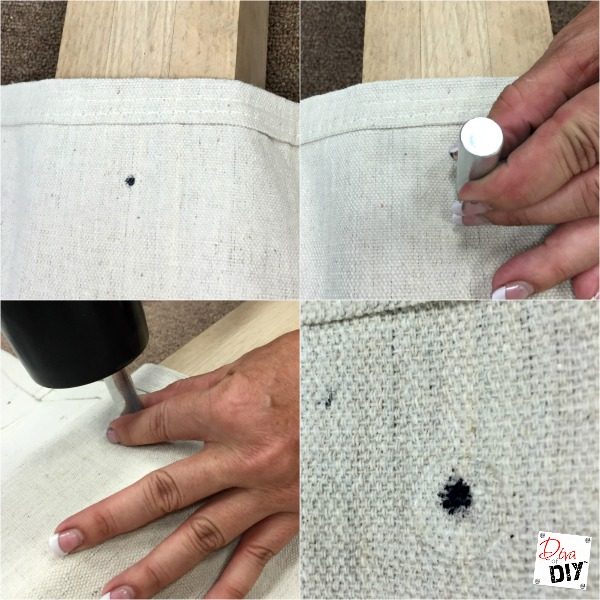
Step 4) Using a block of wood as a strike plate, place the hole cutting tool over the mark and hit it with a rubber mallet. This will create a hole in most materials but I found it did not cut through the drop cloth so I used the circle as a guide and cut it with scissors.
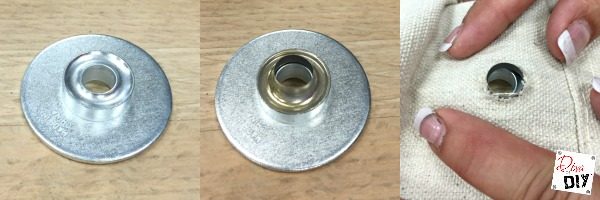
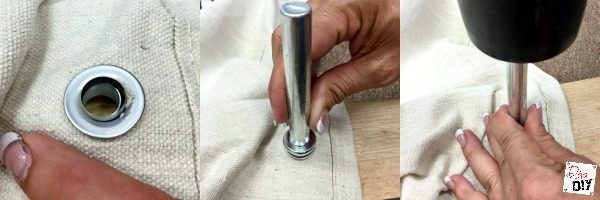
Setting a Grommet for DIY Curtains:
Step 5) Lay the base tool on the block of wood.
Step 6) Lay the larger washer on the base tool with the shaft facing up.
Step 7) Place the drop cloth hole over the shaft. After cutting the first hole I realized I only needed a small enough slit to slide the shaft through so I did not take the time to try and cut the precise shape.
Step 8) Place the smaller, flat washer on the drop cloth with finished side up.
Step 9) Using the finishing tool tap the pieces together with a hammer. Using several taps instead of one large hit helps to keep from damaging the grommet.
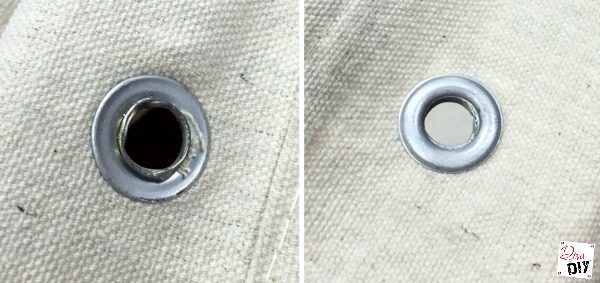
Step 10) Lift the setting tool and make sure the grommet is secure.
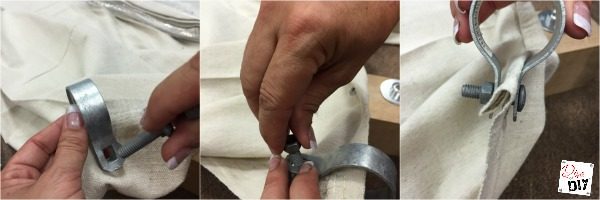
Step 11) Put the Chain link brace on either side of the grommet and secure with the bolt.
Step 12) Slide the DIY curtain on the curtain rod of your choice. I used a metal plumbing pipe, 90 degree angle and wall flange from the plumbing department to add to the industrial look.
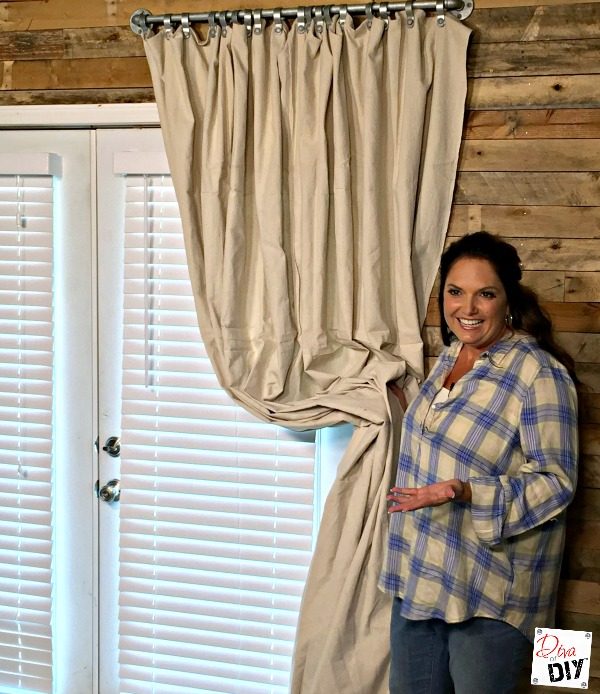
And here they are! I absolutely love the way they turned out and will share an updated picture of them soon at their forever home! I may have to make more and have them for my shop as well… stay tuned to find out!

Each and everyone of you inspire me and I LOVE to see the work that you’ve created. Feel free to share with me on Instagram, Twitter or Facebook. And as always, be sure to follow Diva Of DIY on Pinterest and sign up for our FREE Newsletter to receive the latest projects delivered straight to your inbox!
If you like this project, check out these:


