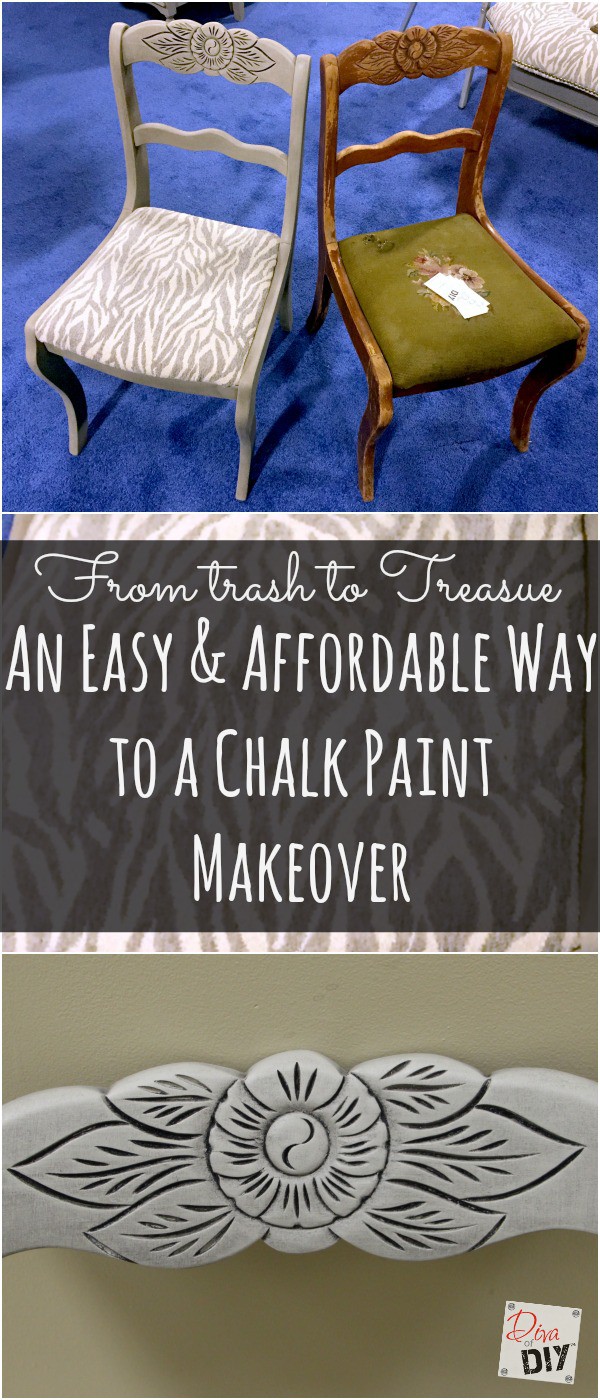
Who likes finding little jewels in the rough on the side of the road? Me! I found these little jewels in a pile of left over garage sale items on a curb. It was a bonus day for sure. The chairs were solid but obviously had seen better days. It was nothing a chalk paint makeover couldn’t cure. I couldn’t wait to get them home and bring life back to these little beauties! At the end of the tutorial I will give you a peak at how The Restaurant Impossible design team used this technique in Season 13 at the Starlight Restaurant and Pizza.
This post contains affiliate links. See full disclosure here
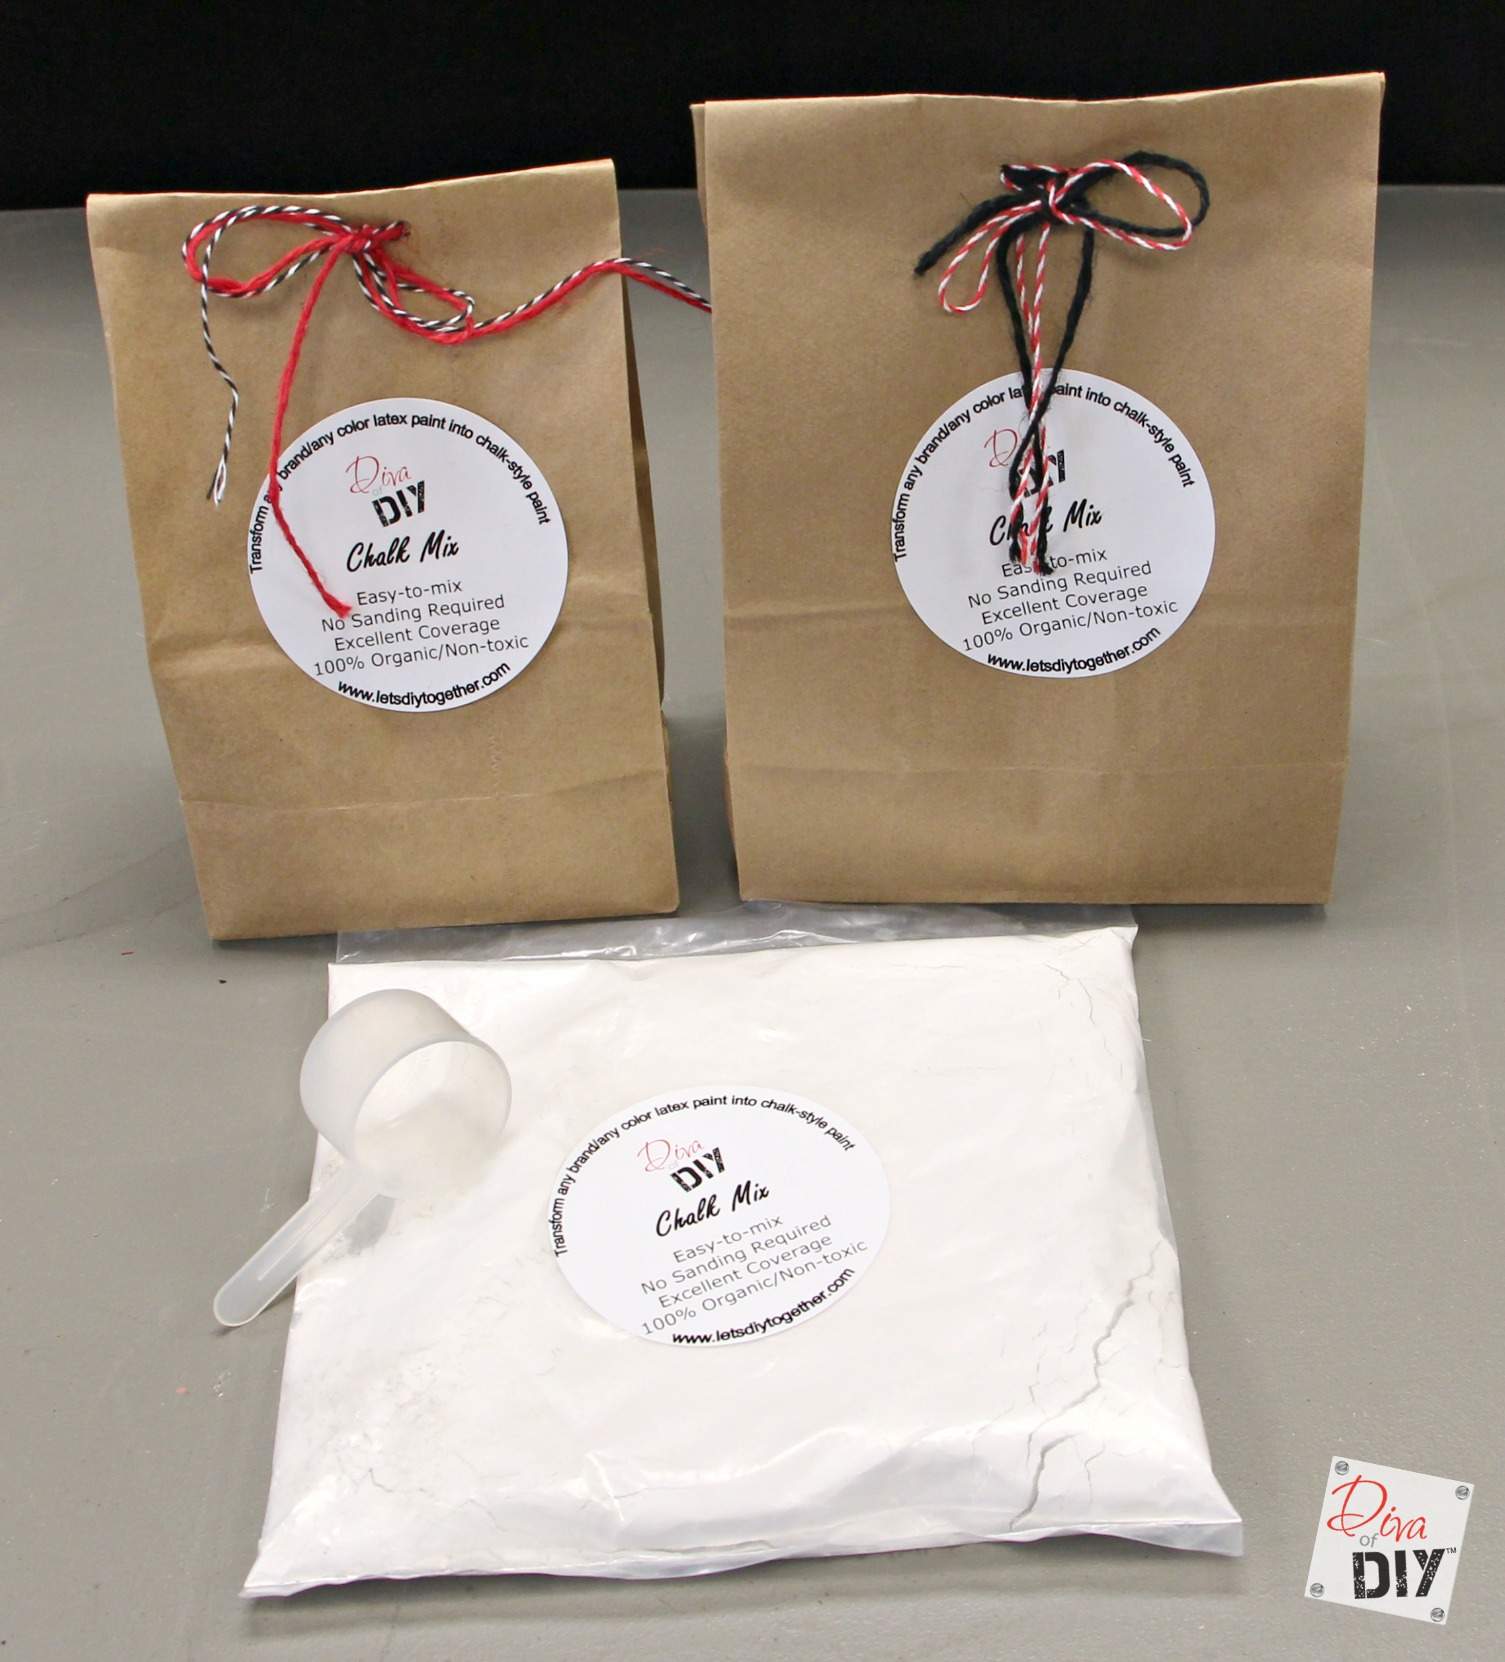
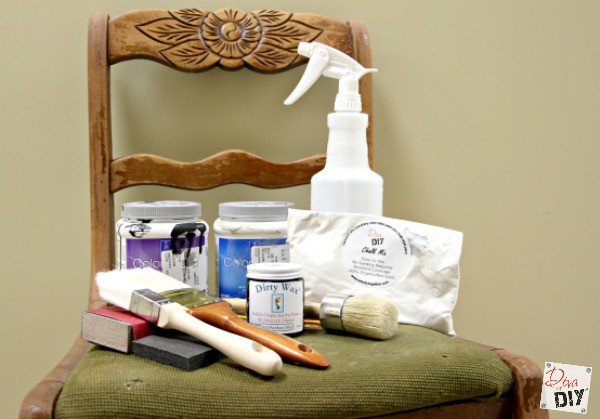
Chalk Paint Makeover Supplies:
- Diva of DIY Chalk Mix
- Latex paint – I used SW Intellectual Grey
- Sanding block
(I use this one)
- Buffing pad
- Paint Brush
(my favorite!)
- Krud Kutter
- Gorilla Wood Glue
- Bondo
(Can you say life-saver?)
- Clamp
- Dirty Wax – Coffee hold the cream
- Wax brush
- Cheesecloth


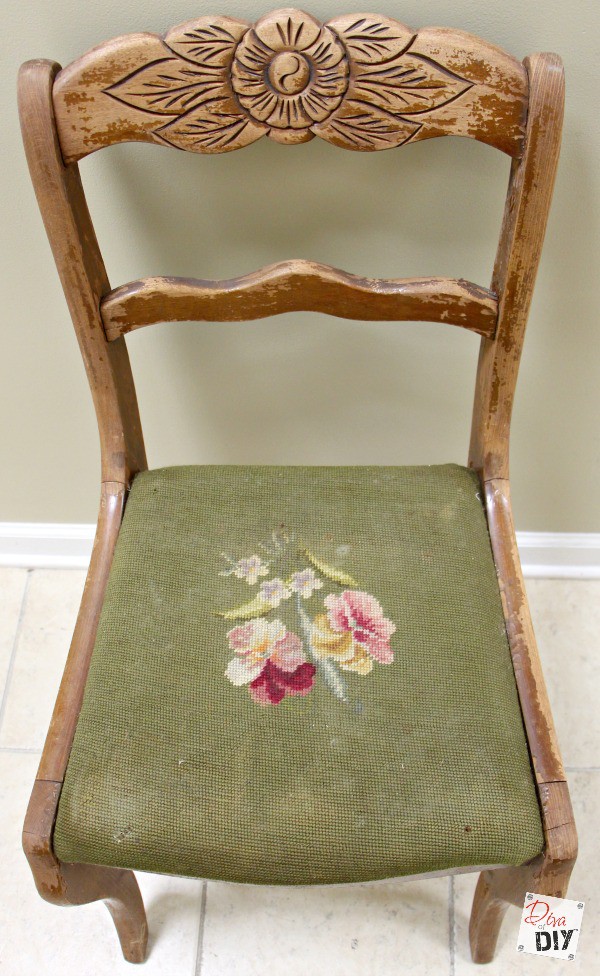
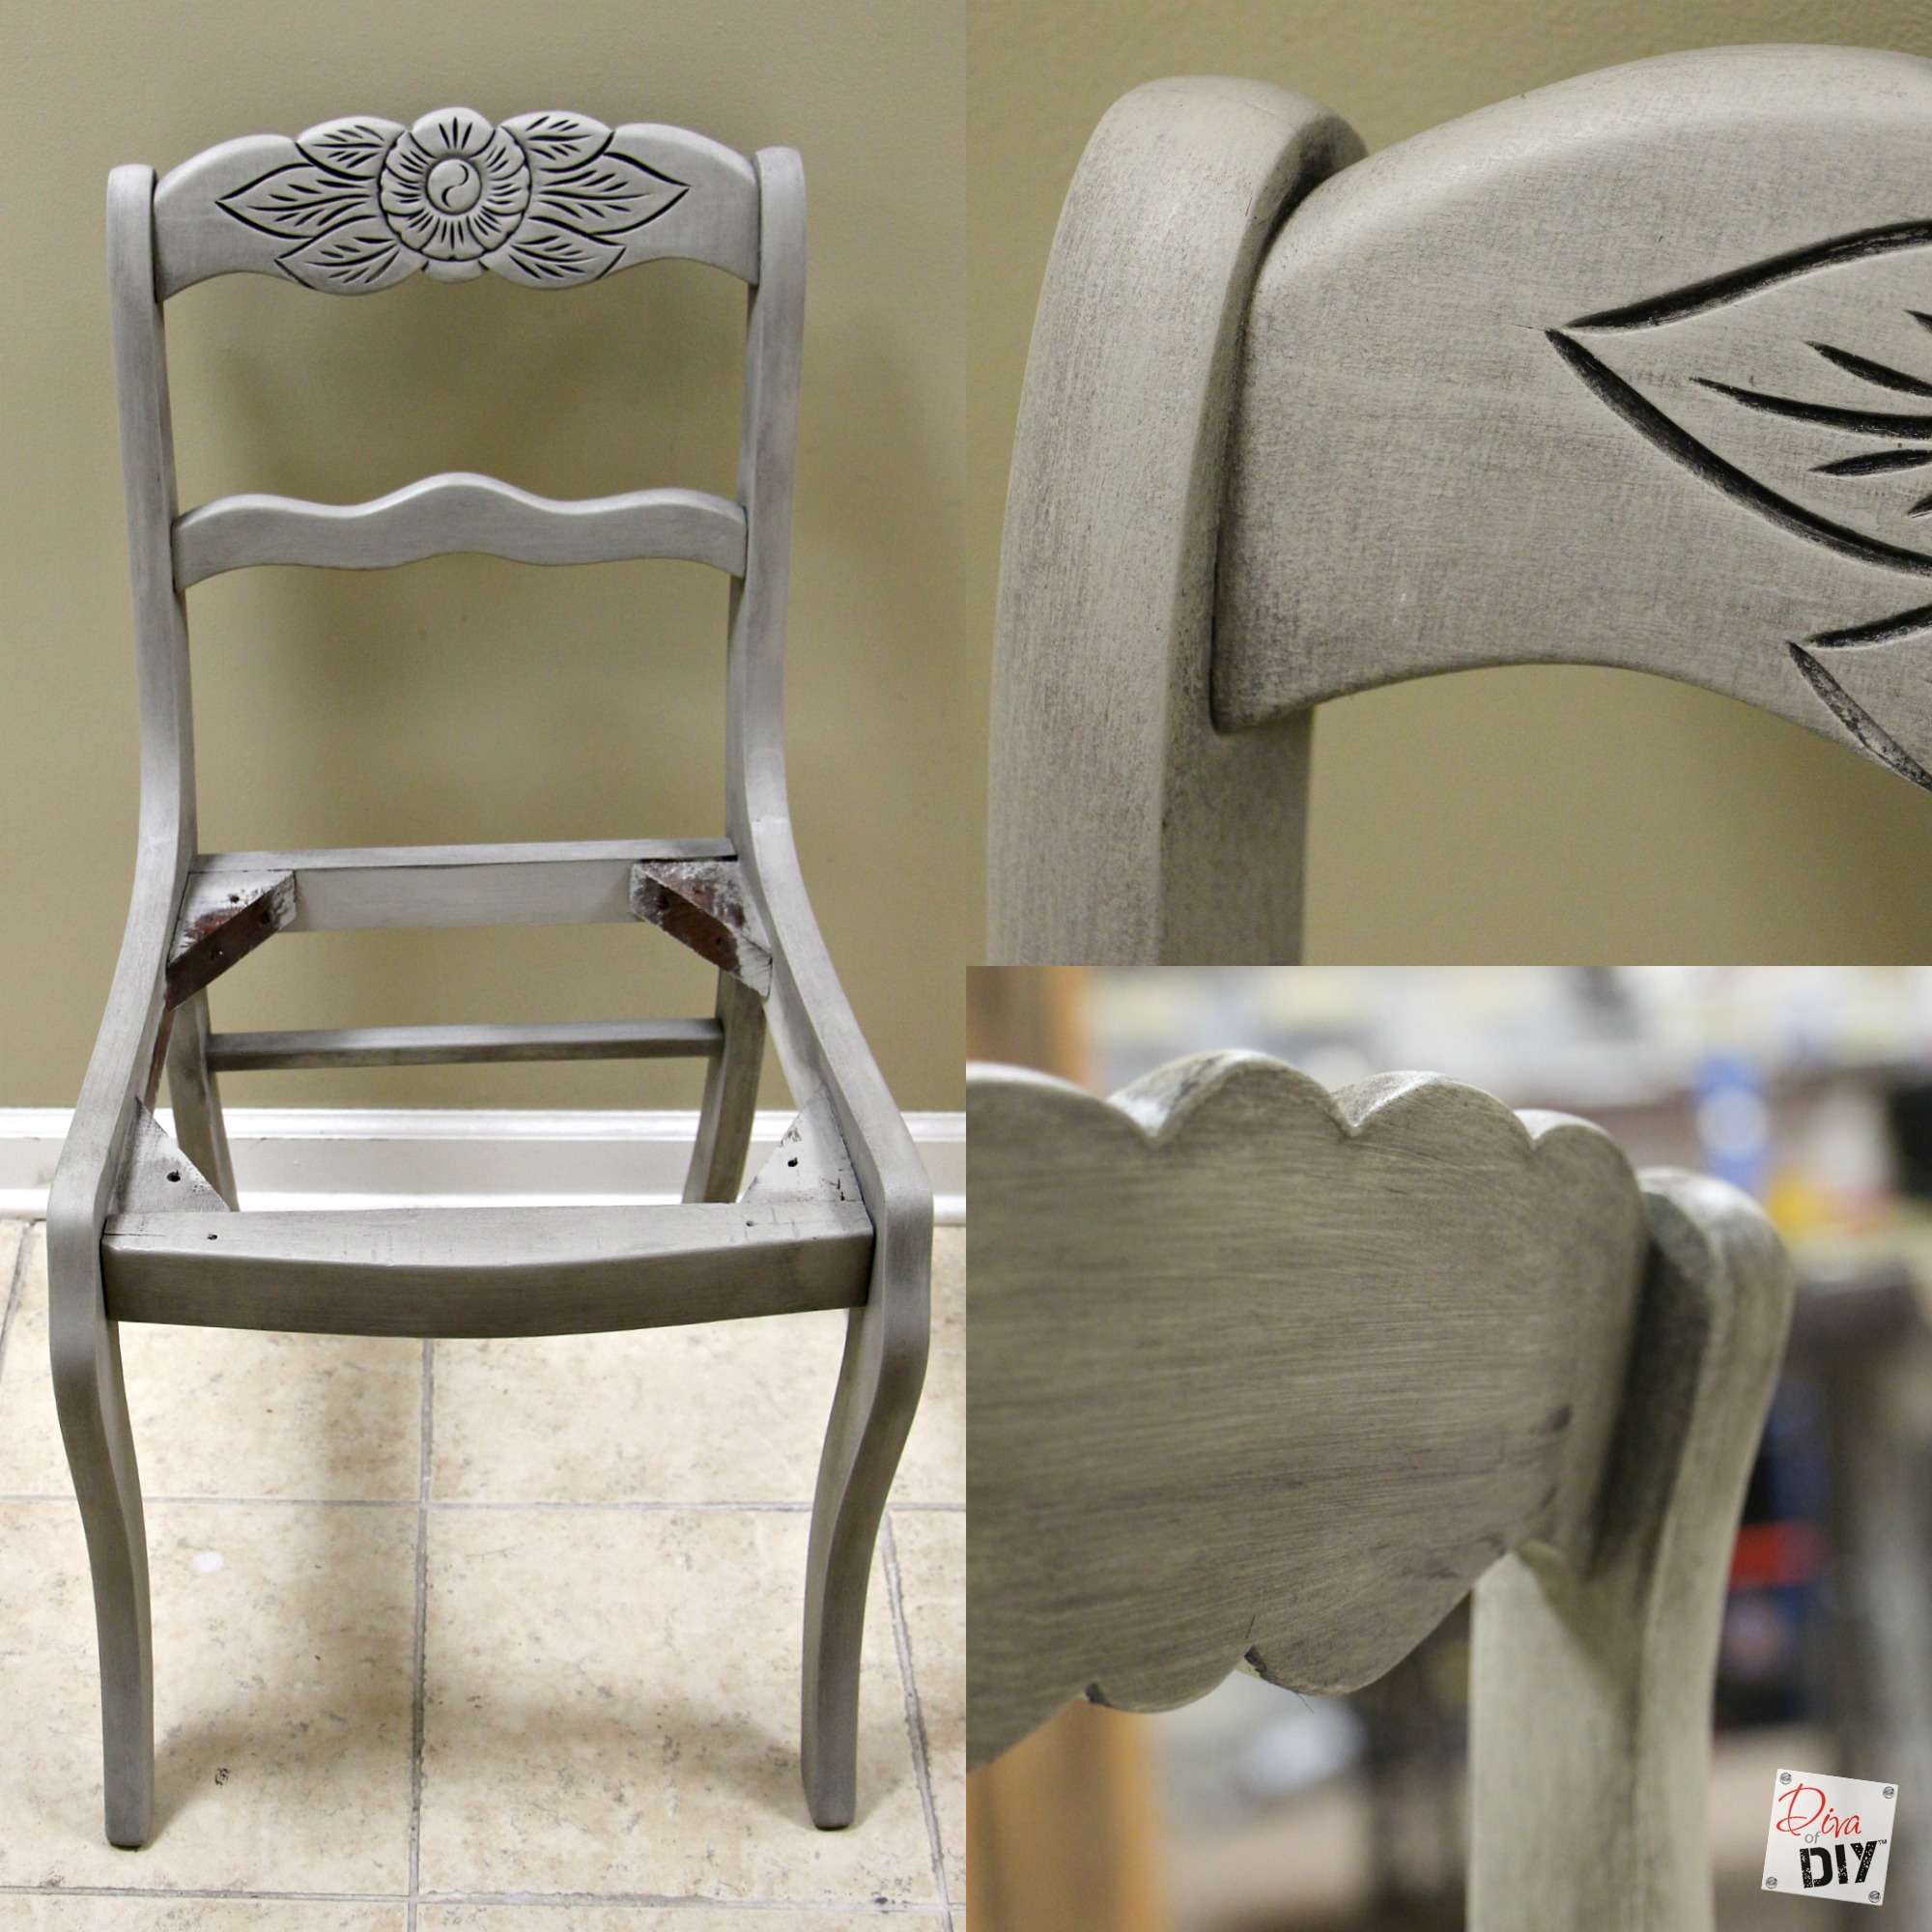
This is what we started with. Both chairs were basically in the same shape. There were a few cracks in the wood, mostly where pieces of wood had been fused together. The embroidered seats were worn and dirty but still sturdy.
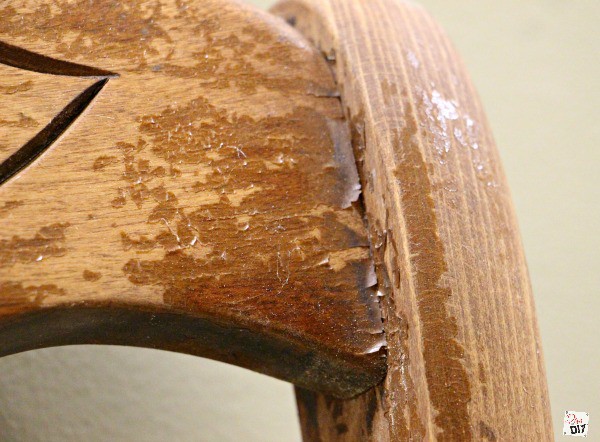
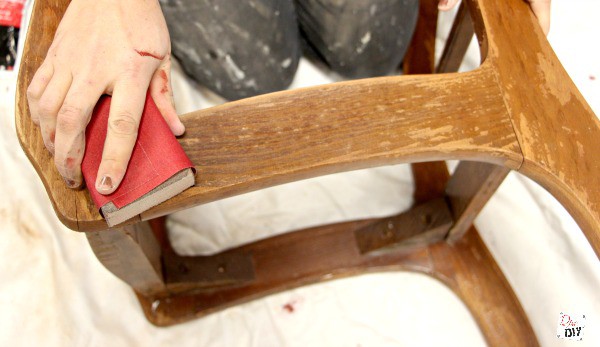
I always do basic prep work to any project I refinish. Chalk style paint requires little prep but see the old finish flaking off? I found this on the curb, I have no idea what it’s history is or what type of grime is on this beauty. So I always give each project a quick scuff with 220 grit sanding paper and a good cleaning with Krud Kutter
Instructions for a Chalk Paint Makeover:
Step 1) Remove the seat by unscrewing it from underneath the chair.
Step 2) Prep the chair by scuffing up the surface and cleaning it with a mild cleaner.
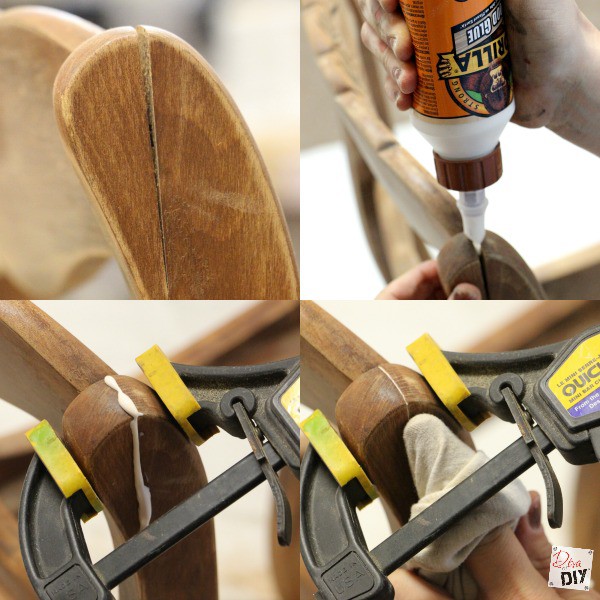
Step 3) Glue any spots where the wood is separating. Put Wood Glue

Step 4) After the wood glue has dried apply Bondo
Step 5) Sand the bondo smooth. This may take more then one application depending on crack.
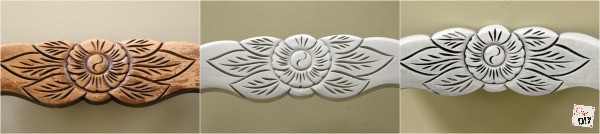
Step 6) Paint chair with color of your choice adding in the Diva of DIY Chalk Mix per instructions on the bag.
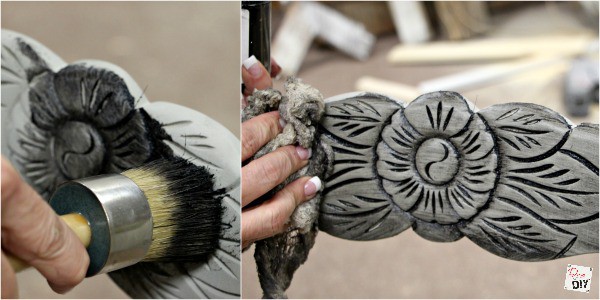
Step 7) Lightly sand first coat with buffing pad
Step 8) Buff with buffing pad to smoothness you desire. Clean off dust.
Step 9) In small sections at a time, rub on wax with wax brush getting into all the grooves. Wipe with cheesecloth or soft rag. Repeat until the entire project is done. Let dry.
Step 10) After wax is dry you can leave it matte as is or buff with a soft rag to bring out shine.
The base of the chair is finished. Now it’s time to work on the seat we removed earlier.
Upholstery Instructions:
Step 1) Remove the old material if possible. This is optional, I left mine on.
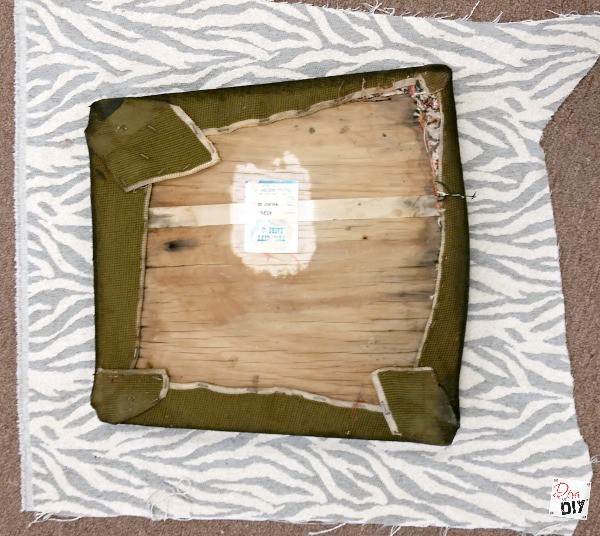
Step 2) Lay new material flat and lay the seat face down on top of the back of the material.
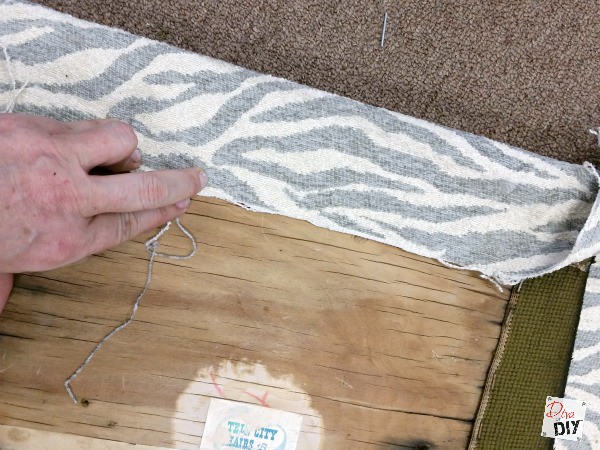
Step 3) Pull the material to the back of cushion and staple
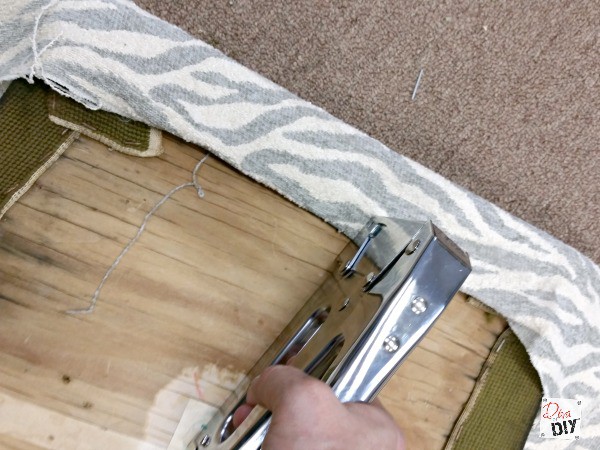
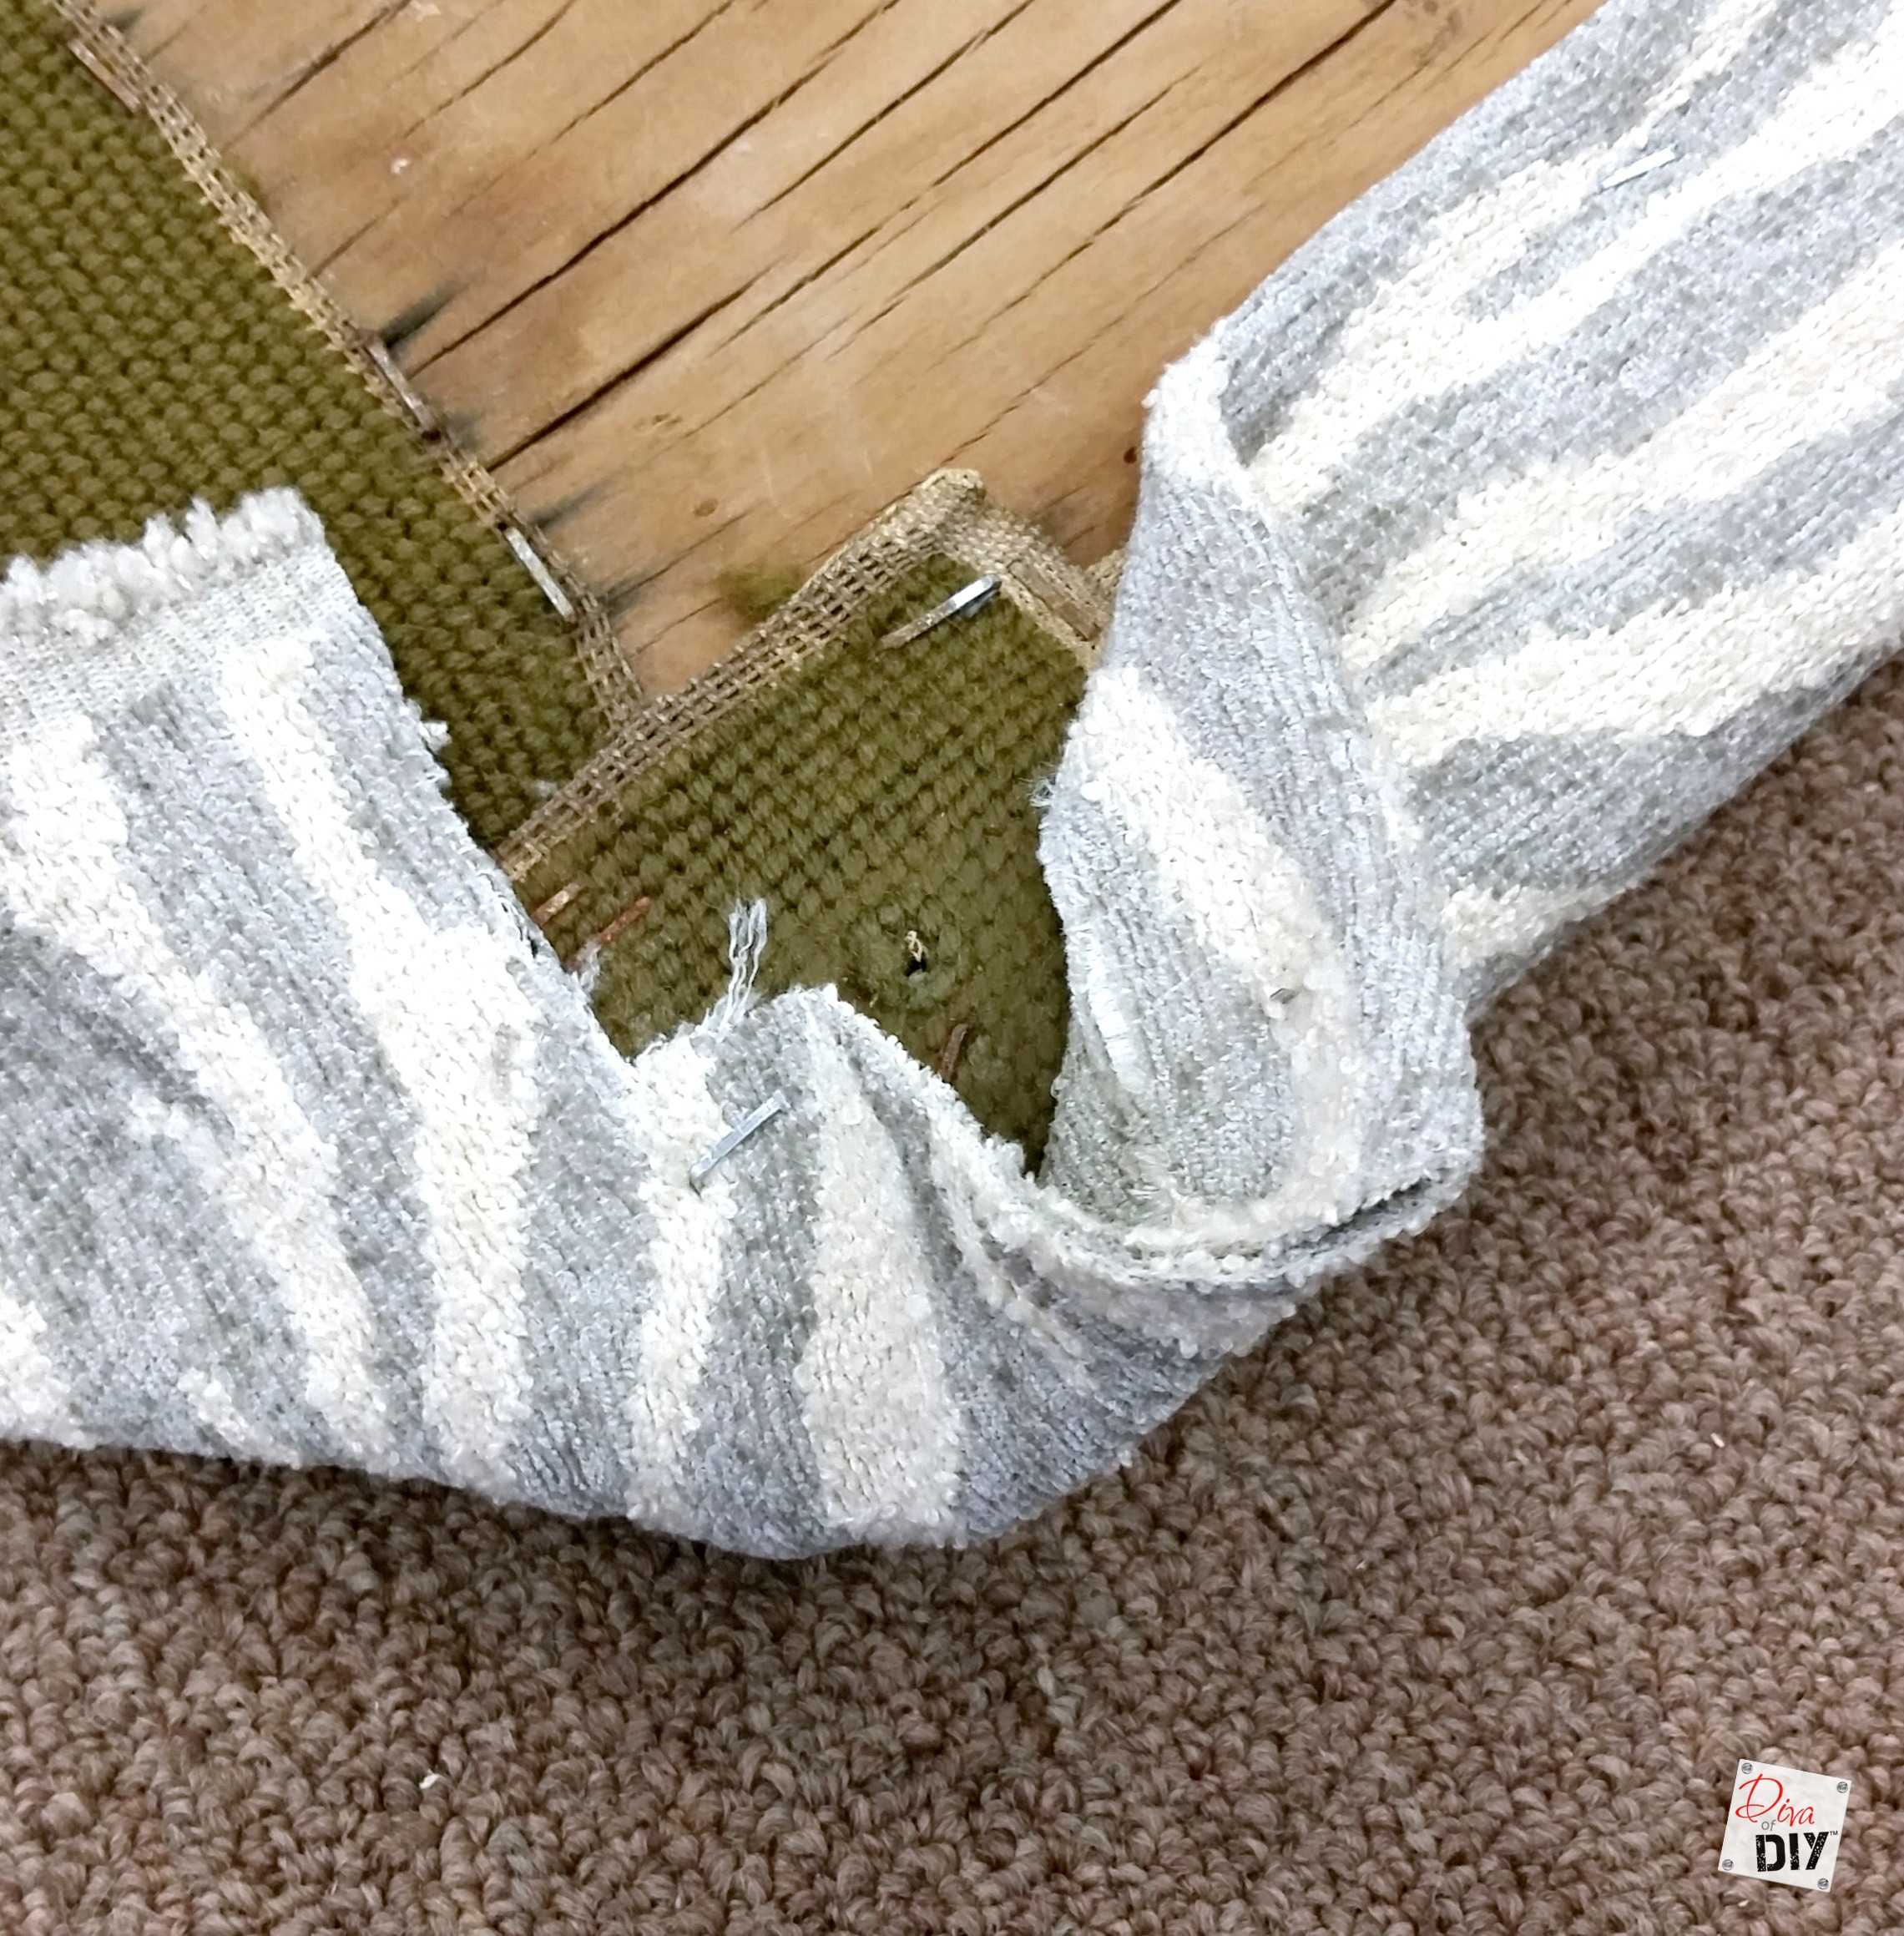
Step 4) Repeat all the way around the seat being sure to pull the material tight. Trim excess material.

Step 5) Replace the seat back on the wooden chair base and attach it from the underneath.
As seen on Food Network’s Restaurant: Impossible
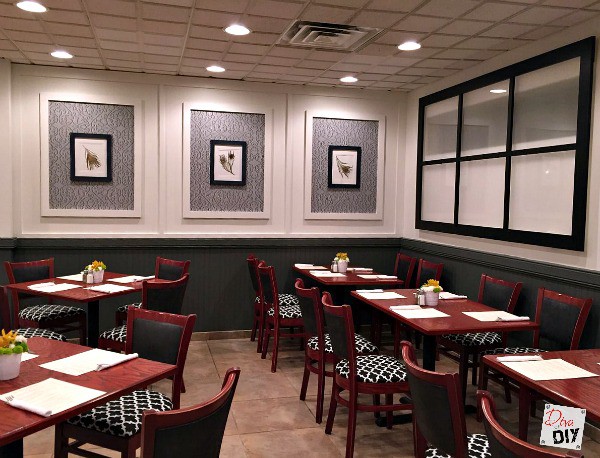
Many of you know I am on the design team for Food Network’s Restaurant: Impossible. One of my tasks for this episode was transforming 74 chairs with outdated upholstery into something Robert Irvine would find appealing…in less than 36 hours!
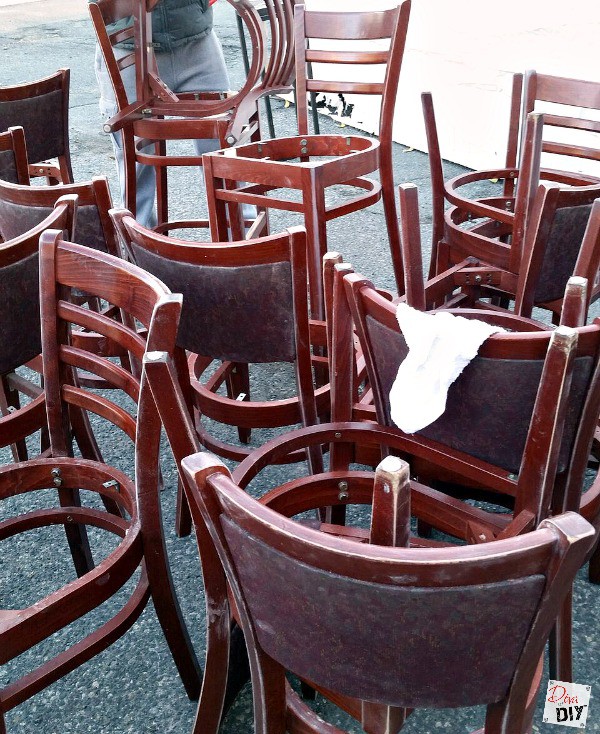
Luckily I had an amazing team of volunteers. We cleaned them all with Krud Kutter, gave the upholstered chair backs a chalk paint makeover with our chalk mix tinted SW Tri-corn Black and reupholstered the seat cushions. The back of the chairs obviously did not come off so we taped off the wood and applied 2 coats of paint mixed for upholstery, buffing between coats.

Don’t they look amazing??? 74 chairs in 36 hours…not bad.
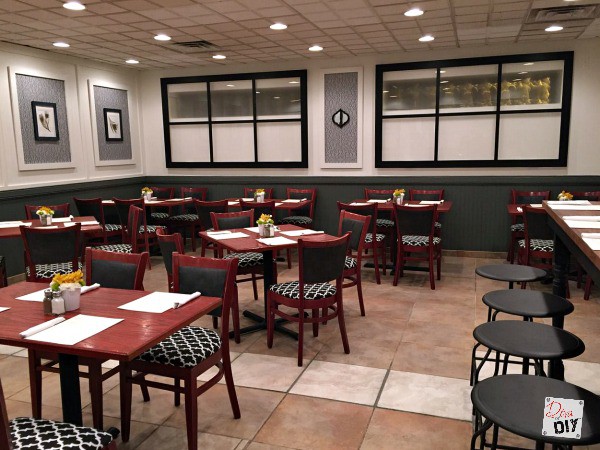
Just look how great they look in the newly-decorated restaurant. I am loving being a part of such an awesome and creative design team! I can’t wait to share more of the projects we are using on the show. The projects are all simple enough for any DIYer!
Each and everyone of you inspire me and I LOVE to see the work that you’ve created. Feel free to share with me on Instagram, Twitter or Facebook. And as always, be sure to follow Diva Of DIY on Pinterest and sign up for our FREE Newsletter to receive the latest projects delivered straight to your inbox!
If you like this project, check out these: