• Home
    • About
      • Contact
  • Shop
    • Home Decorating Accessories
    • Tiered Tray Kits
    • Holiday Home Decor
    • Holiday Ornaments
  • DIY Shop
    • Unfinished Tiered Tray Kits
    • Unfinished Holiday DIY Decor
  • DIY | Projects
    • For The Home
    • Organization
    • Gift Ideas
    • Holidays
      • Valentine’s Day
      • Spring
      • 4th of July
      • Halloween
      • Thanksgiving/Fall
      • Christmas
    • Weddings
    • For The Outdoors
    • Repurposed/Upcycled
    • For Kids
    • Crafts
    • Chalk Paint
    • My Favorites
      • Gift Guides
      • Shop
      • My Keto Journey
        • Easy Keto Meal Plans
        • Recipes
  • Home Inspiration
    • Home Renovations
      • Lake House
      • Before & Afters
    • Kitchens
    • Bathrooms
    • Painting
    • Exterior
    • Design & Decor
    • Lighting
    • Accessories
    • Tips & Tutorials
    • Rekindled Spaces
      • Rekindled Spaces | Schedule a Consultation
      • Rekindled Spaces | Cabinet & Furniture Refinishing
      • Rekindled Spaces | Contact Us
      • Rekindled Spaces | Before & After Photos
    • Email
    • Facebook
    • Instagram
    • Pinterest
    • Twitter
    • YouTube

Diva of DIY

Easter Decorations: How to Make Bunny Art

Tweet
Share39
Pin113K
113K Shares

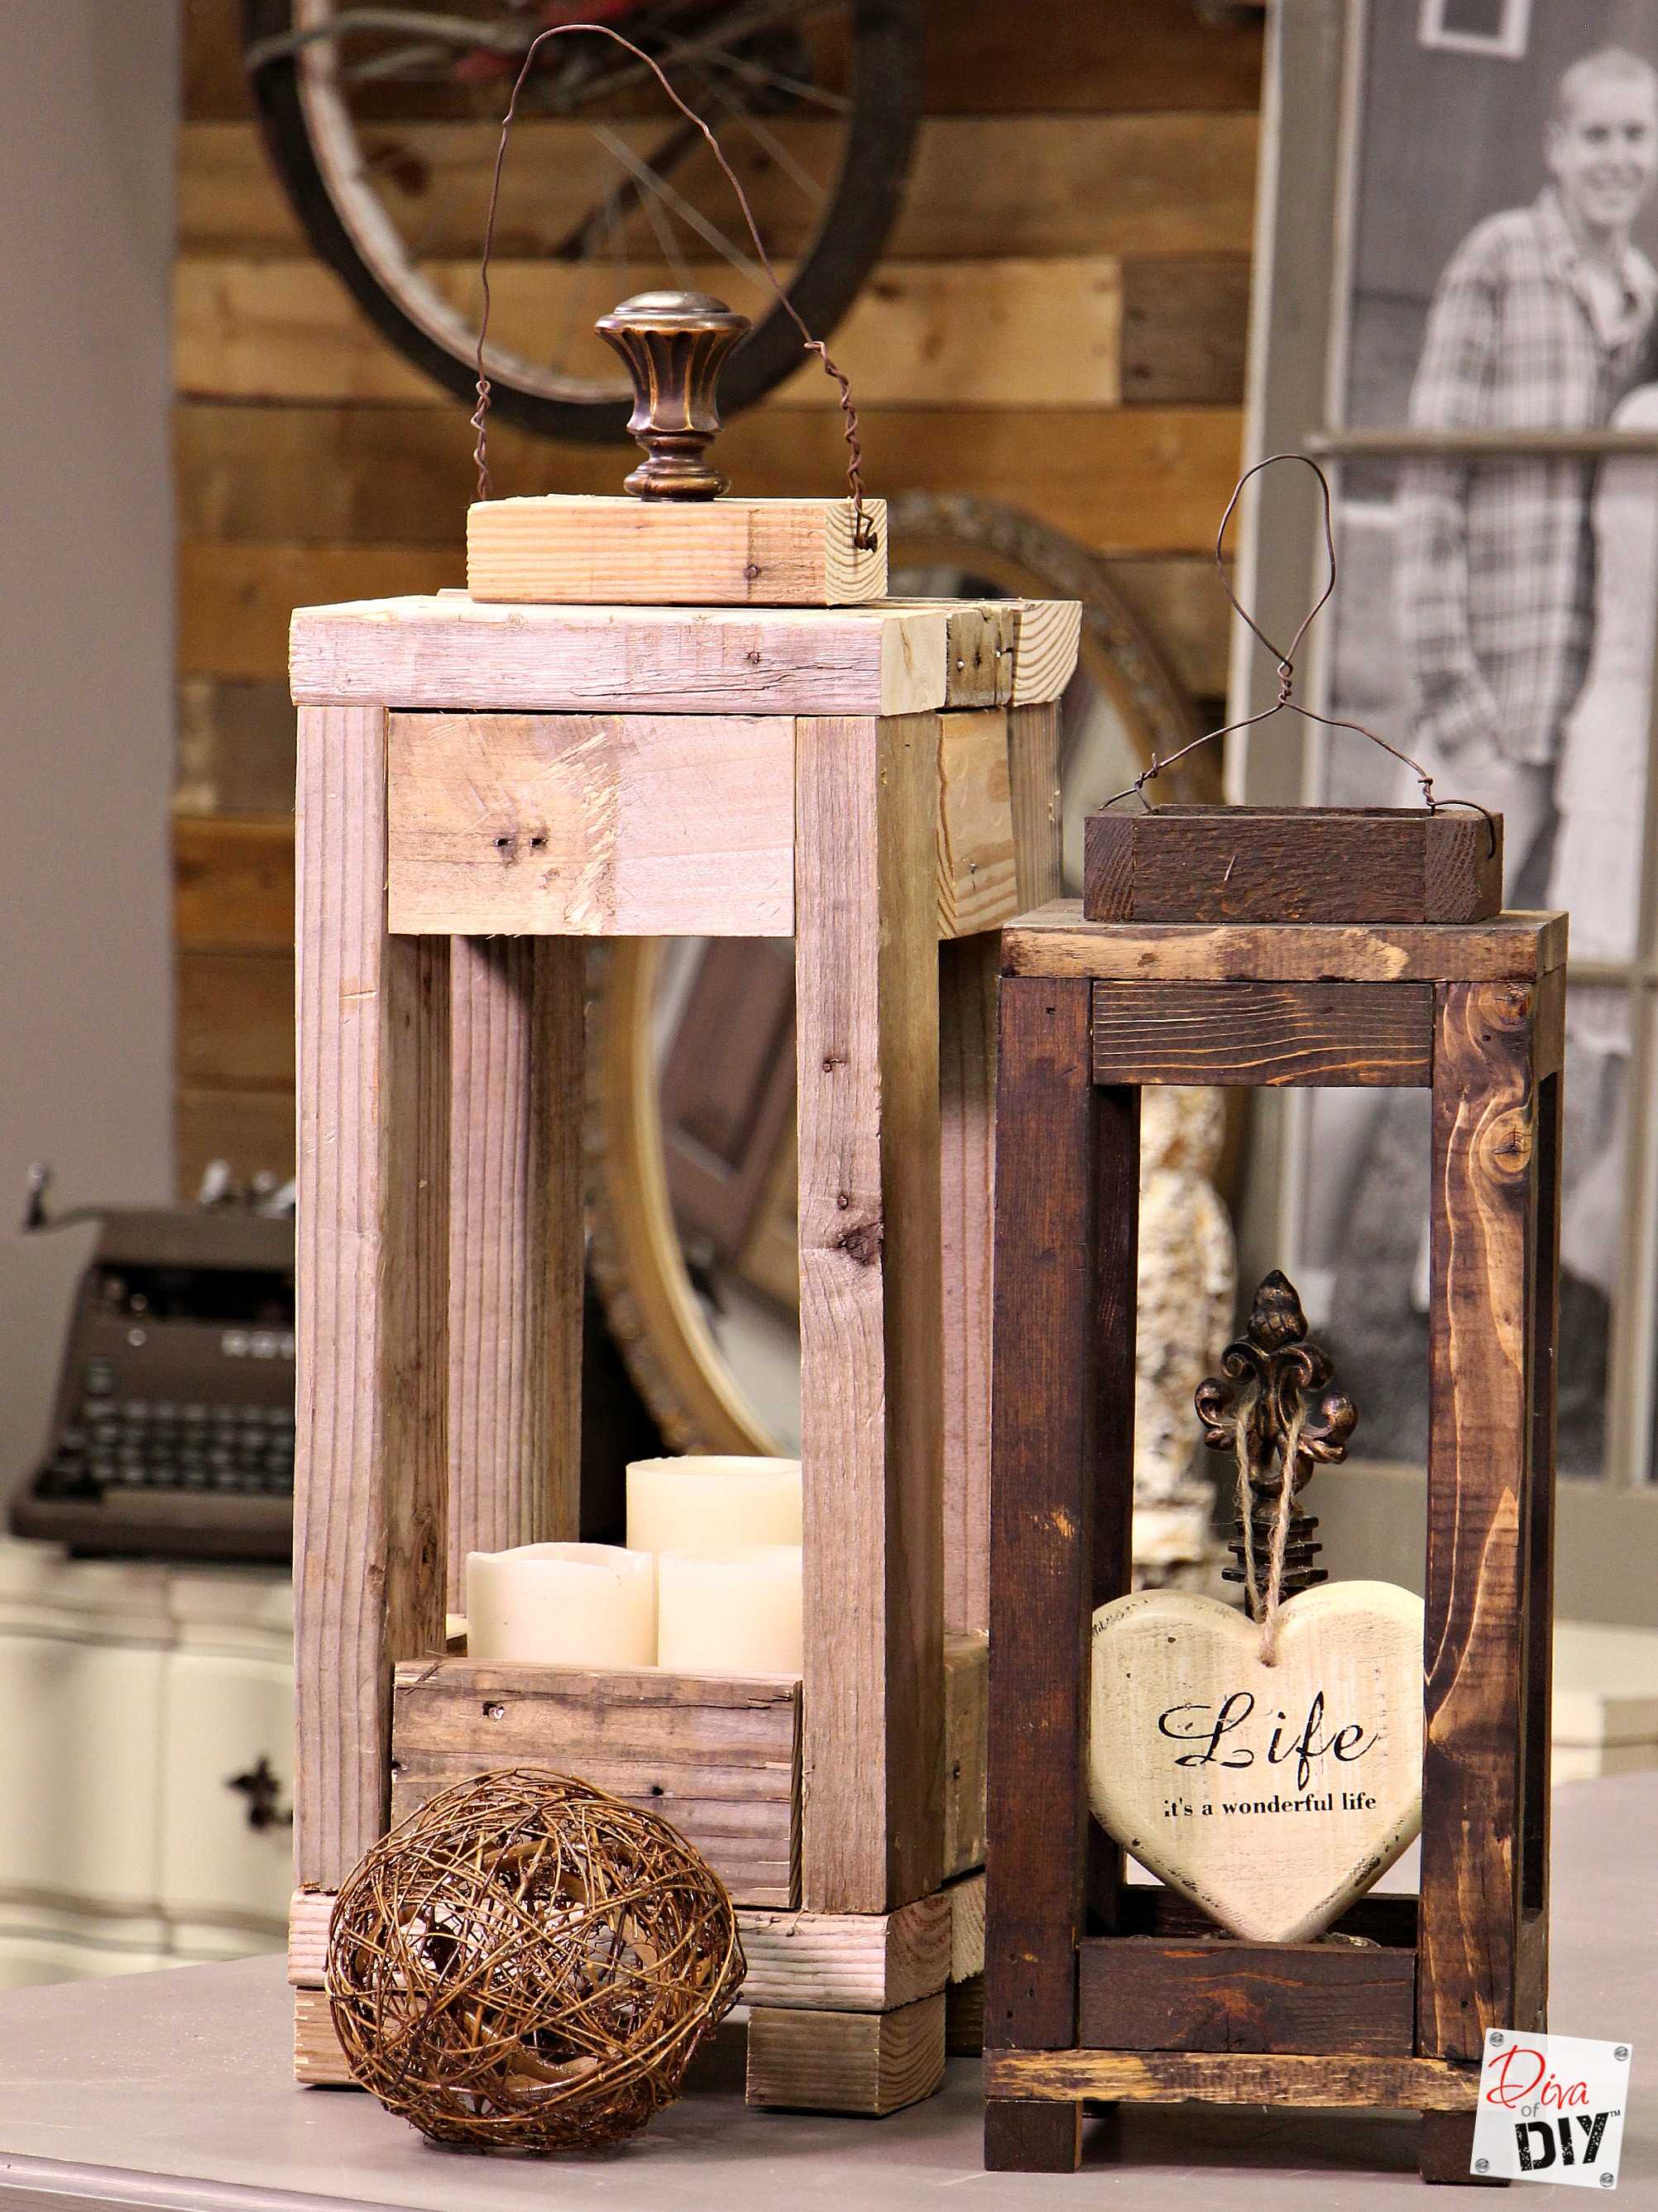
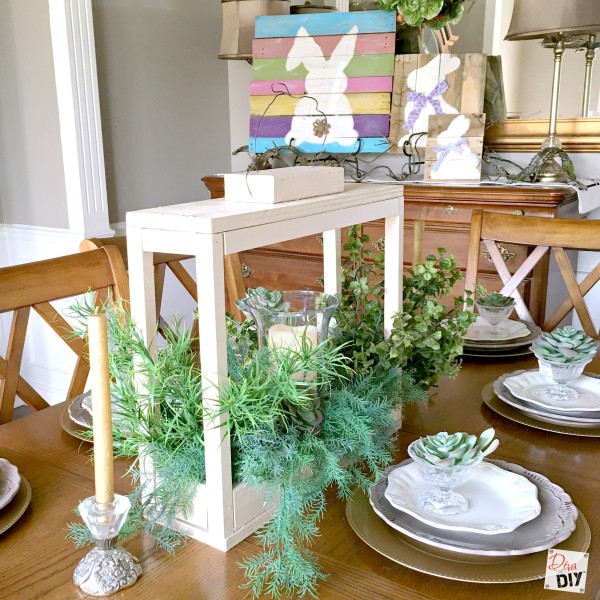
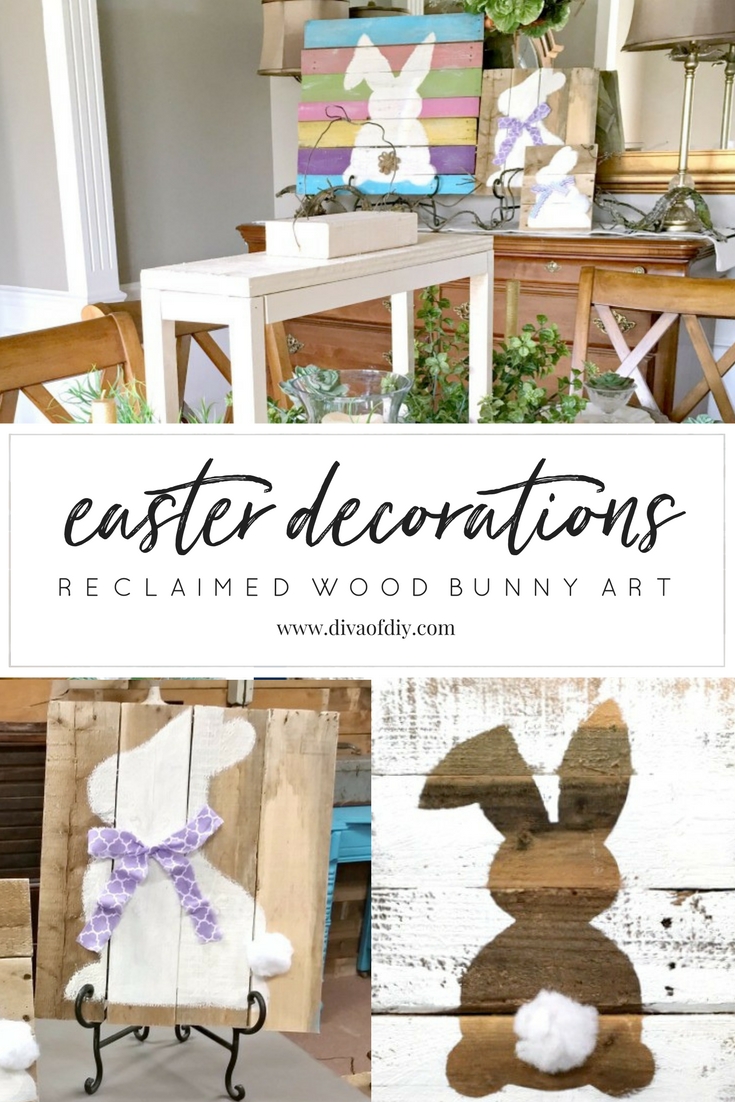
I wanted to make some quick rustic Easter decorations so you know me, I went to my pallet pile! I have a bucket at my shop that always has pallet boards cut and ready to grab anytime I need to make a pallet sign. I was planning on doing one sign and was having so much fun I ended up making these signs in 3 different ways. Look how well they go together with my scrap wood lanterns!

Rustic reclaimed wood signs are all the rage! Using pallet wood makes these signs a cheap and easy DIY to add to your Easter Decorations. Easter Bunny Sign!

This post contains affiliate links.  Please see my full disclosure here.

Supplies for Easter Decorations:

Rustic reclaimed wood signs are all the rage! Using pallet wood makes these signs a cheap and easy DIY to add to your Easter Decorations. Easter Bunny Sign!

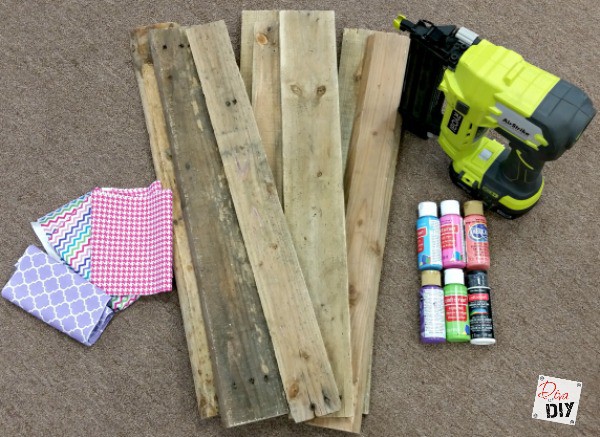
  • Pallet boards cut to size – this is a personal preference
  • Acrylic paint in assorted colors
  • Air Nailer or nails and hammer
  • Fabric Scraps
  • Chalk

Optional supplies:

  • E6000
  • Poly-fil
  • Embellishments

Rustic reclaimed wood signs are all the rage! Using pallet wood makes these signs a cheap and easy DIY to add to your Easter Decorations. Easter Bunny Sign!

Instructions for Easter Decorations:

Basic Sign Instructions:

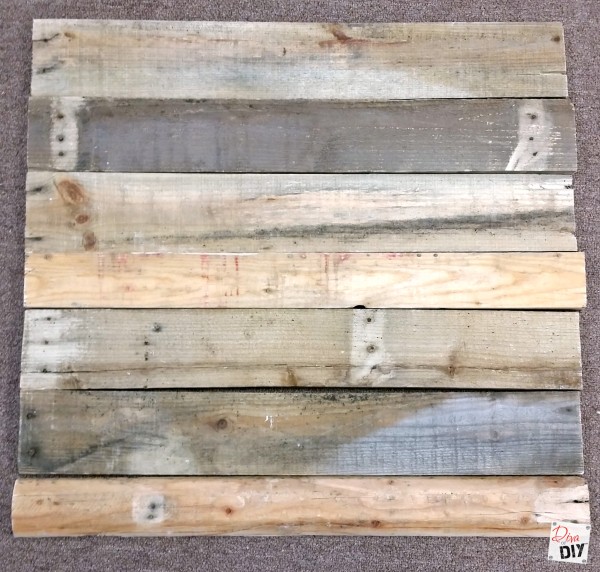
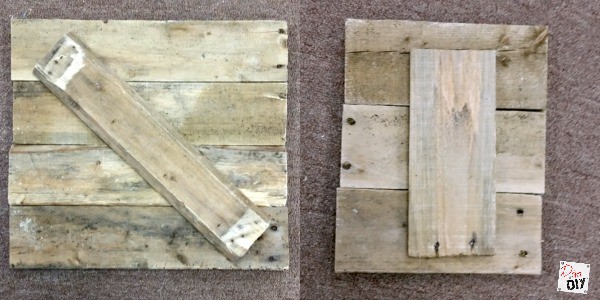
Step 1) Cut your pallet boards to the length you want your sign to be.

Step 2) Lay boards together with the right side face down and measure from the top of the sign to the bottom.


Rustic reclaimed wood signs are all the rage! Using pallet wood makes these signs a cheap and easy DIY to add to your Easter Decorations. Easter Bunny Sign!

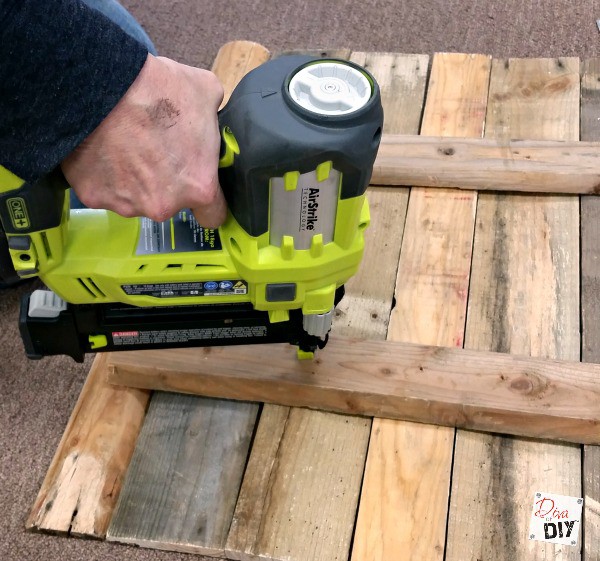
Step 3) Cut 2 boards to the measurement and lay them on the back side of the boards.

Step 4) Using your nail gun, attach boards making sure to attach each pallet board to the back boards.

Now that your sign is built, you need to decide which style you want to do first. (because I know you’ll want to do them all before you are done!)
Rustic reclaimed wood signs are all the rage! Using pallet wood makes these signs a cheap and easy DIY to add to your Easter Decorations. Easter Bunny Sign!

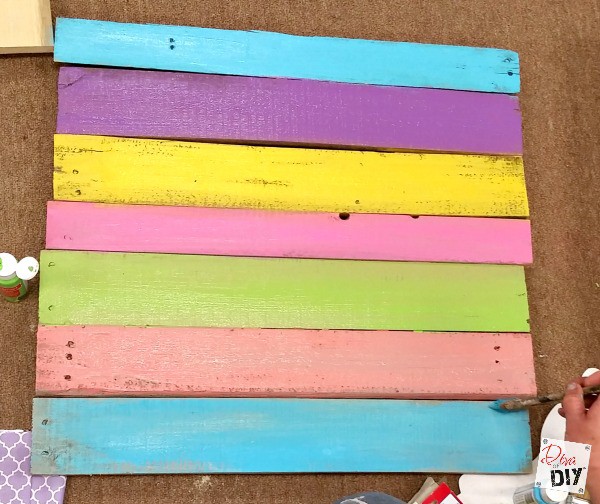
Easter Decorations sign 1:

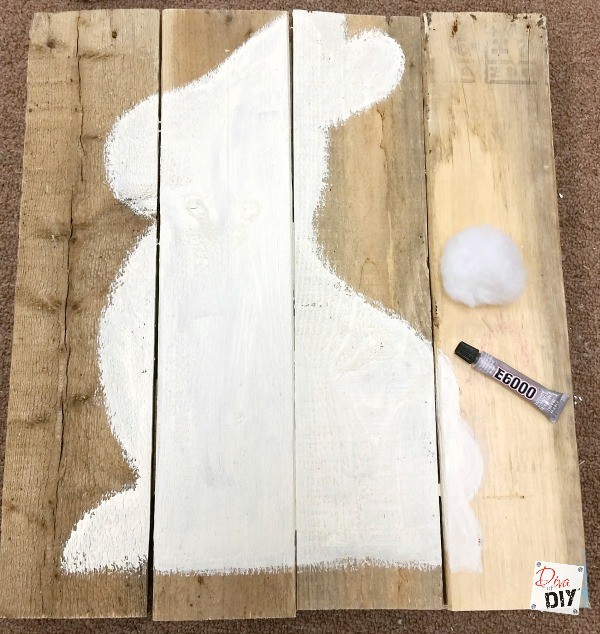
Step 1) Paint each board a different color. Let dry.

Rustic reclaimed wood signs are all the rage! Using pallet wood makes these signs a cheap and easy DIY to add to your Easter Decorations. Easter Bunny Sign!

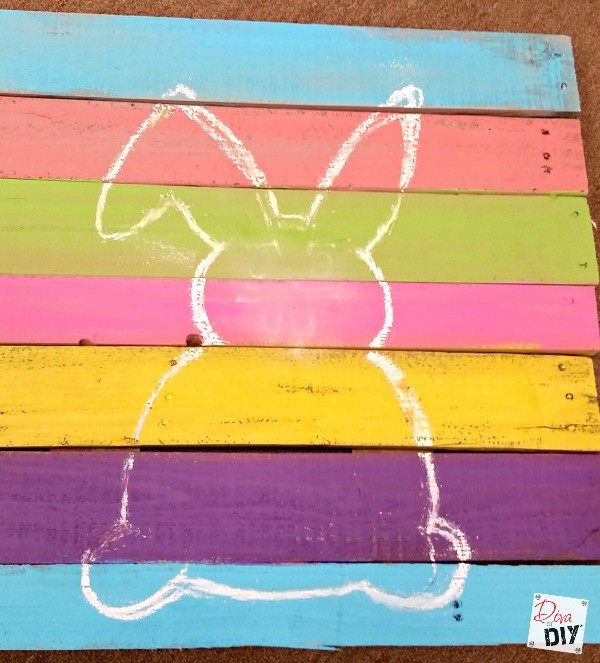
Step 2) Use a pattern or free hand your bunny with white chalk.

Rustic reclaimed wood signs are all the rage! Using pallet wood makes these signs a cheap and easy DIY to add to your Easter Decorations. Easter Bunny Sign!

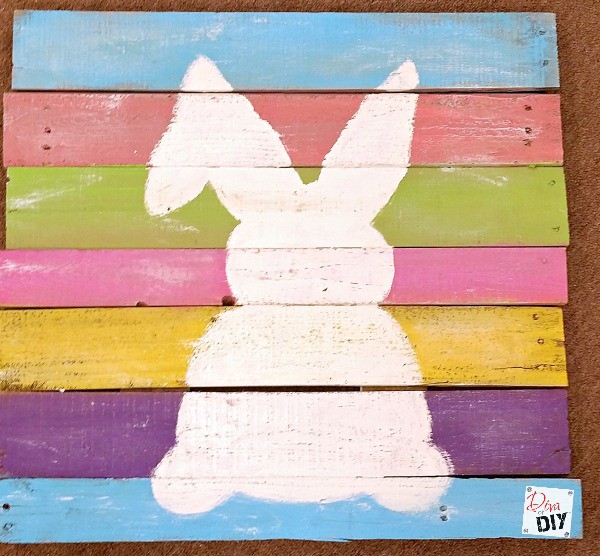
Step 3) Fill Bunny in with white acrylic paint. Let dry.

Rustic reclaimed wood signs are all the rage! Using pallet wood makes these signs a cheap and easy DIY to add to your Easter Decorations. Easter Bunny Sign!

Step 4) Glue on bunny tail embellishment with e6000. – I had this burlap embellishment in my stash.  I simply removed the clip and glued it on.

Rustic reclaimed wood signs are all the rage! Using pallet wood makes these signs a cheap and easy DIY to add to your Easter Decorations. Easter Bunny Sign!

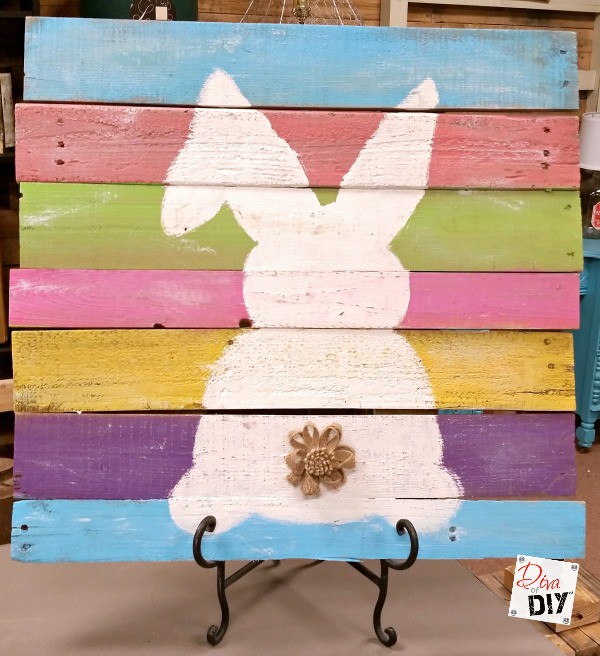
Don’t you just love this little guy! (or girl…you choose lol)

Rustic reclaimed wood signs are all the rage! Using pallet wood makes these signs a cheap and easy DIY to add to your Easter Decorations. Easter Bunny Sign!

I decided to make mine different sizes. Here is what the back look like of the small ones.

Rustic reclaimed wood signs are all the rage! Using pallet wood makes these signs a cheap and easy DIY to add to your Easter Decorations. Easter Bunny Sign!

Easter Decorations Sign 2:

Step 1) Using your pattern or free hand your bunny with white chalk. 

Step 2) Fill in the bunny with white acrylic paint,

Step 3) Glue on a bunny tail with e6000. – I used a ball of poly-fil for mine. *Diva tip: I save my old poly-fil pillows to use for craft projects. If I don’t have one to recycle you can usually buy a cheap pillow for less then a bag of poly-fil.

Rustic reclaimed wood signs are all the rage! Using pallet wood makes these signs a cheap and easy DIY to add to your Easter Decorations. Easter Bunny Sign!

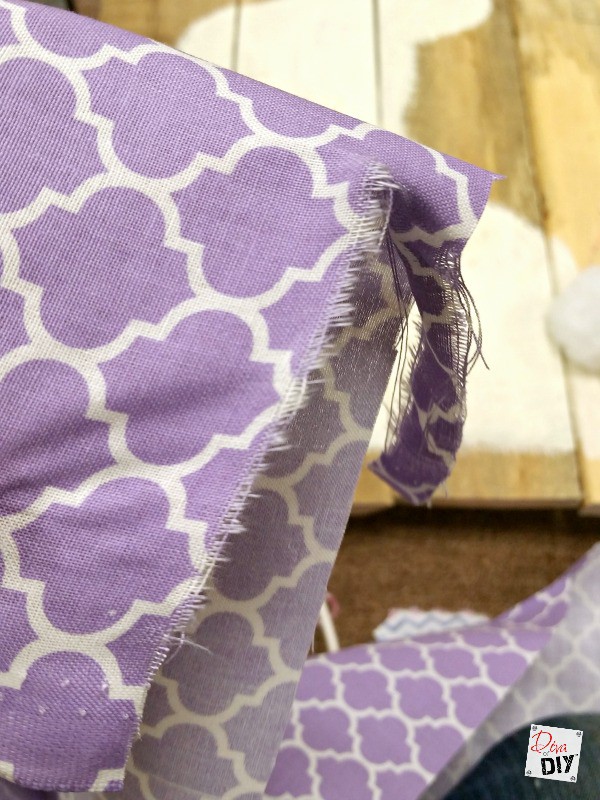
Step 4) Make a bunny bow by tearing a strip of scrap fabric. Attach to bunny.

Rustic reclaimed wood signs are all the rage! Using pallet wood makes these signs a cheap and easy DIY to add to your Easter Decorations. Easter Bunny Sign!

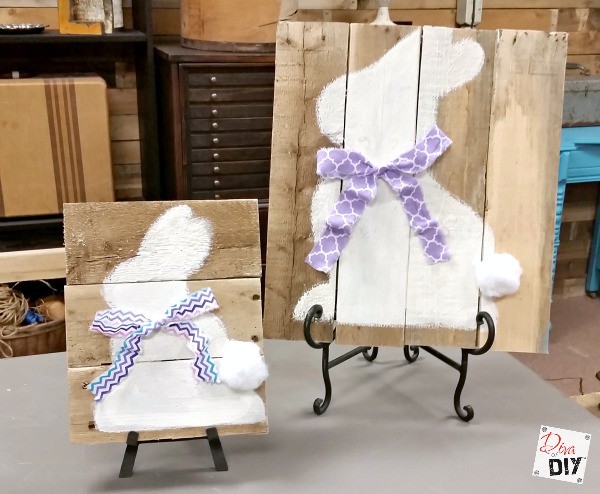
I like having the different sizes don’t you?

Rustic reclaimed wood signs are all the rage! Using pallet wood makes these signs a cheap and easy DIY to add to your Easter Decorations. Easter Bunny Sign!

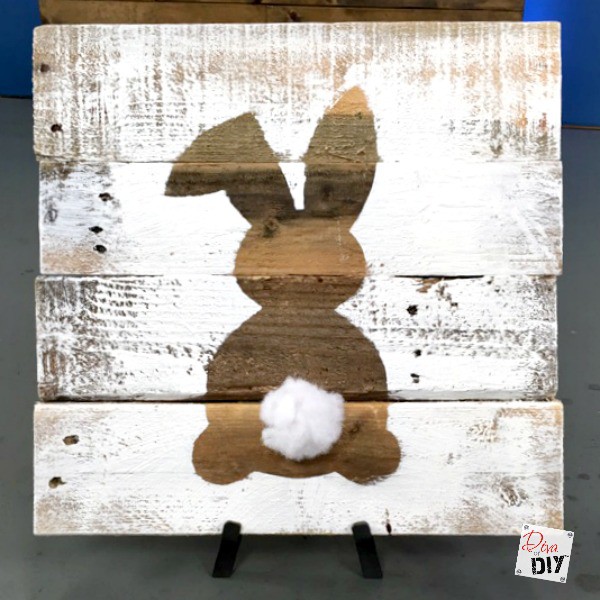
Easter Decorations Sign 3:

Step 1) Spray your bunny pattern with repositionable glue and stick down to the wood.

Step 2) Using the pattern as a stencil, paint around the bunny pattern starting from the middle of the pattern and painting outward.

Step 3) Remove bunny pattern and paint more of the sign if you desire.

Step 4) Attach poly-fil tail with e6000.

So which one is your favorite? I seriously love them all and I hope you enjoy making them as much as I did.

Each and everyone of you inspire me and I LOVE to see the work that you’ve created. Feel free to share with me on Instagram, Twitter or Facebook. And as always, be sure to follow Diva Of DIY on Pinterest and sign up for our FREE Newsletter to receive the latest projects delivered straight to your inbox!

If you enjoy this project, check out these:

Easy Outdoor Decor: How to Make Lanterns from Scrap Wood

How to Make Lanterns from Scrap Wood

How to Make an Easter Bunny Craft in a Flower Pot

Flower Pot Easter Bunny Craft

How to Make a Pallet Coffee Table

How to Make a Pallet Coffee Table


Tweet
Share39
Pin113K
113K Shares

Blog// DIY | Projects// Holidays// New on the blog// Spring8 Comments

Become an insider and never miss a post!

« An Easy & Affordable Way to a Chalk Paint Makeover
Lake House Fixer Upper: It’s Time To Cut Our Losses »

Comments

  1. Kathleen says

    03/20/2016 at 9:31 pm

    Holy Smoke! These is so stinkin' cute! I love them.
    Reply
    • divaofdiy says

      03/21/2016 at 10:33 am

      Thank you Kathleen! Which one is your favorite?
      Reply
  2. colleen l says

    03/06/2017 at 8:10 pm

    where can I find the bunny stencil?
    Reply
    • divaofdiy says

      03/07/2017 at 11:02 am

      I just printed a clip art bunny from the internet!
      Reply
  3. Sam @ Raggedy Bits says

    03/18/2017 at 1:04 am

    These are so cute! I love them all! Love the rustic feel to them from using the pallets! Thank you so much for sharing your adorable bunny's with us over at Waste Not Wednesday!
    Reply
    • divaofdiy says

      03/18/2017 at 7:49 am

      Thanks Sam! You're so sweet!
      Reply

Trackbacks

  1. 15 Stunning Easter Decorations | On Honeysuckle Hill says:
    03/13/2017 at 9:53 am
    […] at Diva of DIY shared how to make a captivating rustic Bunny […]
    Reply
  2. 21 Simple Farmhouse Cottage Easter Spring Decor Ideas says:
    03/21/2017 at 7:05 am
    […] Rustic Easter bunny pallet wood sign at Diva of DIY. […]
    Reply

Leave a Reply Cancel reply

Your email address will not be published. Required fields are marked *

Looking For Something?

Shop Amazon!

Do you struggle with choosing paint colors for your home?

Trying to select them off of small paint strip can be a daunting task.  DOWNLOAD THIS FREE E-BOOK full of professional tips for choosing the perfect paint colors…
THE FIRST TIME!

You have Successfully Subscribed!

Subscribe

Please don't make the same mistakes most DIYer's make

Are you considering painting your cabinets?  Download our free cabinet painting checklist to make sure you are painting your cabinets the right way!

You have Successfully Subscribed!

  • Email
  • Facebook
  • Instagram
  • Pinterest
  • Twitter
  • YouTube
Privacy

Tags

bathroom makeover ideas Chalk Paint Christmas christmas decor christmas ornament Craft Projects design tips easy keto recipes Fall decorating fixer upper furniture Furniture Rehabs Gift Ideas Halloween handmade holiday holiday decor Home Decor home renovations keto keto diet kids crafts kitchen makeovers lake house fixer upper Mother's Day Organization Outdoor painting paint party Pallet Projects pallet projects Pumpkins repurposed Repurposed & Upcycled Repurposed Projects Restaurant: Impossible Shopping Guides Thanksgiving upcycled Upcycled Projects Valentine's Day wood decor wood projects wood signs wreaths

Copyright © 2021 · Savory theme by Restored 316

Copyright © 2021 · Savory Theme on Genesis Framework · WordPress · Log in