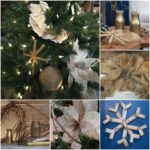
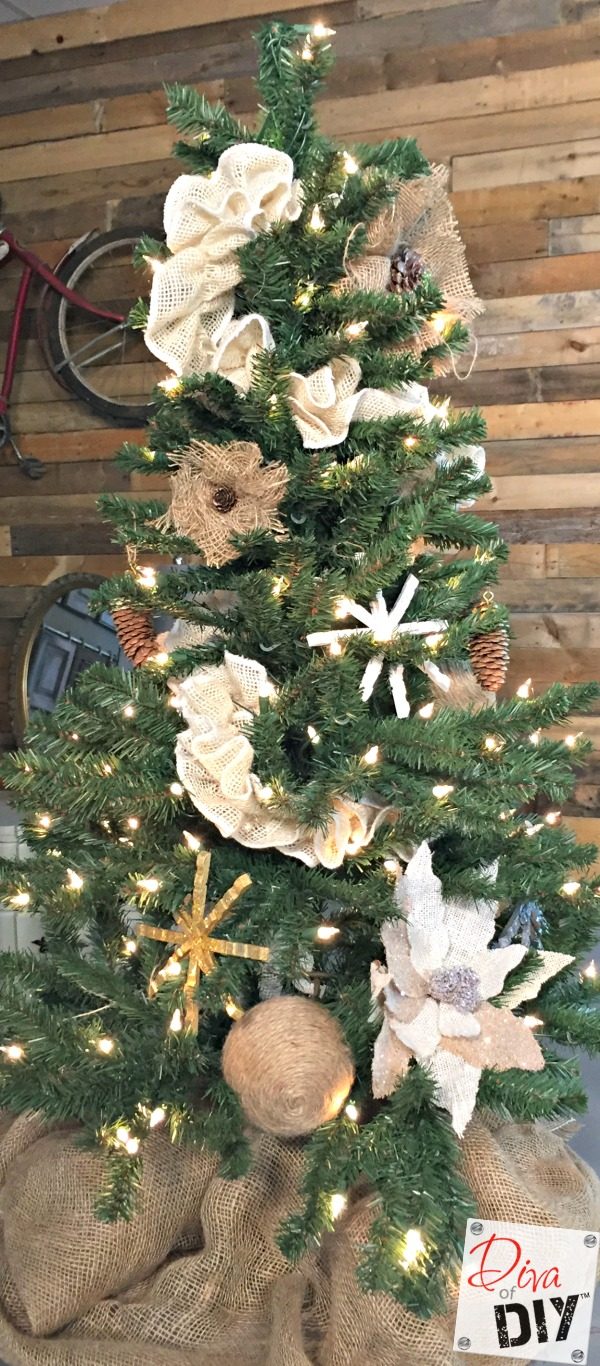
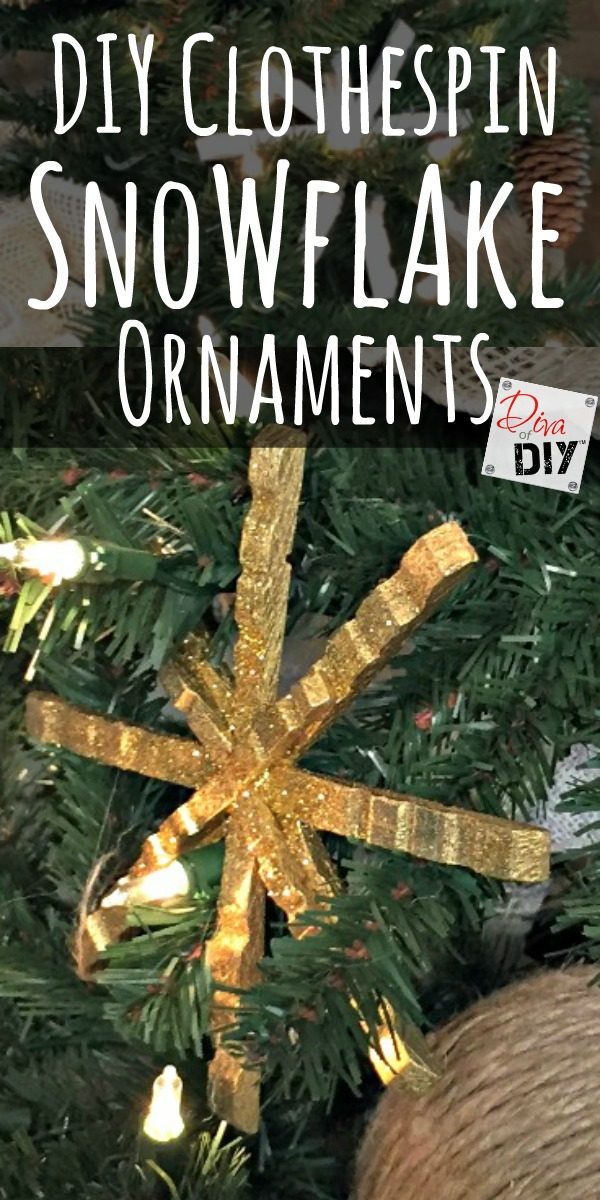
When my boys were growing up we enjoyed doing crafts for the holidays. I always liked to try and come up with ideas that they could be proud of making while at the same time genuinely work into my style of decorating. These DIY clothespin snowflake ornaments fit that criteria!
(Don’t miss the updated option below)
When they were too young for the hot glue gun they put them together with glue dots (if you have never used glue dots before you are missing out!) and then I would reinforce them with hot glue. Where there is a will, there is a way! Try and find alternatives for all ages!

This post contains affiliate links. If you buy something from clicking one of my links, I will get a commission from the sale. It will not cost you a penny more and allows me to keep sharing my ideas with you for free. You can see my full disclosure here. Thank you for supporting my blog!
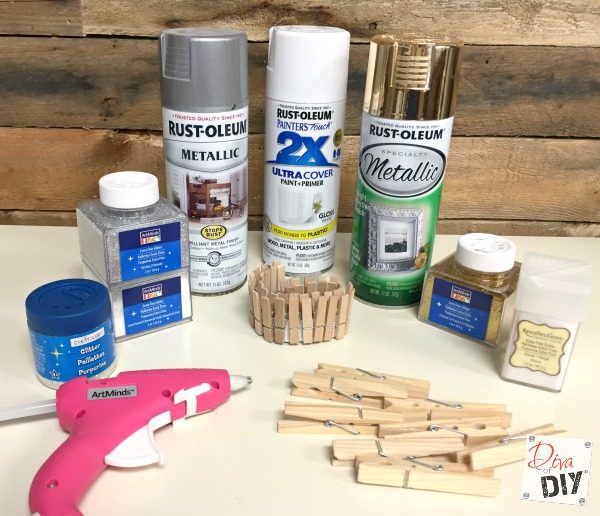
Clothespin Snowflake Ornaments Supplies:
- Clothespins (I used this larger size
and this smaller size
)
- Spray Paint
- Glitter
- Glue Gun
- Jute Twine
- Glue Dots
(optional)


Clothespin Snowflake Ornaments Instructions:

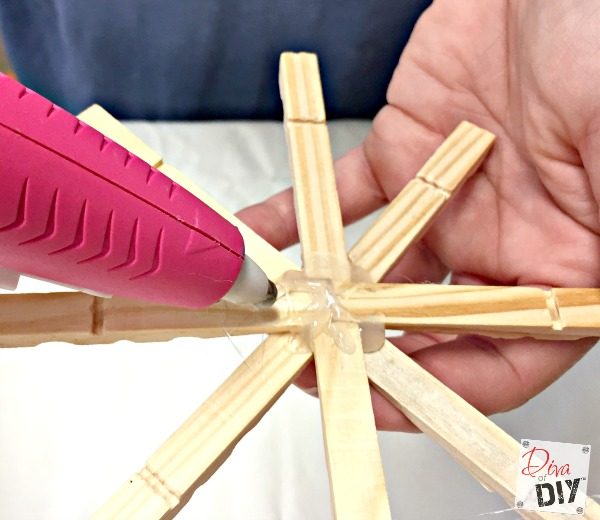
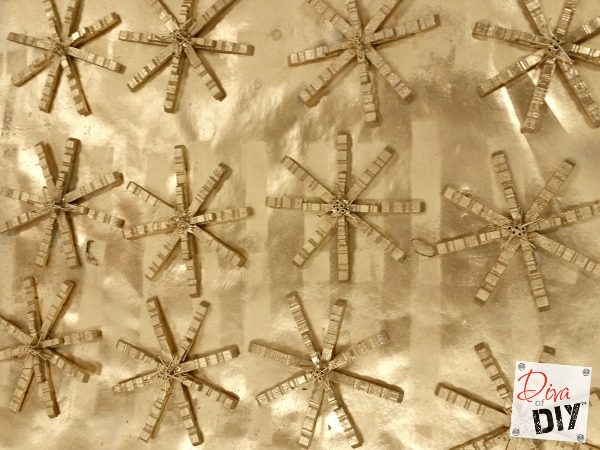
Step 1) Take apart the clothes pins. 4 regular clothes pins and 2 small clothes pins per snowflake.
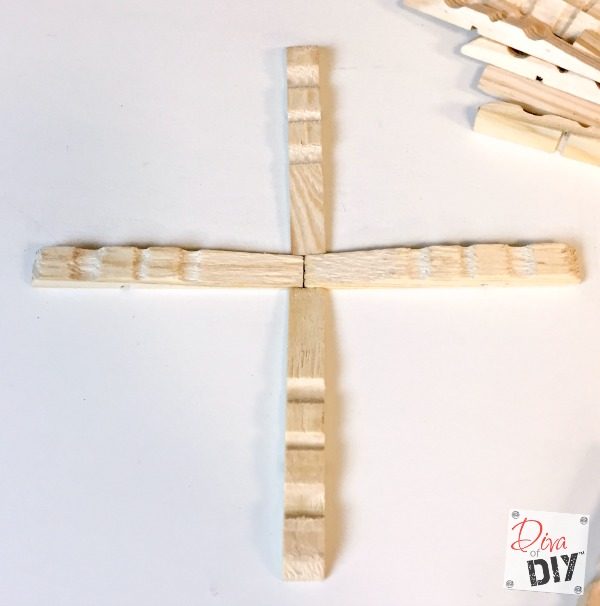
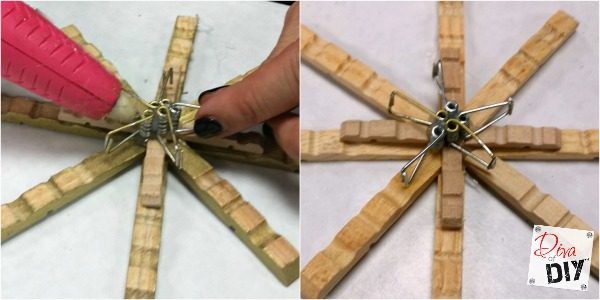
Step 2) Hot glue four pieces together as shown above.
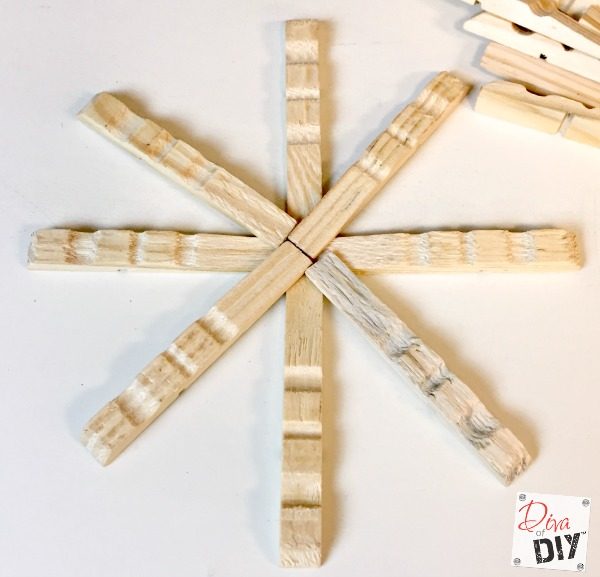
Step 3) Hot glue together the next 4 pieces as shown above.
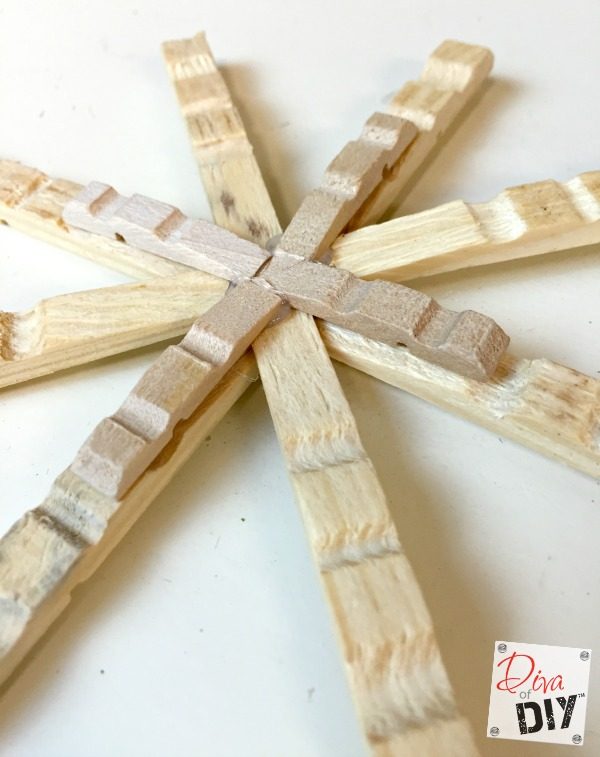
Step 4) Hot glue 4 smaller clothespins pieces as above.
Diva tip: If you are making these with small children have them do steps 1-3 with glue dots
Step 5) Turn snowflake over and add glue to the back to reinforce it.
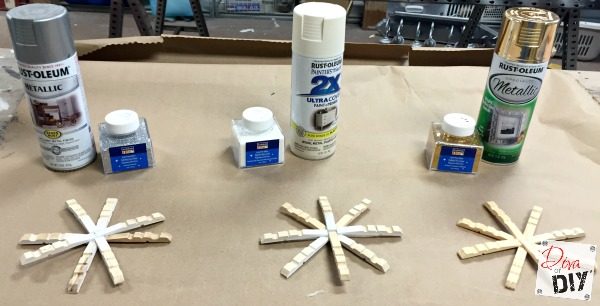
Step 6) Spray paint the front and back of the snowflake ornaments with the color of your choice.
Diva Tip: If you are making these with small children or you do not have a way to spray paint in a well ventilated area, paint the snowflake ornaments with acrylic or child safe paint.
Step 7) While the spray paint is still wet sprinkle snowflake with glitter. (optional)
Step 8) Allow snowflake ornaments to completely dry.
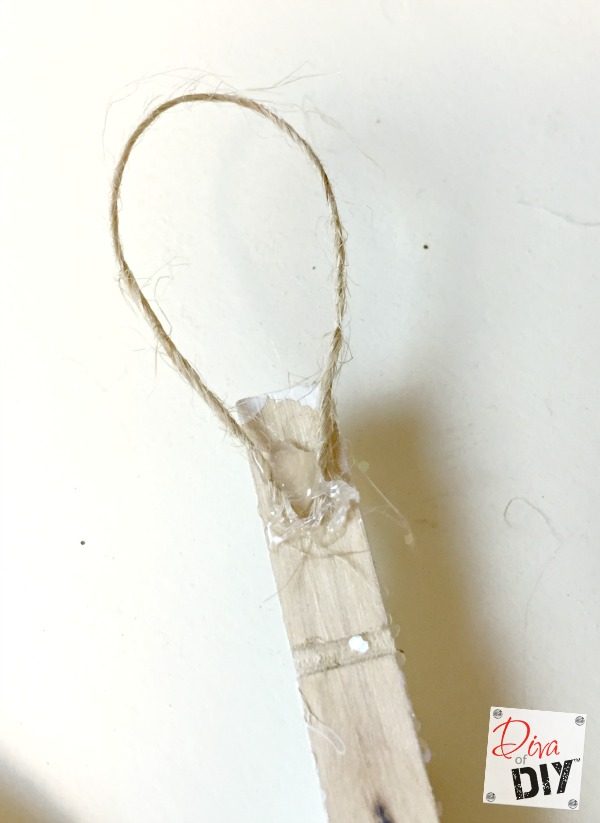
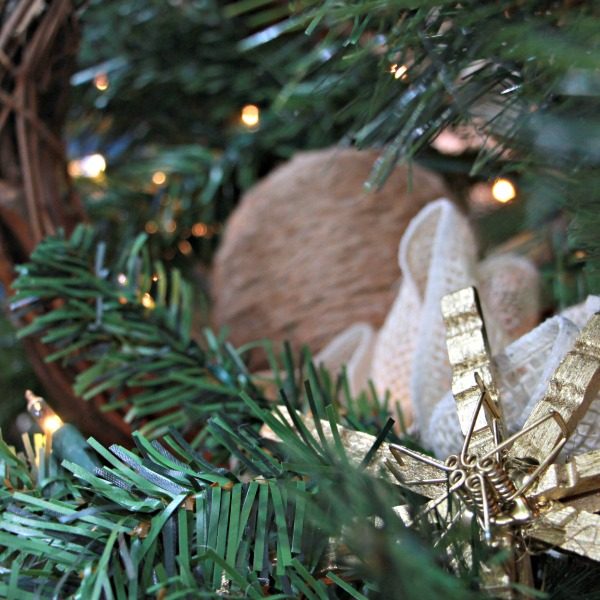
Step 9) Hot glue a piece of jute twine
You could also hot glue jute twine to the middle of the snowflake or leave it off all together if you want to just nestle the snowflake into the branches.
Snowflake Ornaments Updated Option:
Since repurposing is in my blood I kept looking at the metal pieces leftover from pulling the clothes pins apart. I started playing around with them and realized I could make them into and accessory to add even more depth to the snowflake ornaments!
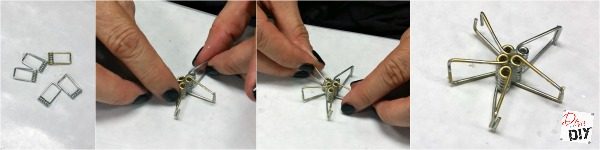
Step 1) Arrange metal pieces into a cross.
Step 2) Hot glue the cross onto the top of the finished clothespin snowflakes.
Step 3) Spray Paint the clothespin snowflakes. I painted mine all one solid color. I also liked leaving the metal unpainted on the top of the silver snowflake. As always, make this project your!
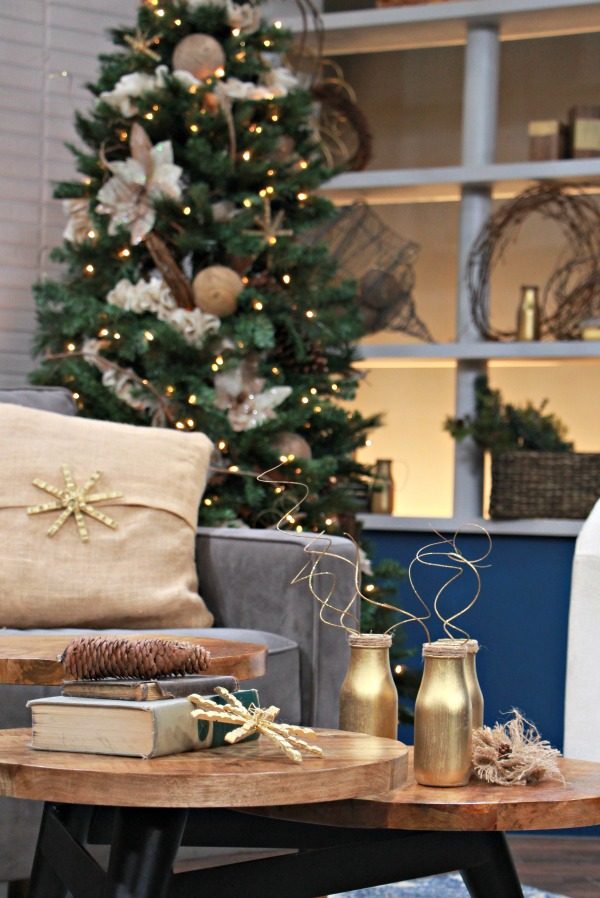
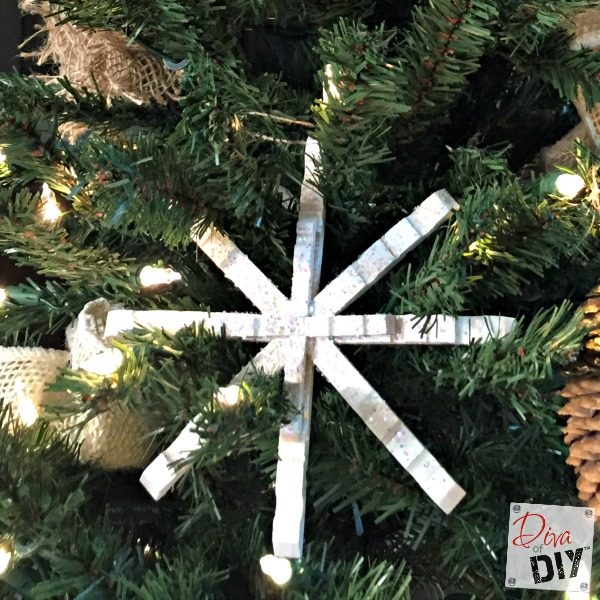
These snowflakes are not just for the tree. See how I used them as accents around the set of KCLive to pull everything together. I have to admit that I am completely in love with this natural look!
Each and everyone of you inspire me and I LOVE to see the work that you’ve created. Feel free to share with me on Instagram, Twitter or Facebook. And as always, be sure to follow Diva Of DIY on Pinterest and sign up for our FREE Newsletter to receive the latest projects delivered straight to your inbox!
If you enjoyed this project, check out these: