
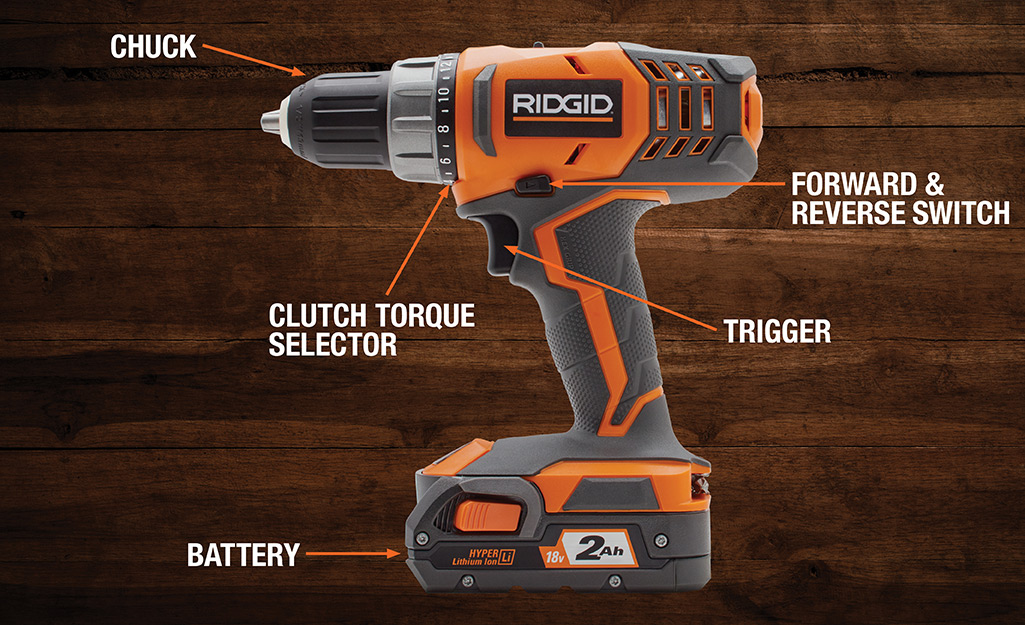
The power drill (also known as a drill/driver) are used in almost every DIY and home improvement project, but do you really know how to adjust one to maximize its full potential?
Drills are designed for lighter tasks such as drilling small holes in wood or drywall. With all the different types of bits available, a drill is one of the most versatile tools in a toolbox. Ideal projects for a drill include:
- Hanging shelves or curtains
- Installing light fixtures
- Drilling holes in metal or plastic
- Installing door knobs or handles
- Mounting artwork or mirrors on walls
Efficiency: A standard drill may struggle with tough materials and large screws, requiring more effort and time to complete tasks.
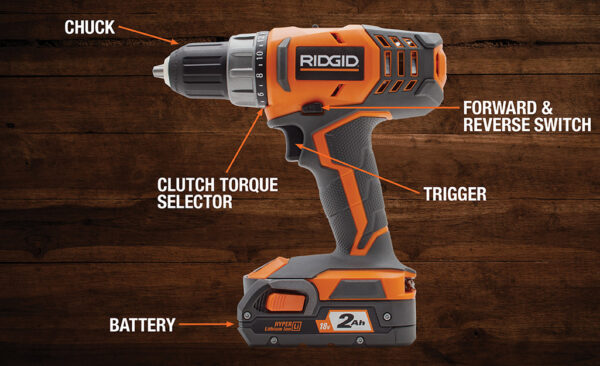
Drill Terminology:
- Chuck: The chuck is the part of the drill that holds the drill bit in place. It consists of jaws that can be tightened or loosened to secure various sizes of drill bits. Chucks can be keyless (operated by hand) or keyed (require a key tool to tighten or loosen).
- Motor: The motor is the power source of the drill. It drives the rotation of the chuck, allowing the drill bit to rotate and bore holes into different materials. The power of the motor is typically measured in watts (W) or volts (V), indicating the drill’s overall power output.
- Trigger: The trigger is a switch that controls the drill’s power. By squeezing the trigger, you can start the drill. The more you squeeze the trigger, the faster the drill bit rotates, allowing you to control the speed of drilling.
- Speed Settings: Many drills come with adjustable speed settings that allow you to control how fast the drill bit rotates. Different materials and tasks require different drilling speeds. For example, drilling through metal usually requires slower speeds, while drilling into wood can be done at higher speeds. Some drills have a variable speed trigger, allowing you to precisely control the speed with the pressure you apply.
- Reverse Function: The reverse function allows the drill bit to rotate in the opposite direction. This is helpful when you need to remove screws or back out a drill bit from a hole. By switching the drill to reverse mode, you can rotate the chuck counterclockwise.
The relationship between torque and speed:
A drill’s gearing creates an inverse relationship between speed and torque. When you’re in the lower gear, you get lower speed and higher torque. Switch to the high gear and you get higher speeds and lower torque.
Changing gears is a matter of flipping the switch on top of the drill. Low gear is marked with a 1, and high gear is marked with a 2.
| Task | Torque Setting |
| For driving small screws | 1-4 |
| For pushing screws into soft materials | 5 -8 |
| For pushing screws into soft or hard materials | 9 – 12 |
| For pushing screws into hardwood | 13-16 |
| For pushing large screws | 17 – 23 |
| For drilling into materials or high-torque projects | Drill Bit symbol |
- How Do You Adjust the Torque on a Drill?
- If you want to adjust the torque on the drill: Head to the gearbox on top of the device. Push the switch to the 1st setting for high torque / slow speed. Push the switch to the 2nd setting for higher torque/ speed. Turn the clutch or torque adjustment ring to the required settings ( check the table below) to deliver the required torque range
- What Do the Numbers on a Drill Mean? The numbers on a drill are used to increase its torque. As you choose a higher number, the drill offers more power.
- What is Setting 1 and 2 on a drill? On drills, the 1 and 2 settings help adjust the torque. To use this setting, push the switch to 1 for low speed or 2 for higher speed.
- Drill 1 or 2 Setting? If you use the 1 or 2 setting on the drill, you can adjust its torque. To adjust this setting, push the switch to 2 for quicker speeds or 1 for slower speeds.
- High Torque: Useful for drilling into harder materials like metal or when driving large screws.
- Low Torque: Suitable for softer materials like wood or when driving smaller screws.
- High Speed: Ideal for drilling into softer materials like wood. Higher speeds reduce friction and produce cleaner holes.
- Low Speed: Suitable for drilling into harder materials like metal or when using larger drill bits.
- The clutch setting is the most important feature to have dialed in.
How to change or insert a drill bit:
- Disconnect the drill from the power source. That means remove the battery or unplug it.
- Open the chuck. Unless you have a heavy-duty drill, just unscrew the chuck. It’ll be a circular piece with the bit in the middle. Rotate it until you see the chuck open. If you need a key, use the chuck key that came with the drill to open it.
- Pull out the bit. If it’s stuck, open the chuck more so you can remove the bit.
- Put the old bit in a case or off to the side. You don’t want it getting stepped on.
- Insert the new bit into the chuck as far as it can go. Make sure it’s centered and not angled.
- Twist the chuck to tightly close it around the drill bit. Again, if you need the key, use it here.
- Assure your drill bit is snugly held. It should be evenly inserted so it won’t wiggle.
How to drill a hole:
- Choose the Right Drill Bit:
- Different drill bits are designed for different materials (wood, metal, masonry). Select the appropriate bit for your project.
- Insert the Drill Bit:
- Open the chuck (the part that holds the drill bit) by turning it counterclockwise. Insert the drill bit and tighten the chuck by turning it clockwise.
- Adjust the Speed and Torque:
- Drills usually have adjustable speed settings. For softer materials, use higher speeds, while lower speeds are better for harder materials. Adjust torque settings as needed.
- Mark the Drilling Spot:
- Use a pencil or marker to mark the spot where you want to drill. This helps ensure accuracy.
- Secure the Material:
- Clamp or secure the material you’re drilling to prevent it from moving during the drilling process.
- Hold the Drill Properly:
- Hold the drill with a firm grip. Use both hands, with one hand on the handle and the other on the body of the drill for stability.
- Start Drilling:
- Align the drill bit with the marked spot and gently squeeze the trigger to start drilling. Apply steady and even pressure.
How to use the drill as a screwdriver?
- Power up the drill either by plugging in the cord or attaching a battery
- Adjust the torque so it’s low. Drilling in screws that have pilot holes doesn’t require a lot of force.
- Fit the screw into the slot on the screwdriver bit.
- Line up the screw with the hole.
- Make sure the drill is vertical.
- Pull the trigger on the drill and press gently into the screw. This should keep the screw in place.
- Make sure you’re not drilling at an angle.
- Once the screw is inserted, stop drilling.
- If you’re concerned about over-screwing, stop before the screw is completely inserted. Finish with a screwdriver.
Best Practices:
- When drilling, start with a lower speed and gradually increase it as needed.
- Use higher torque settings for tougher materials and larger drill bits.
- Adjust the torque to prevent over-tightening when driving screws.