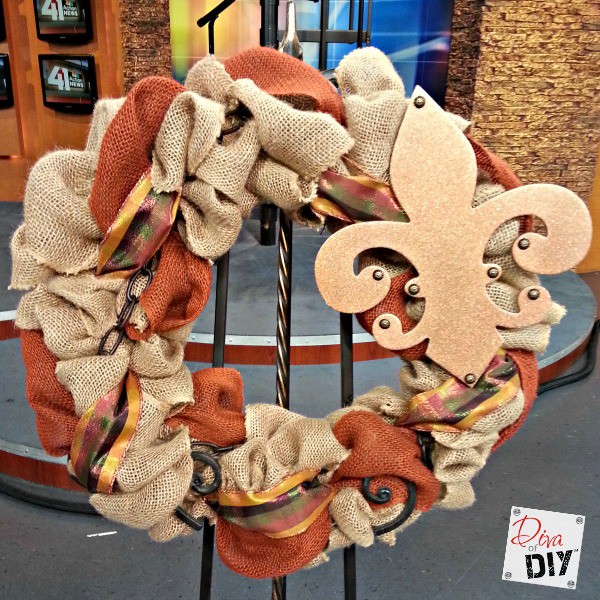
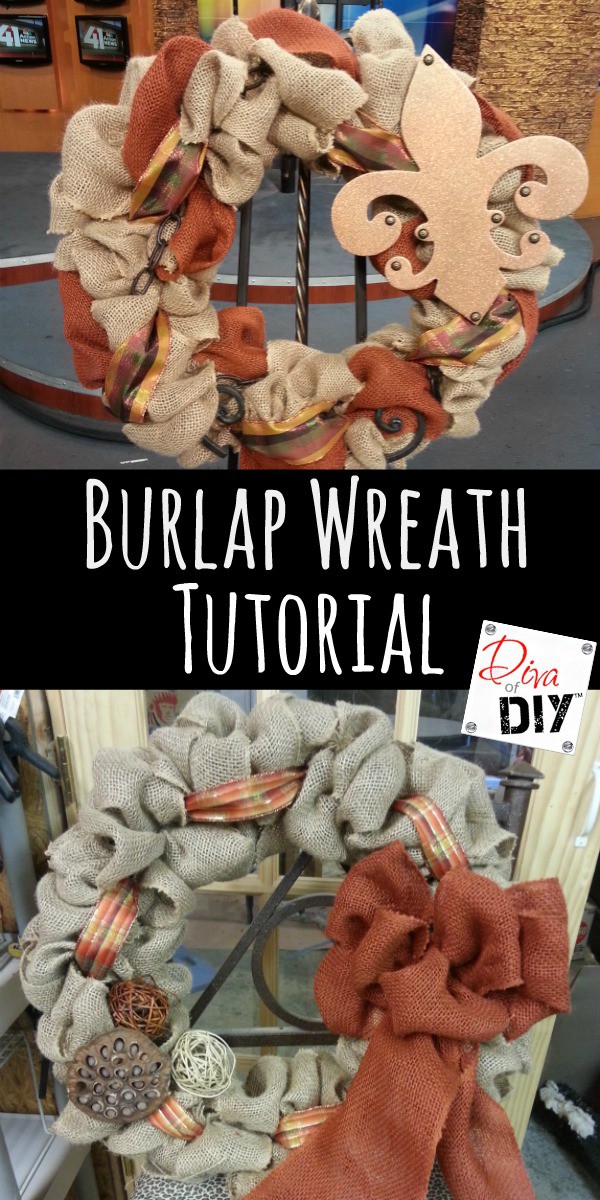
I am pretty much obsessed with burlap…in any size, color or pattern. Nothing says “welcome to my comfortable, cozy home” like a burlap wreath. If you are looking for the perfect fall decoration for your home, you have found it!
This post contains affiliate links. If you buy something from clicking one of my links, I will get a commission from the sale. It will not cost you a penny more and allows me to keep sharing my ideas with you for free. You can see my full disclosure here. Thank you for supporting my blog!
Burlap Wreath Supplies:
16″ Metal wreath form (in floral section of craft store)
3 rolls of 4 “burlap (one roll is 10 yds)
Scissors
Embellishments
Jute or floral wire (cut in 4″ sections)
Burlap Wreath Instructions:
Step 1) Begin by cutting the burlap ribbon into 7’6″ strips. A 10 yard roll will yield 4 strips. You will need one strip for each section of the Metal wreath form
.
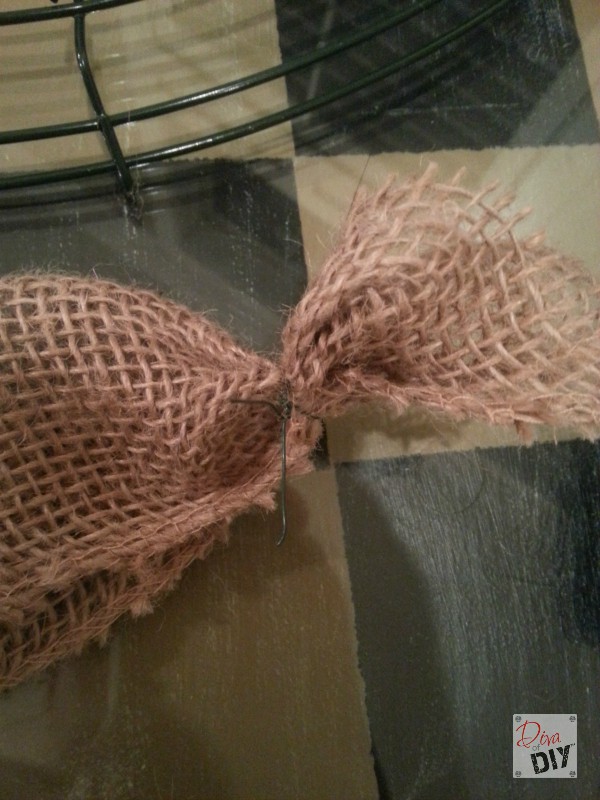
Step 2) Wind each end of the burlap strips with floral wire leaving some extra to attach to wreath form.
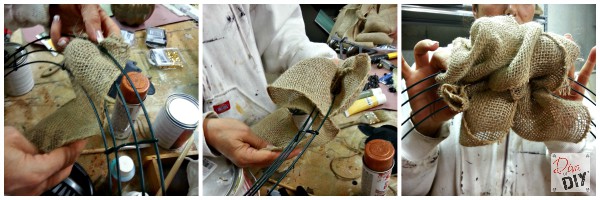
Step 3) Begin looping each burlap strip through the wire form, attaching each end with the floral wire to the cross-bars of the metal wreath. I looped my burlap through the top, middle and outer rims. To create the fullness, I looped the burlap through the rims and pushed everything together.
Step 4) Continue this process around the metal form.
Step 5) Secure Embellishments with jute or floral wire
.
Step 6) “Fluff out” any twisted loops and move any loops to conceal the metal frame.
Option:
These instructions are for a very full wreath. You can reduce the rolls of burlap needed to 2 rolls if you cut each burlap strip to 6′. This will yield 5 strips per section.

There’s so many variations to creating a burlap wreath like this. You can personalize it with a initial of your last name, hang a embellishment for a holiday and change them out for each season or the next holiday to come. The options are endless and I can’t wait to see how your burlap wreath turned out.

Be sure to pin this tutorial so you will have it for all the Holidays and Seasons! And make sure to follow Diva of DIY on Pinterest for more amazing DIY ideas!
Each and everyone of you inspire me and I LOVE to see the work that you’ve created. Feel free to share with me on Instagram, Twitter or Facebook. And as always, be sure to follow Diva Of DIY on Pinterest and sign up for our FREE Newsletter to receive the latest projects delivered straight to your inbox!
If you enjoyed this project, check out these:
