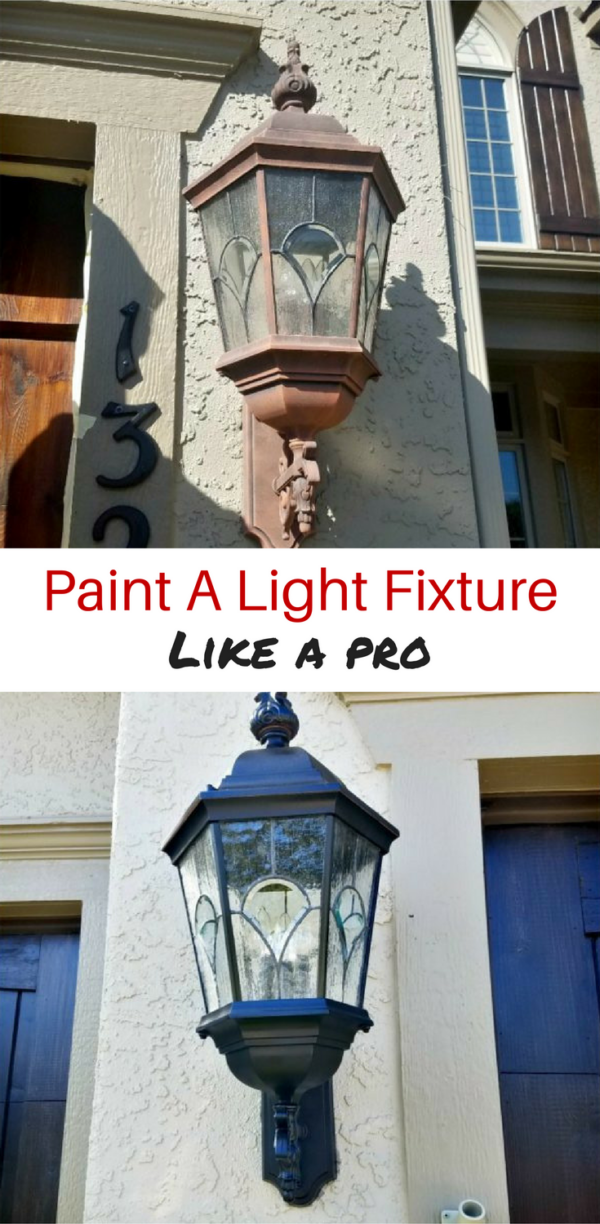
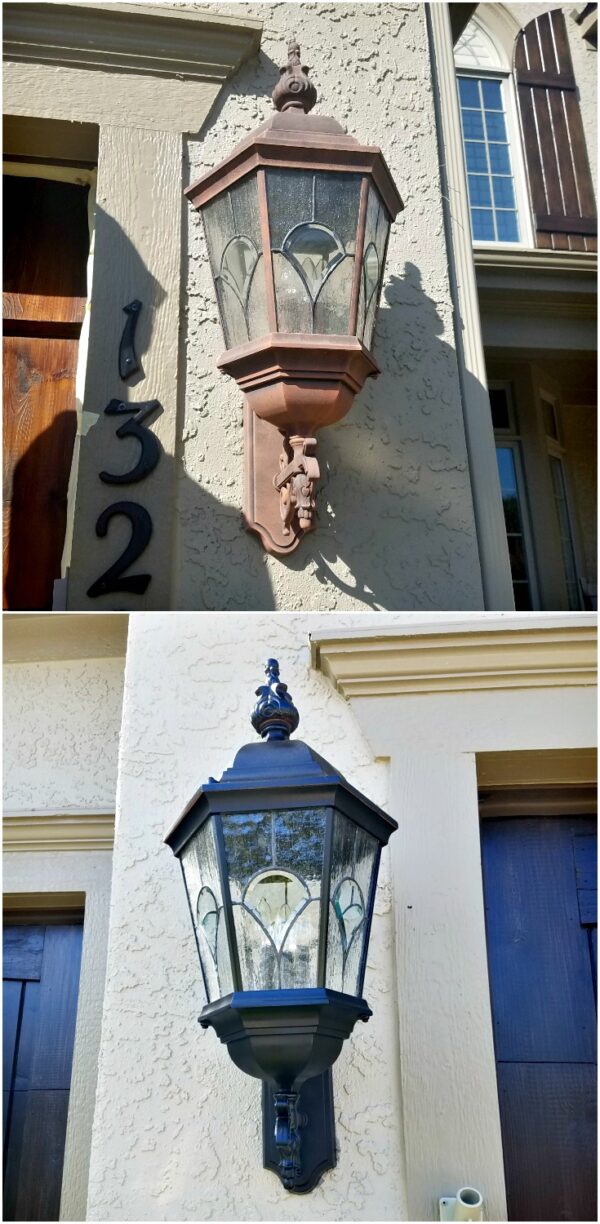
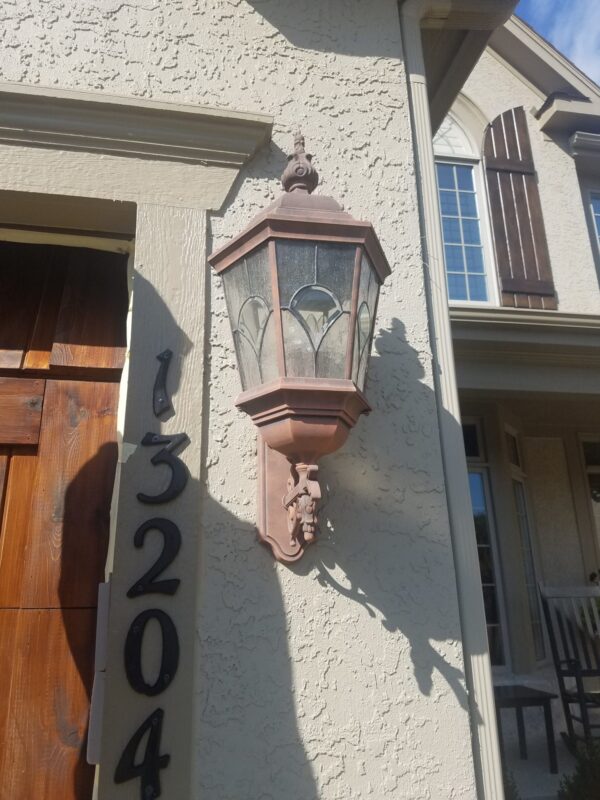
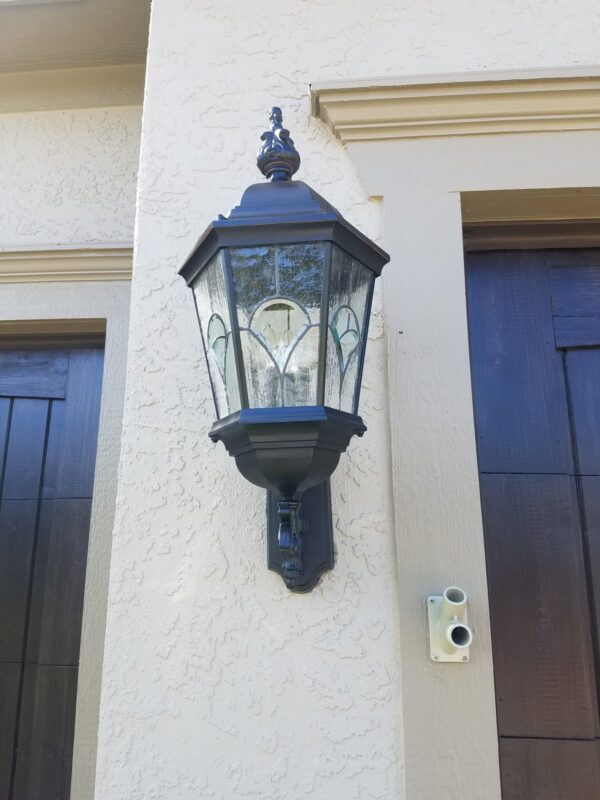
It’s amazing how the smallest changes can make a big impact, isn’t it? That’s the case with exterior lighting like this. Great looking lighting accentuates a home, but dull and dreary lighting is just that…dull and dreary. In this example, the light fixture sort of blends in with the house. The sun has taken its toll and the light isn’t very bright through the dingy panels. Here’s how to paint a light fixture like a pro – and make your home’s entire exterior look better in the process!
I have provided affiliate links for your shopping convenience. If you buy something from clicking one of my links, I will get a commission from the sale. It will not cost you a penny more and allows me to keep sharing my ideas with you for free. You can see my full disclosure here. Thank you for supporting my blog!
The first thing I did was take the fixture apart. Because all light fixtures are different, I’m only going to go into detail about how to paint a light fixture, rather than how to remove one. In general, however, the top, bottom, or both come off with a few screws.
A note of caution: Wear work gloves if you’re removing glass pieces, because the fixture has been out in the weather. It could be brittle, especially if you live in places where it gets really cold. If things go wrong, there’s nothing quite as awful as a bare handful of broken glass!
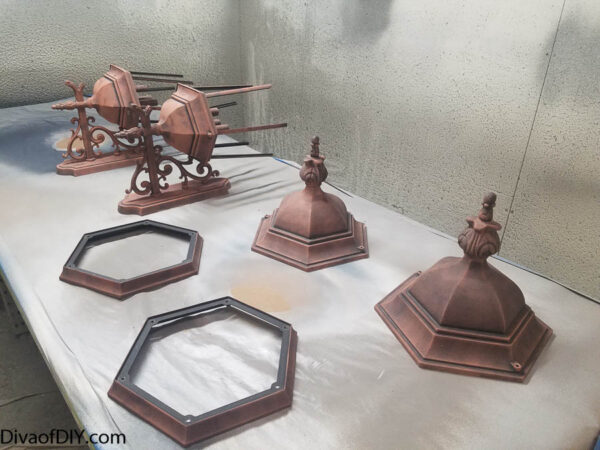
Once the fixture is down, lay the parts out on a flat work surface. If there are a lot of them, you might want to keep them in some sort of order to make it easy to put the fixture back together.
Clean the light fixture well. Scuff the existing paint a bit with Scotch Scuff pads. Paint adheres better to a scuffed surface than a smooth one. With a clean cloth, remove all remaining dust. If there are a lot of cracks and crevices, try brushing with a dry paint brush to get the dust out.
Using short, even strokes, spray paint the metal parts of the fixture, from left to right. (Unless you’re a lefty, and then it may be more comfortable for you to go right to left!) For this project, I used Rustoleum black satin spray paint. Let dry.
After all the parts are dry, put the fixture back together. Now is also a great time to change the light bulb. The worst time to change a bulb is in the dark after you’ve already found out the hard way that it doesn’t work. With exterior lighting, it’s also much easier to do it now than when there is a foot of snow on the ground!
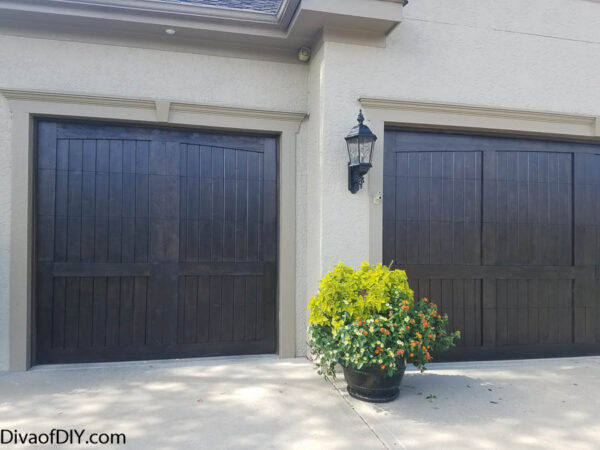
What do you think? It makes quite the difference, doesn’t it?
If you’d just like an entirely new fixture, you might like these options:
How about some more spray paint inspiration?
How To Paint Furniture With Spray Paint
Thrift Store Finds: How To Make Gold-Dipped Baskets
A DIY Organization Station from a Repurposed Screen Door
Each and every one of you inspire me and I LOVE to see the work that you’ve created. Feel free to share with me on Instagram, Twitter or Facebook. And as always, be sure to follow Diva Of DIY on Pinterest and sign up for our FREE Newsletter to receive the latest projects delivered straight to your inbox!