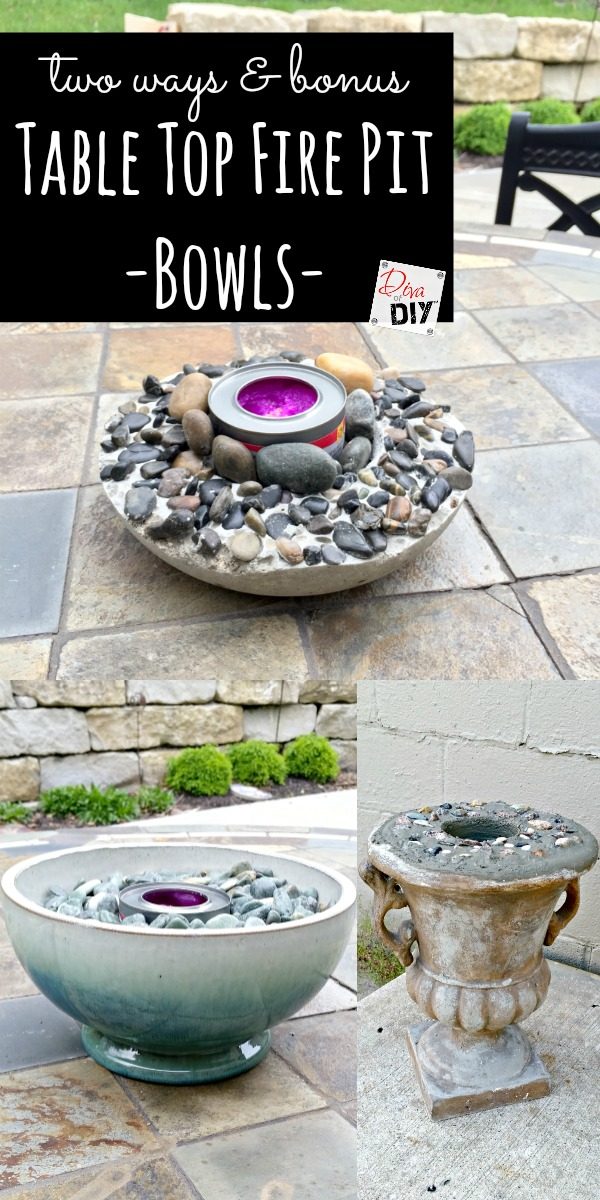
Do you want the feel of a fire pit but do not have space for one? What about making a table top fire pit bowl that can fit just about anywhere! These fire pit bowls are easy to make and fun to display. Just be warned, once you have your first get together everyone is going to want you to help them make one. Just look at that as an excuse to have another get together!
I started off making one, which led to two, which let to another bonus idea! I hope you will be inspired with this project also!
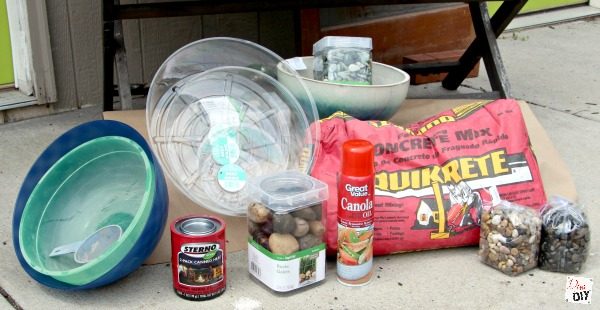
Table Top Fire Pit Bowl Supplies:
This post contains affiliate links. Click here for full disclosure.
- Quikrete Cement
(This is the one I used because it sets up fast)
- Sterno Camping Heat
- Non-stick cooking spray
- Assorted Rocks
(This is what I used)
- Pea Gravel
- Disposable Bowls to use for a mold


Table Top Fire Pit Bowl Instructions:
Option 1
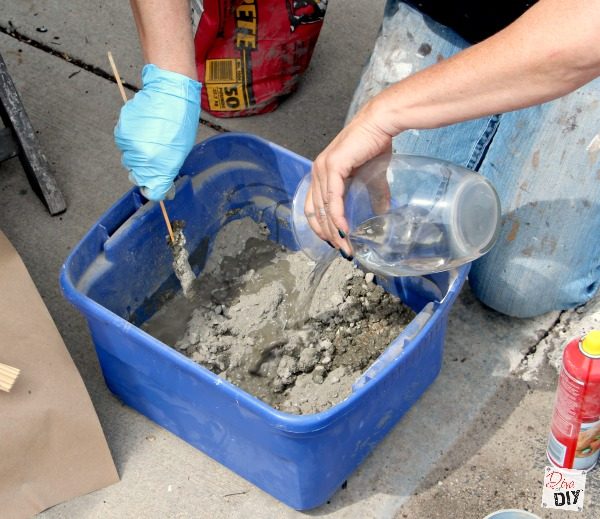
Step 1) Mix your concrete
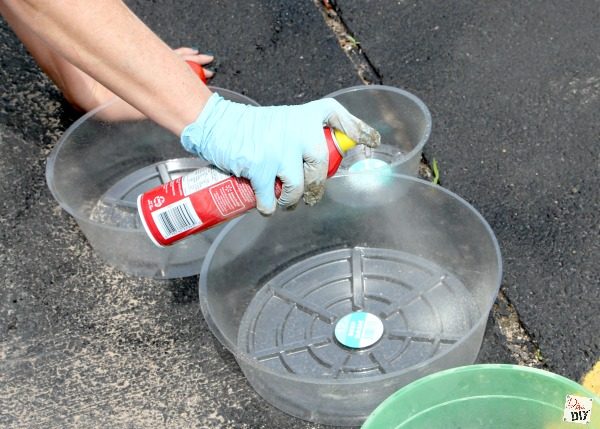
Step 2) Using non-stick cooking spray, coat the inside of the large bowl you will be using as a mold and the outside of the small bowl or other object you will be using to create the space for the can of fire gel.
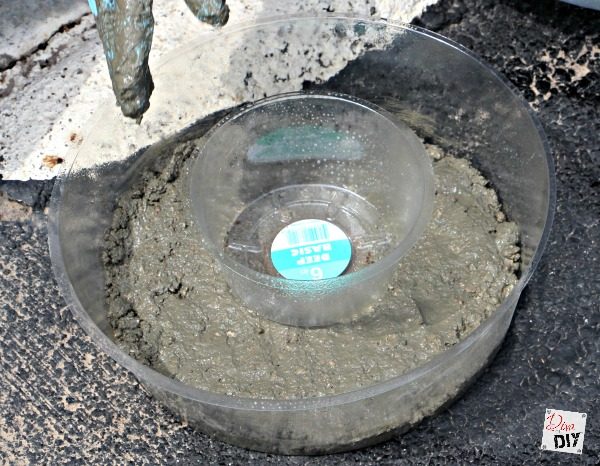
Stap 3) Put a layer of concrete on the bottom of the pan for the base of your table top fire pit bowl.
Step 4) Place the smaller bowl or object in the middle of the larger bowl on top of the layer of concrete.
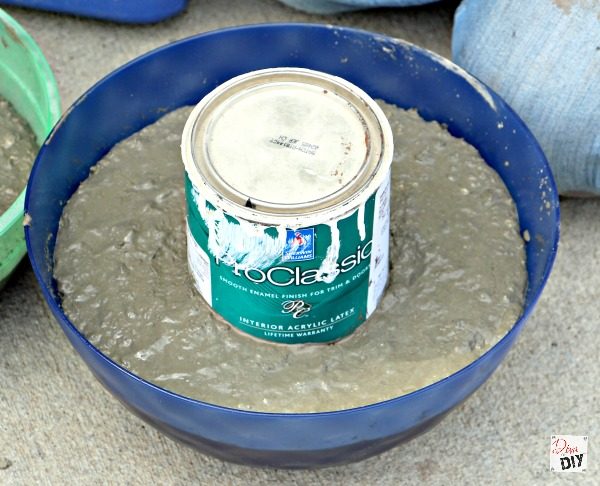
Step 5) Fill the bowl with concrete to desired height around the smaller bowl. In the bowl above I used a paint can I had on hand. *Diva Tip: I tried to fill the bowl and then shove the can into the middle, it is definitely easier to fill around the can.
Step 6) To help the concrete level out and fill in holes carefully drop the pan on the ground like you would to level out a cake.
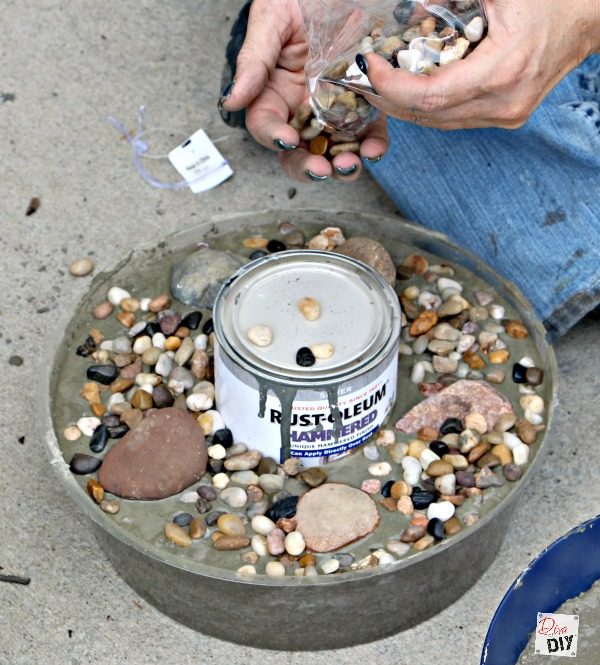
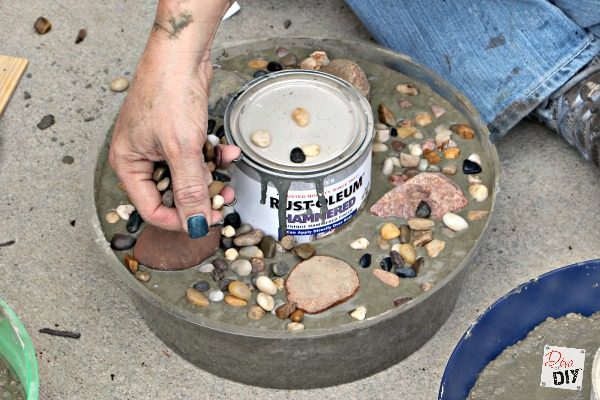
Step 7) Start filling the top of you table top fire pit bowl with decorative rocks. Start my placing the larger ones in first, if you choose to use them and then filling in with smaller rocks.
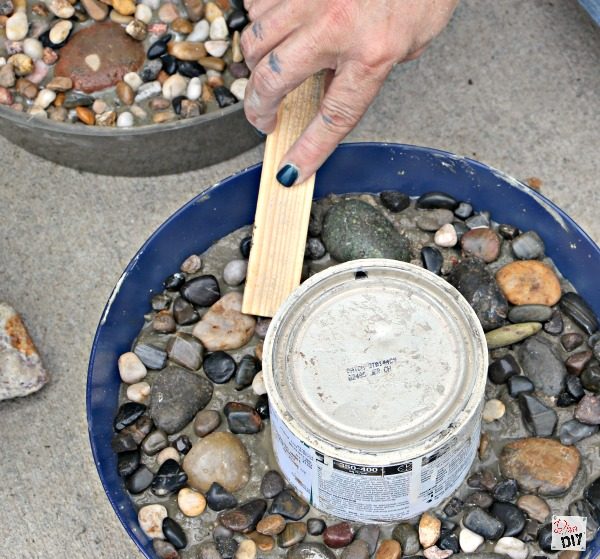
Step 8) Tap the rocks into the concrete. This is very important because they need to be in the concrete far enough so they will stay when the concrete hardens.
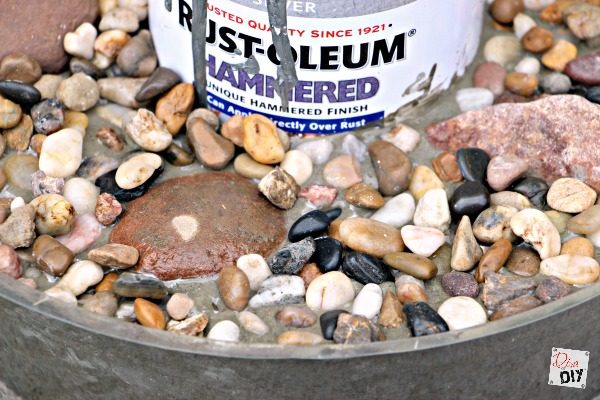
See the rocks that are not in the concrete? It looks good now but those will just fall off!
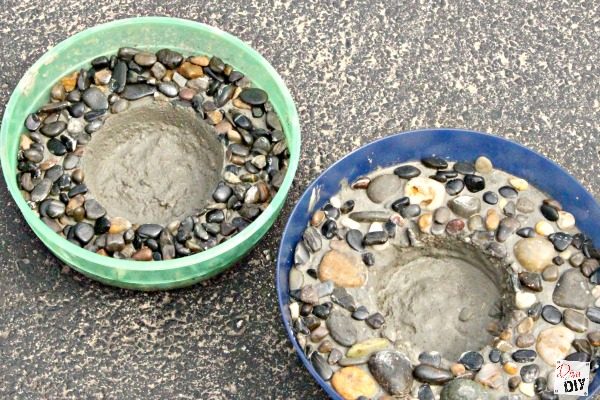
Step 9) Allow the concrete to begin drying. I turned the can on the inside about every 5 minutes. When it feels like the concrete will hold the shape in the middle (this will depend on the mix you use) gently pull out the middle bowl or can. I pulled mine out in about 15 minutes.
Step 10) Allow the concrete to dry for several hours or even overnight if you have time.
Step 11) Put a piece of cardboard on the top of the bowl and gently turn the bowl over. The fire bowl will come out easily.
Step 12) Allow the concrete to continue to dry. I left mine for another 24 hours. Depending on the concrete you buy, check the bag instructions.
And now you have the perfect table top fire pit to add that special touch to those evening get togethers!
Option 2
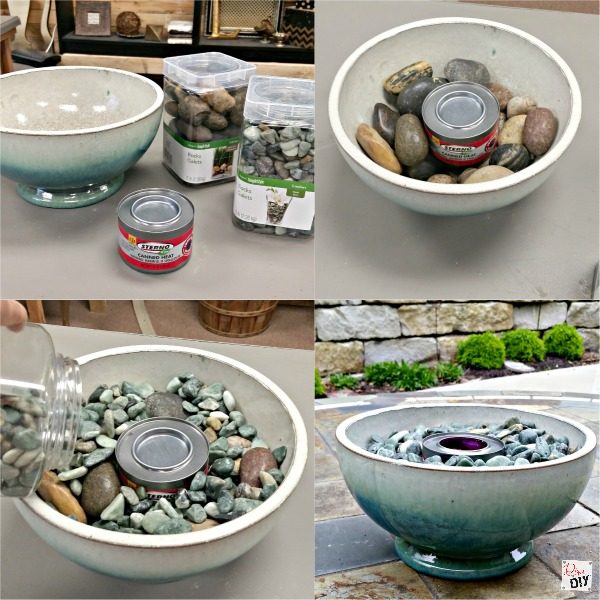
Not wanting to mess with the concrete? Find a bowl that you love that will work outside, grab some coordinating rocks and a can of Sterno Camping Heat. Put the can in the bowl and fill the bowl up with rocks around the can! It’s that simple!
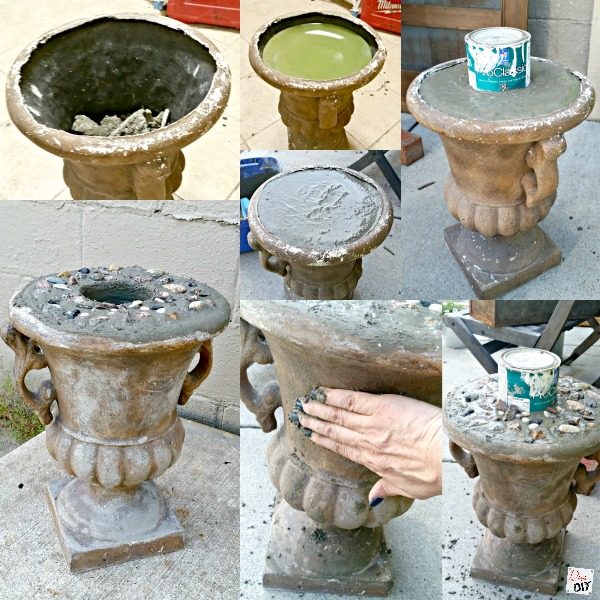
You all know how I get when I get on a roll… As I was making these I noticed a flower urn I had that had cracked last year. Of course I kept it, and now I started thinking… that urn needs repaired so maybe I should go ahead and do that while i have some extra concrete. Good idea right? But then… what if I also made it into a fire pit bowl! Cue lightbulb!
Bonus Option
So I put some weight into the bottom of the urn. In this case I had some chunks of dried concert from a bowl that didn’t really work. I put a plate in the top of the urn opening, this way it wasn’t going to be 1000 pounds like it would have been if I filled it all the way with concrete. I followed the same steps as the table top fire pit bowl, adding some repair work where needed for the cracks in the urn. I love the way it turned out! The concrete on the side just gave it a more rustic look which I love! As the concrete dried on the top it became lighter. I was so excited with this bonus idea!
Each and everyone of you inspire me and I LOVE to see the work that you’ve created. Feel free to share with me on Instagram, Twitter or Facebook. And as always, be sure to follow Diva Of DIY on Pinterest and sign up for our FREE Newsletter to receive the latest projects delivered straight to your inbox!
If you like this project, be sure to check out these: