Applying a fresh coat of paint is one of the easiest and least expensive ways to transform the look and feel of a space. Anyone can paint a room but getting the results of a professional requires a little more talent. Follow this tutorial on how to paint a room like a pro to achieve a perfect paint job every time.

How To Paint A Room Like A Pro
How To Paint A Room Like A Pro: The Prep
I cannot stress to you enough how important this step is to the outcome of the painting project. You see, there are hours of prep work that needs to be completed prior to picking up a paint brush and roller.
![]()
I have provided affiliate links for your shopping convenience. If you buy something from clicking one of my links, I will get a commission from the sale. It will not cost you a penny more and allows me to keep sharing my ideas with you for free. You can see my full disclosure here. Thank you for supporting my blog!
How To Paint A Room Like A Pro: The Supplies

Brushes come in many shapes, sizes and functions. It’s important for you to choose a brush that is suitable for the type of paint you are using. For example, if you are using an oil-based paint, you need to make sure the brush you are using says it is suitable for oil. It’s also a really good idea for you to find a brush that fits your hand so you feel comfortable when you are painting. This is the brush I use.

I like to have 2 rollers going: a 4-inch
- Roller Cage (make sure you get a decent roller cage to keep from having your roller cover slip off all of the time)
- Paint Tray
- Paint Tray Liner
(optional)
- Extension Pole
- Primer (if needed)


How To Paint A Room Like A Pro: Choosing a paint color:
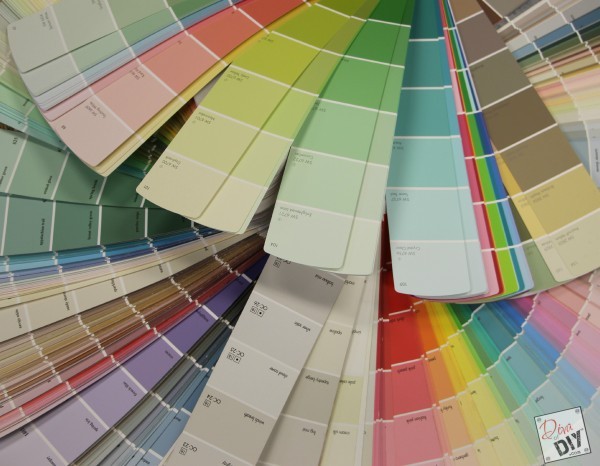
Please… don’t try and pick a color from a 2” x 1” paint swatch. This is a good way to narrow your color choices down but invest in a sample container (roughly $6.00) and paint a large piece of poster board. This way, you can move it around the room to make sure you love the color before you invest the time and money into painting the entire room.
![]()
Once you’ve decided on a color, you will need to determine the amount of paint you need and decide on a sheen. Here is a general rule for calculating the amount of paint you will need. One gallon of paint will typically cover between 350-400 square feet. I always recommend applying 2 coats or more if needed.
This is how I measure:
Multiply the width and height of each wall to get the wall square footage. Subtract out the doors and windows. This will give you your total paintable square footage (PSF). Multiply the PSF by 2 (for the 2 coats ) then divide by 400 square feet. This total is the number of gallons you will need to paint the room.
If your job requires several gallons of paint, avoid color variations from can to can by opening all of the cans and mixing, or “boxing,” them together in a separate container. While you work, use a paint stick to mix the paint frequently, giving it a good stir from the bottom up to prevent the pigments from settling.
How To Paint A Room Like A Pro: The Instructions
Before I give you the steps, lets discuss a couple of painting terms that can be confusing:
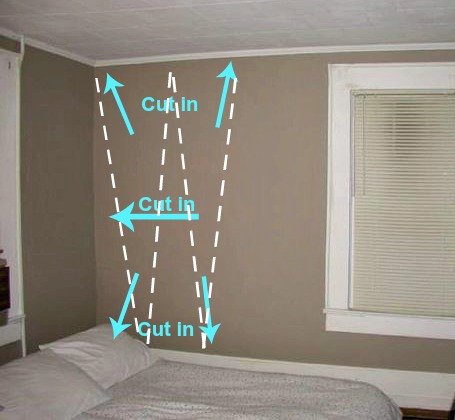
Cutting In = Using a paint brush
Wet Edge = The wet edge is the last paint you applied to the wall (that is still wet). To eliminate lap marks/hat bands, roll the area of the wall into the part you cut in before it dries.
Laying off = The final “strokes” of the roller starting at the top of the wall and allow roller to roll down to the bottom of wall with little or no pressure. To do this, make a series of long vertical strokes—moving in one direction, left or right—up the full length of the wall. This last step distributes the wet paint across the surface in a nice even layer.
Step 1) Load brush with paint. Load a brush by dipping the bristles one-third of the way into the paint. To remove the excess paint off the brush, drag the brush against the inner edge of the paint can or bucket.

Begin cutting in along the baseboard, ceiling and corner of the wall
Pro painters always work with “wet edges.” The best scenario is having one person cutting in around trim, ceilings and corners and another person rolling the wall right behind him/her to avoid what we call a “hat band”. If you can’t recruit a helper, only cut in as much as you can roll while the paint remains wet.
Step 2) Load roller with paint. Fill the well of the roller tray with paint. Dip the roller in halfway, then roll it back onto the tray’s angled platform to remove excess paint. Apply paint first in an overlapping vertical “W” pattern, then re-roll this area filling in the voids, working within the space you cut in.
After you’ve rolled a section of the wall, lay it off (see above).
An extension pole screwed onto the paint roller handle will help you reach overhead areas.
Repeat steps 1 and 2 until the room is completely covered with the new paint color. Cover all areas of the wall and try to avoid missed spots. Don’t worry if the first coat looks thin, appears lighter than the color you chose, or doesn’t completely hide the original paint. A second application is usually required to provide a uniform, finished coat that accurately matches the color you purchased.

Each and every one of you inspire me and I LOVE to see the work that you’ve created. Feel free to share with me on Instagram, Twitter or Facebook. And as always, be sure to follow Diva Of DIY on Pinterest and sign up for our FREE Newsletter to receive the latest projects delivered straight to your inbox!